Friday, September 25, 2015

Cricut® Artistry Collection

Close To My Heart recently added a video to their YouTube Channel which focuses on the latest Cricut® Collection Artistry.

You may want to download the handbook (in PDF format) to review while you watch the video.


The CTMH Corp. description of Cricut® Artistry Collection is "Close To My Heart's Cricut® Artistry Collection is winning over the heart of every papercrafter."

While the cartridge still comes with 700 images, the images layer, creating endless possibilities. Artistry includes backgrounds, banners, borders and shapes that can be used in any part of your artwork.

There are two options for purchasing the Cricut® Artistry Collection. There is the traditional version, Cricut® Artistry Collection (Z3167), where you will receive a physical cartridge, three My Acrylix® D-size Stamp Sets and an Enchantment Cardstock Combo Pack and a digital version, Cricut® Artistry Digital Collection (Z3190), where instead of a physical cartridge, overlay and handbook inside a box, you will receive a card with a code on it for inputting online (the card is shown near the end of the video) which will link the cartridge to your Cricut® account. Both options will be shipped to the address you specify when you place your order.

The stamp sets that are included with this collection are:
  • Life Is Sweet (D1680)
  • Perfect Picture (D1681)
  • Love Right Now (D1682)
All of the D-Size stamps coordinate with a cut from the cartridge. The recommended My Acrylix® Blocks are: 1" × 3½" (Y1002), 2" × 2" (Y1003), 3" × 3" (Y1006) and 2" × 3½" (Y1009).

A note about the Perfect Picture stamp set; the size listed refers to the inner shape. The inner shape "nests" inside the frame creating a perfect spot for a sentiment. At approximately 4:15 into the video we are shown the Perfect Picture stamp set and a project created using this stamp set.

Products featured in the video include:
If you still have questions about the Cricut® Artistry Collection, please do not hesitate to send me an email. If you are ready to place an order, the Shop Now button will take you there.


Please follow me on Facebook at Brenda's Paper Crafts for additional updates.

Thursday, September 24, 2015

National Stamping Month - Only 7 Days Left

There are only a few days left in September and that means there are only a few days left in National Stamping Month. As I told you at the beginning of September (when it was still summer), Close To My Heart released three stamp sets to celebrate National Stamping Month.

The three National Stamping Month—Hello, Life! stamp sets are:

CC1040
Hello, Life!—Scrapbooking
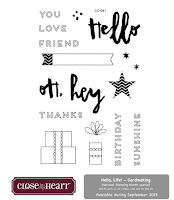
CC1041
Hello, Life!—Cardmaking
CC1042
Hello, Life!—Pocket Scrapbooking

You may purchase one or two C-size stamp sets for $13.95 each or all three for $34.95. Choosing all three is a savings of $6.90.

If you want to purchase any of the National Stamping Month—Hello, Life! stamp sets, you need to order before 11:59pm MDT on September 30. However I encourage you to order sooner rather than later as September 30 is the end of the quarter and the website could be busy with consultants trying to meet their minimums and people taking advantage of the promotion.

UPDATE 9/27/2015: An order was placed and the stamp set and coordinating die cuts will be shipped tomorrow. Keep checking back - who knows when I will offer a similar promotion.

To encourage you to place your order early, and not get caught up in any possible end-of-quarter craziness, the first person to order one or more of the National Stamping Month—Hello, Life! stamp sets from my OBA, will receive a new August 2015 SOTM Framed stamp set. This is a promotion directly from me; there is no need to look for anything to place in your shopping cart. When I see the first order since September 24 in my monthly report I will ship the package directly to that person. In addition to the stamp set, I will send as many coordinating die cuts as I am able to cut from one 12" x 12" each piece of White Daisy and Colonial White cardstock.

At the start of the month I shared this video created by the Close To My Heart Corporate Office. In the video we see some projects created with the stamp sets.


Images from the stamp sets also coordinate with shapes from the new Cricut® Artistry Collection (Z3167)  also available as a Digital Collection (Z3190).

I have pinned many projects created with the National Stamping Month—Hello, Life! stamps to my Pinterest Board CTMH Promo Hello, Life! We have been encouraged use the hashtag #CTMHHelloLife when we post projects on social media so they will be easier for you to find.

This is one of the cards I created for the National Stamping Month—Hello, Life! Blog Hop. My post is here.


If you have any questions about the National Stamping Month—Hello, Life! promotion, please do not hesitate to send me an email me. If you are ready to place an order, the Shop Now button will take you there.


Thank you for visiting today. Please follow me on Facebook at Brenda's Paper Crafts for additional updates.

Wednesday, September 16, 2015

More Fun With Watercolor Paints

After my initial testing over Labor Day weekend I pulled out my CTMH Watercolor Paper (Z3146) and National Stamping Month Hello, Life! stamp sets because I needed to create something for the National Stamping Month Hello, Life! blog hop. The samples I was creating did not get finished in time and/or make the cut for the blog hop, but I thought you might still like to see my process and ultimately what I created.

Before I forget, the specifications for the watercolor paper CTMH offers for purchase is: "Watercolor paper: 220 lb. (hot press, no coating)". I thought the paper felt like it had a light coating and, from what I read on blogs, others did too; I am guessing we had that impression due to the hot press process.

This is a photo of the CTMH Watercolor Paper after embossing using a VersaMark™ Ink Pad and Ranger™ Clear Super Fine Embossing Powder, but before painting. I was going for a resist technique.


This is also after embossing, with a White Daisy Exclusive Inks™ Stamp Pad and Ranger™ White Super Fine Embossing Powder, but before watercoloring.


And here are the panels after watercoloring; I sprinkled regular table salt on this one. You may be able to see it near the right side of the greeting.


Here is a close up of the area where you can see impact of the salt.


I was really hoping for a much more noticeable resist look. That is why I did not use this panel for the blog hop.

On this sample I also used some salt, but it is so subtle that I am not posting any close-up photos; even having a photo of this panel with the salt still on it, I have a hard time seeing the impact of the salt.


Since I really prefer the look of heat embossing after watercoloring, this panel did not get made into a card for the blog hop.

On the sample below, I tried to create an ombré look. I thought the watercolor paper and paint was too dry for the salt to do anything, but what a great impact the sea salt created. After it was dry and I brushed the salt off, I wished I had put more salt on.


As I mentioned the other day, my personal preference is to heat emboss after watercoloring. But I was on a roll while I was trying different things that I did not wait for paints to dry before pressing on. I hope what I shared here and on previous posts will help you determine how you want to start, or things to try, using your watercolor paints.

The supplies I used to create these panels:
You should know that Close To My Heart recently started carrying the Tuxedo Black Memento™ ink pads and replenished their stock of Archival Black Exclusive Inks™ Stamp pads so there are now four black ink pad options available on my OBA:
  • Black Exclusive Inks™ Stamp Pad (Z2105) - dye ink/water base; there is a re-inker available: Black Exclusive Inks™ Re-inker (Z2205); the description from my OBA is "Single-color dye-based ink in patented swivel-top stamp pad."
  • Archival Black Exclusive Inks™ Stamp Pad (44751) - dye ink; the description from my OBA is "Waterproof, lightfast, fade-proof, and non-smearing, archival black ink locks your stamped designs to the paper. Acid free."
  • Black StazOn™ Ink Pad (Z888) - dye ink/solvent base; there is a re-inker available: Black StazOn™ Re-inker (Z889); the description from my OBA is "Appropriate for all surfaces. Designed for decorating non-porous surfaces such as glass, metal, coated paper, and leather, use StazOn™ with stamps or Sponge Daubers for a unique “stained glass” appearance. Acid free. (Not recommended for fabrics.) Tsukineko®."
  • Memento™ Tuxedo Black Ink Pad (Z899) - dye ink; the description from my OBA is "The black Memento™ ink pad is an archival quality ink pad that works for any stamping project and can be used with alcohol markers, watercolors, or any of our other coloring options."
Please stop back in a few days to learn what became of the watercolor paper panels I shared above. I still do not know yet. :-)

Thank you for visiting today.

Tuesday, September 15, 2015

Some Christmas Cards

I decided to mix up my crafting a bit and I created two similar Christmas cards with some of the products I have recently purchased. I used the Create and Craft Die-Lectables - Christmas Wreath and BowCraftwell Cut'n'Boss Machine (but if you are shopping today, the better option is Craftwell Teresa Collins Cut n Boss Die Cutting Machine), Tattered Lace Seasons Greetings Embossing Folder Set - Folder, 2 Borders and Corners and Sizzix Big Shot (I have had this machine forever - it is the red version) on both cards. I used the Big Shot to control some of my embossing by being able to reverse the direction of the "sandwich" mid-emboss.

On this card I used one layer of cardstock for the wreath. I also used Create and Craft Pack of Single Sided 50 A4 Mirror Board to mat the focal panel. The second embossing folder is from Sizzix. I think it was one that was included with the Sizzix Texture Boutique Embossing Machine, but I do not remember the name of the pattern.


On this card I cut the wreath a second time from a darker cardstock and layered under the light color. The embossing folder is also from Sizzix, but I do not remember the name.


The card bases and cardstock are from my stash. I used CTMH 3L® E-Z Dots® Adhesive (Z3022) and Scotch Quick-Dry Adhesive to assemble my cards.

I am a Close To My Heart Independent Consultant and CTMH linked products above may be ordered from my Online Business Address. The list of other products and links to them (if any) are for your convenience only; they are products I have been happy using. I am not an affiliate of any other retail outlet. If the craft projects I share inspire you and you would like to use Close To My Heart products to create them, I would appreciate it if you placed an order on my OBA.

I hope you like the cards and the eventual recipients will also like them. Thanks for visiting today.

Wednesday, September 9, 2015

Fun With Watercolor Paints: The Cards

Something I am guilty of, and I bet others are too, is I expect near-perfect results as soon as I try something new. I think we need to give ourselves permission to climb the learning curve. I would guess that [insert your favorite musician] did not become a master [of their instrument] without hours of practice, so we need to give ourselves permission to practice to learn something new.

Trying to climb the learning curve is what I did over the Labor Day Weekend. As I posted yesterday, I spent some of my time using my watercolor paints, even without a specific project in mind, to get a feel for how to use the watercolor paints.


I did not share the "before assembled into a card" of this green watercolor panel. It is the back of the watercolor paper I got from my mom. As you can see, it is especially noticeable near the top of the card that the paper reacted differently to the watercolor paint and water, some watercolor paper definitely has a right side and a wrong side (FYI, I have not found this with the CTMH Watercolor Paper; the results have been similar no matter which side of the paper you use - pictures coming tomorrow). I also found that this watercolor paper was a bit heavy and hard to get all of the curl out of it. This is noticeable on the bottom edge.


As I showed you yesterday, this watercolor panel was dusted with an anti-static bag, then stamped with Ranger™ Archival Ink - Jet Black followed by VersaMark™ Ink Pad, then Ranger™ White Super Fine Embossing Powder was applied then heated, all before watercoloring. I thought the colors went well with the new CTMH Kaleidoscope Paper (X7202B). Since I was happy with the watercoloring on this and some of my other trials, I kept the card simple, but once I have an occasion to send the cards, I may change my mind.


The stamping and watercolor on this Hello Friend card was completed as on the purple/Kaleidoscope Hello Sunshine card above.


"Oh, hey" was stamped using Ranger™ Archival Ink - Jet Black before watercoloring.


This reddish Hello Sunshine card, I dusted with an anti-static bag and used White Daisy Exclusive Inks™ Stamp Pad and Ranger™ Clear Super Fine Embossing Powder before watercoloring. Please ignore the brownish streak under the "N". The wind came up and knocked the card and it rubbed up against a plant, probably tomato, on the way down. I was able to (mostly) disguise the problem by using a white rubber eraser and a little more paint on the card front. I thought the color went nicely with the new CTMH Sangria Paper (X7199B). I had this scrap of ribbon so I put it on this card.


On this card I watercolored the paper and after it dried I dusted with an anti-static bag and used VersaMark™ Ink Pad and Ranger™ White Super Fine Embossing Powder. Again I used the new CTMH Sangria Paper (X7199B). I used satin ribbon to embellish the card.

I have not created cards using the pink/blue/purple strip of watercolor paper that I shared yesterday. I hope to create something with that soon.

Stop back tomorrow for some swatches using CTMH Watercolor Paper (Update - I did not get a chance to prepare a post; please stop by in a few days).

Products used to create these cards:
I hope you find a card that you like in this stack. If you have a moment, I would love to know what you think of the watercolor on these cards. Thank you for stopping by today.

Tuesday, September 8, 2015

Fun With Watercolor Paints

Since, until last week, I had not used watercolor paints for more years than I will admit, I set out to play a bit Labor Day weekend. I did not use my CTMH Watercolor Paper (Z3146) for my initial testing because I want to save it for special projects.

I used an inexpensive watercolor paper that my mom had picked up at a chain store. I knew the quality was not the same as soon as I looked at it; this watercolor paper is a little rougher (I think you will be able to see it in some of the photos). In addition, while the description does not state this, the CTMH Watercolor Paper feels like it may have a light coating to aid with the paper not absorbing too much water (update: I recently, on 9/13/2015, read the specs for the CTMH Watercolor Paper and it says "Watercolor paper: 220 lb. (hot press, no coating)"; so my guess about the light coating was wrong - it must be the hot press technique that makes the paper feel that way). I thought even with different watercolor paper I still might get a feel for how watercolors work when the paper is wet (or not) and how wet my brush needs to be to try to achieve the look I am hoping for.

While surfing for watercolor tips and tricks, I saw where people heat embossed an image before using watercolors so I tried heat embossing before and after watercoloring. In addition, I used both clear and white pigment ink and clear and white embossing powders. Here are some of my samples:


The two samples in the photo below were dusted with an anti-static bag, then stamped with Ranger™ Archival Ink - Jet Black followed by VersaMark™ Ink Pad, then Ranger™ White Super Fine Embossing Powder was applied then heated.


As you can see, the black ink attracted some of the white embossing powder. I did not know what to expect when overlapping the embossing ink and white embossing powder over the black ink. It did a good job making the embossing appear to be in the foreground.

In the heat embossed sample below, I dusted with an anti-static bag and used White Daisy Exclusive Inks™ Stamp Pad and Ranger™ Clear Super Fine Embossing Powder.


If this sample, the black ink shows through the white ink and clear embossing power almost appearing as if the black was stamped last. I think both ways look nice; which you choose may depend on the project you are creating. For all of the samples that I heat embossed first, I used a paper towel to try to pick up as much watercolor paint as I could from the embossed images.

For these samples I watercolored the paper and set it aside to dry. I dusted with an anti-static bag and used VersaMark™ Ink Pad and Ranger™ White Super Fine Embossing Powder.


Personally I prefer the look of embossing after watercoloring, but there may be times I will want a more subtle embossed look on my projects.

I hope these samples give you some ideas for using the watercolor paints. I have created some cards with these samples. Please stop back in a few days to see how they turned out. I also created some samples using the CTMH Watercolor Paper which I also will be making into cards (or something) and sharing over the next week or so.

Thank you for stopping by.

Sunday, September 6, 2015

National Stamping Month Hello, Life! Blog Hop

Welcome to the National Stamping Month Blog Hop featuring the Hello, Life! stamp sets. There are approximately 40 bloggers sharing projects they created with National Stamping Month stamp sets. If blog hopping is new to you, just keep clicking on the link to the next blog (typically near the bottom of the post) to visit the next stop.


There are four options for the National Stamping Month—Hello, Life! stamp sets. Select any one of the three C-size stamp sets for $13.95 each. Or choose all three for $34.95 which is a savings of $6.90.

CC1040
Hello, Life!—Scrapbooking
CC1041
Hello, Life!—Cardmaking
CC1042
Hello, Life!—Pocket Scrapbooking
Each stamp set is designed to fit with a specific type of papercrafting, whether that’s traditional scrapbooking, cardmaking, or pocket scrapbooking. However, all the stamp sets coordinate with each other and can be used together to create artwork. These stamp sets also coordinate with shapes from the new Cricut® Artistry collection. The stamp sets are only available during September 2015.

You should have arrived here from ***Melissa Robinson's My Heartful Sentiments***. If you get lost along the way, Melinda Everitt keeps a complete list of participants on her blog If You Bling It.

I played with the stamps and watercolors for quite some time, but was not coming up with something that I was happy with. I still not sure I am over the moon with these cards, but time was running outthe natural light getting dim (I am sorry that I did not get outside earlier to take these photos)and my post had to be up in less than 3 hours.

This was the most recent card, the last before the hop, I created with the Hello, Life! stamp sets. No watercolors.


Three of the flowers were cut from the Glacier Houndstooth Zoe paper using the Artistry cartridge (with the hole in the center) and then layered on a the flower cut from White Daisy (the hole removed using hide contour in Design Space). The rest of the flowers are one layer of White Daisy. I used both 3-D and 3-D Foam Tape to attach the flowers. I also used first and second generation stamping for the leaves and I attached that stamp to the block at two different angles, but the flowers hide that. I used the rock and roll technique to ink Happy Birthday.

My next card has a watercolor strip. I painted this "leftover" piece of watercolor paper with colors that I thought might go well with the Zoe papers with the hope I would find a way to use it.


I let the watercolor paper dry for hours, maybe overnight, before stamping Happy Birthday with Whisper Exclusive Inks™. The stars were cut using the Artistry cartridge. I hope you find something about my cards that is pleasing to your eye.

Before you head to ***Priscilla's Paperie by Priscilla Gotham***, the supplies I used to create my project are listed below. All supplies are from Close To My Heart except where noted:
If you are not already working with a CTMH Independent Consultant, you may purchase all of the supplies I used at my Online Business Address.

I love to hear what people think of my crafts, so if you have a moment I would be delighted if you leave a comment. So you do not have to scroll back up, the next stop on the hop is ***Priscilla's Paperie by Priscilla Gotham***. I hope you are finding much inspiration on the hop. Thank you for visiting today.

Friday, September 4, 2015

Happy Birthday Dad - Sentiment Reveal

On August 24 I shared this card I created for my father's birthday. I was only able to show you a peek of the sentiment since I used a stamp set that was not available until September 1, 2015 - with the release of the 2015-16 Annual Inspirations.

You may recall that I was inspired by the On The Ball™ pattern on page 47 of Wishes™. Here again is the card front.


And here is the sentiment.


This is the entire stamp set.


If those you create birthday cards for have a funny bone, this is a stamp set you must have in the collection.

The Birthday Funnies stamp set is only available with Hostess Rewards. If you would like to host an online or home gathering to earn Hostess Rewards to purchase this set, send me an email me with your contact information so we may discuss the details. Alternatively, if you are ready to place an order or would like to research any product, the Shop Now button will take you there.


If you have any product or promotion questions, do not hesitate to email me. You will also find me on Facebook at Brenda's Paper Crafts.

Thursday, September 3, 2015

Mini Stamp Organizer - Organization for More than Stamps

The recently introduced My Acrylix® Mini Stamp Organizer (Z3106) provides organization for more than just the M-sized My Acrylix® Mini Stamps.


The divider creates four compartments in the organizer which is perfect to hold up to 28 My Acrylix® M-size stamp sets. The divider is removable so you can use the Mini Stamp Organizer for larger items too.


In addition to the M-sized My Acrylix® Mini Stamps, the organizer with the dividers is also perfect for holding Embellishments, Exclusive Inks™ Re-inkers, Shimmer Trim and some of the recently retired ribbon spools (like the Diagonal Striped Ribbon). The newer embellishments fit better than older embellishments. The packaging on the older embellishments, e.g., Sparkles (Z1104), is a little tall, but only the packaging folds over when the lid is closed.


Other items that fit in the compartments are Foam Tape, Memory Book Glue Dots™ (not in the box), Thick Twine and Embossing Powders. There are likely other items I have not tried yet that will also work well in the My Acrylix® Mini Stamp Organizer.

If you are ready to place an order or would like to research any product, the Shop Now button will take you there.


If you have any product or promotion questions, do not hesitate to email me. You will also find me on Facebook at Brenda's Paper Crafts.

Wednesday, September 2, 2015

September is National Stamping Month

As I mentioned yesterday, September is National Stamping Month and Close To My Heart released three stamp sets to celebrate.

The three National Stamping Month—Hello, Life! stamp sets are:

CC1040
Hello, Life!—Scrapbooking
CC1041
Hello, Life!—Cardmaking
CC1042
Hello, Life!—Pocket Scrapbooking

You may select any one of these three C-size stamp sets for $13.95 each or you may choose all three for $34.95. Choosing all three is a savings of $6.90.

The Close To My Heart Corporate Office shared this video about the stamp sets and showed us some projects created with them.


The CTMH Description of the video is "During the month of September, you can purchase any one of the exclusive C-size My Acrylix® Hello, Life! stamp sets for $13.95 each! Or, for an even better deal, you can purchase all three for only $34.95!"

Each stamp set is designed to fit with a specific type of papercrafting, whether that’s traditional scrapbooking, cardmaking, or pocket scrapbooking, but do not hesitate to use the stamp sets together. Images from the stamp sets also coordinate with shapes from the new Cricut® Artistry Collection (Z3167)  also available as a Digital Collection (Z3190). The stamp sets are only available during September 2015.

Projects I find created with the National Stamping Month—Hello, Life! stamps will be pinned to my Pinterest Board CTMH Promo Hello, Life! Look for the hastag #CTMHHelloLife on social media.

Please stop back September 6 for the National Stamping Month—Hello, Life! Blog Hop. My blog post will be here.

Thank you for visiting today.

Tuesday, September 1, 2015

Paper Garden September 2015 SOTM Blog Hop

Welcome to the September 2015 SOTM Blog Hop featuring the stamp set Paper Garden. This month there are almost 40 bloggers sharing projects they created with Paper Garden. If blog hopping is new to you, just keep clicking on the link to the next blog (typically near the bottom of the post) to visit the next stop.


The SOTM for September 2015, Paper Garden, is a D-size set of 10 stamps that is $5 with a qualifying purchase. Paper Garden is compatible with the Cricut® Artiste Collection (Z3170) exclusive to Close To My Heart. Recommended CTMH My Acrylix® Blocks for this stamp set are: 1" x 1" (Y1000), 2" x 2" (Y1003) and 4" x 5" (Y1012). The stamps in the Paper Garden set are:


You should have arrived here from ***Melinda Everitt's If You Bling It***. If you get lost along the way, Melinda keeps a complete list of participants on her blog at If You Bling It.

Unfortunately I misplaced my stamp set. I have been taking some medication and while they warned me that I should not drive, it did not register with me that I had to be extra cautious in other aspects of my life. I remember thinking I needed to put the stamp set in a "safe place" because I needed to create with it soon, but, well you know. I guess I should not be surprised since I have tried to put the milk carton in the cupboard with the glasses. If the milk carton would have fit, that is where I would have found it the next time I wanted milk.

Fortunately some of the stamps coordinate with cuts from the Cricut® Artiste Collection (Z3170), so I improvised with die cuts and our new Watercolor Paper and Paints. I hope you forgive me my craziness this month.


The CTMH Watercolor Paper cut beautifully on my Cricut® Explore. I used the Light Cardstock + setting and a well used green mat. In the photo above, you can see the cuts that have not been painted and those that I watercolored. I watercolored right on top of my Cricut® mat. I will wash my mat off in the sink and hang it to dry later. As you can see, the die cuts curled at bit as they dried. That was fine with me as I planned to do some shaping. After the paint dried, I used both the end of a paint brush and my fingers to shape the flowers and leaves.


I tried to create an ombré color wash look on the background die cut. My plan was to have the background darker in the middle and lighter near the top and bottom. It did not turn out exactly as I envisioned, but I am still quite happy with it. I waited until the paint was completely dry before stamping the sentiment. I used a combination of adhesives to attach the flowers and leaves working around the shaping and creating different heights for the pieces.

This was the first time I working with watercolors since grade school. I am fairly pleased with the results. I hope that you find my card pleasing to your eye.

Before you head to ***Priscilla's Paperie by Priscilla Gotham***, the supplies I used to create my project are listed below.

All supplies are from Close To My Heart except where noted:
If you are not already working with a CTMH Independent Consultant, you may purchase all of the supplies I used at my Online Business Address.

I love to hear what people think of my crafts, so if you have a moment I would be delighted if you leave a comment. So you do not have to scroll back up, the next stop on the hop is ***Priscilla's Paperie by Priscilla Gotham***.

Thank you for visiting today. I hope you are enjoying the hop.

CTMH News for September 2015

September 2015 brings us a new Stamp Of The Month, a great National Stamping Month special collection of stamps AND the latest 2015-16 Annual Inspirations AND Holiday Expressions.

The September 2015 Stamp of the Month is Paper Garden


Paper Garden (S1509) is an exclusive D-size set of 10 stamps that you can only purchase during the month of September 2015. The stamp set can be yours for $5 when you place an order of $50 or more in qualifying Close To My Heart products. Alternatively you can purchase it for $17.95. Recommended CTMH My Acrylix® Blocks are: 1" x 1" (Y1000), 2" x 2" (Y1003) and 4" x 5" (Y1012).

Paper Garden is compatible with the Cricut® Artiste Collection (Z3170) available exclusively from Close To My Heart Independent Consultants (more on the cartridge below).

Items created with the stamp set by CTMH Corporate artists are this card and layout:


If you would like a list of the products used to create the above items, you will find the information in the Recipes for Holiday Expressions, a PDF file that lists the products used to create the samples in the Idea Books so you may re-create projects at home. Also check my Pinterest Board CTMH 2015 09 Sep SOTM Paper Garden for additional ideas using this stamp set.

Please stop back tomorrow for the Paper Garden Stamp of the Month Blog Hop. My blog post will be here.

National Stamping Month

There are four options for the National Stamping Month—Hello, Life! Select any one of these three C-size stamp sets for $13.95 each. Or choose all three for $34.95 which is a savings of $6.90.

CC1040
Hello, Life!—Scrapbooking
CC1041
Hello, Life!—Cardmaking
CC1042
Hello, Life!—Pocket Scrapbooking
Each stamp set is designed to fit with a specific type of papercrafting, whether that’s traditional scrapbooking, cardmaking, or pocket scrapbooking. However, all the stamp sets coordinate with each other and can be used together to create fantastic artwork. These stamp sets also coordinate with shapes from the new Cricut® Artistry collection. The stamp sets are only available during September 2015. When ordering from my OBA, when you are viewing the items in your cart, you should see the promotional items in the shaded area near the bottom of your cart (you may need to scroll down).

If you are looking for ideas for using the National Stamping Month—Hello, Life! stamps, projects I find created with them will be pinned to my Pinterest Board CTMH Promo Hello, Life!.

Please stop back September 7 for the National Stamping Month—Hello, Life! Blog Hop. My blog post will be here.

New Idea Books

September 1 brings us not one, but two, new Idea Books.


2015-16 Annual Inspirations


The 2015-2016 Annual Inspirations book is valid from September 1, 2015 through August 31, 2016. It shows the core products of Close To My Heart, including inks, re-inkers, cardstock, albums, tools, etc. as well as six new My Reflections collections and a variety of new stamp sets.

A note about the four previous Cricut® collections: Art Philosophy, Artiste, Artbooking and Artfully Sent. They have been re-packaged and have new product numbers. Each will now include a package of colored cardstock instead of Dimensional Elements (or White Daisy cardstock which was included with Artfully Sent). The images on the cartridges and included stamp sets have not changed, only the consumable products included with it.

Also, Artistry is available digitally if you use Cricut® Design Space with any of the Cricut® Explore machines. The item number for the Cricut® Artistry Digital Collection is Z3190. You will still receive the stamp sets and cartstock as if you had ordered the collection with the cartridge, but rather than a physical cartridge, you will receive an online code and instructions for redeeming the code to link the images to your Cricut® account.

Holiday Expressions


The Holiday Expressions book  is valid from September 1, 2015 through December 31, 2015. It includes two new My Reflections collections and a variety of stamp sets which focus on Halloween, Thanksgiving and Christmas. Holiday Expressions also shows the Stamp of the Month stamp sets.

When you place an order on my OBA on or after September 1, and have not already taken advantage of an offer for a free copy of 2015 Holiday Expressions, you will be prompted to add a copy to your cart. If you already have a 2015 Holiday Expressions, please take advantage of the offer and share the copy with a friend or family member.

If you are ready to place an order or would like to research any product, the Shop Now button will take you there.


If you have any product or promotion questions, do not hesitate to email me. You will also find me on Facebook at Brenda's Paper Crafts.