Hello! I am back with another project that was completed some time ago and the photos have been stored on my SD card waiting to be shared.
This is a Christmas gift I gave in 2016 to someone who enjoys taking cruises. It is a savings bank in the shape and size of a larger canning jar - about the size you would use to can spaghetti sauce or tomatoes. I found it at Bed, Bath and Beyond. The jar came with this chalkboard label and a piece of chalk to personalize the jar. I did not try, but I believe if you wanted to remove the chalkboard tag that you would be able to, but you may need to use some adhesive remover to clean up the jar.
I searched Cricut® Design Space for some cruise-themed images and found 41 to start just using "cruise". That search gave me ideas for additional searches, for example "anchor", and I found more than enough ideas to decorate the jar.
I simplified this ship's wheel buy removing layers, slicing and welding. The image started out as Helm - #M344C0 - from Life is a Beach.
I added text to the Bon Voyage image, Cruise Ship Phrase - #M33E0C - Life is a Beach, and attached it so everything would be cut where I wanted it
Seeing the anchors from my search for "cruise" gave me the idea to search for "anchor" where I found this image that I used just as it is. The image is Anchor - #M37456 - Going Places.
I liked the Cruise Ship Border - #M330F6 - Life is a Beach I found when searching for "cruise", but it would have been too tall if I just made it long enough, so I welded two of the border together and size it.
The vinyl I used is from a variety of sources. I "seeded" the bank with a little money to get the recipient started toward saving for their next cruise. I received positive feedback when I gave the gift. I hope you like it too. Thank you for visiting today.
Some of my latest crafty projects especially card making and scrapbooking with some home decor thrown in.
Pages
▼
Wednesday, March 29, 2017
Saturday, March 25, 2017
Whimsy Fundamentals Thank You Cards
These cards were created and mailed in January – this photo has been waiting for almost exactly two months to finally make the light day.
I used a pattern from the Close To My Heart 2016 Convention to create the cards. The card bases are the 5½" × 4¼" White Cards & Envelopes, Value Pack (X254). Whimsy Fundamentals patterned papers (Z3255) and ribbons from the Whimsy Ribbon Pack (Z3287) embellish the cards. The sentiments are from All the Thanks stamp set (B1536). I used Whimsy ink colors (Thistle, Crystal Blue, Glacier, Juniper, Sweet Leaf, Canary, Flaxen, Sorbet, Pixie, Smoothie) to stamp, letting the paper and ribbon colors influence which color I stamped with.
By choosing a different stamp set, for example Birthday Sparkles (B1537), you could easily make the cards into quick birthday greetings.
If you would like to place an order or research any product, the Shop Now button will take you there.
If you have any product or promotion questions, please email me. I also have a Facebook page at Brenda's Paper Crafts. Thanks for stopping by today.
Thursday, March 16, 2017
Thin Cuts Blog Hop
Welcome to the CTMH Thin Cuts Blog Hop. For this hop there are almost 20 bloggers sharing projects they created with Thin Cuts - the thin metal dies from Close To My Heart. If blog hopping is new to you, we try to keep it easy: just keep clicking on the link to the next blog (typically near the bottom of the post) to visit the next stop. Our blog hop is circular so visiting the next blog will take you back to where you started.
You should have arrived here from ***Tracey Pierce's Papercrafting Princess***. If you get lost along the way, Melinda Everitt keeps a list of participants on her blog at If You Bling It.
Close To My Heart has 22 Thin Cuts options that are part of the Cut It Out! promotion this month. Some are designed to be used standalone, like words and some icons, while others are designed to coordinate with stamp sets. Some, like the Basic Hearts and Basic Circles, can do both.
My niece recently celebrated a birthday so I created this card for her.
I used the Momento ink on the cupcake shape. I stamped the entire image once on watercolor paper and the top "frosting" portion of the stamp once. I cut both with the Thin Cuts and then I trimmed the bottom of the "frosting" so you can see the top of the cupcake liner. I stamped the sprinkles using Lmeon, Willow and Pansy, then I re-stamped using VersaMark so I could emboss with the clear powder. Then I used the white watercolor paint on the "frosting". I used the Small Round Waterbrush to get into some of the tighter spaces. After the watercolor on the candle dried, I stamped the image again so it would be more defined.
Despite risking that my brush would be too wet and make the stamped hat image run, I stamped the hat with Pansy ink and watercolored using the Small Round Waterbrush to get into the tighter spaces. After the hat dried I attached using Thin 3-D Foam Tape.
I like this stamp set because using different paper and ink colors, using the different stamps in the set on or with the cupcake and the wide variety of embellishments available can make this set work for any birthday and even other celebrations (for example cupcakes are popular choices for weddings and baby showers now). I hope you like how I used this set on this card.
Before you head to ***Jennifer Dykstra's JD Designs***, the supplies I used to create my project are listed below.
All supplies are from Close To My Heart except where noted:
It would be wonderful if you have a moment to leave a comment telling me know what you think of my card before you head to ***Jennifer Dykstra's JD Designs***.
I hope you are finding many ideas for using the Thin Cuts and Thin Cuts Bundles available for 25% off retail during the Cut It Out! promotion from Close To My Heart. Thanks for hopping with us!
You should have arrived here from ***Tracey Pierce's Papercrafting Princess***. If you get lost along the way, Melinda Everitt keeps a list of participants on her blog at If You Bling It.
Close To My Heart has 22 Thin Cuts options that are part of the Cut It Out! promotion this month. Some are designed to be used standalone, like words and some icons, while others are designed to coordinate with stamp sets. Some, like the Basic Hearts and Basic Circles, can do both.
My niece recently celebrated a birthday so I created this card for her.
I used the Momento ink on the cupcake shape. I stamped the entire image once on watercolor paper and the top "frosting" portion of the stamp once. I cut both with the Thin Cuts and then I trimmed the bottom of the "frosting" so you can see the top of the cupcake liner. I stamped the sprinkles using Lmeon, Willow and Pansy, then I re-stamped using VersaMark so I could emboss with the clear powder. Then I used the white watercolor paint on the "frosting". I used the Small Round Waterbrush to get into some of the tighter spaces. After the watercolor on the candle dried, I stamped the image again so it would be more defined.
Despite risking that my brush would be too wet and make the stamped hat image run, I stamped the hat with Pansy ink and watercolored using the Small Round Waterbrush to get into the tighter spaces. After the hat dried I attached using Thin 3-D Foam Tape.
I like this stamp set because using different paper and ink colors, using the different stamps in the set on or with the cupcake and the wide variety of embellishments available can make this set work for any birthday and even other celebrations (for example cupcakes are popular choices for weddings and baby showers now). I hope you like how I used this set on this card.
Before you head to ***Jennifer Dykstra's JD Designs***, the supplies I used to create my project are listed below.
All supplies are from Close To My Heart except where noted:
- Sweet Birthday Stamp + Thin Cuts (CC1220)
- Adventure Fundamentals (Z3253)
- 5½" × 4¼" White Cards & Envelopes, Value Pack (X254)
- Exclusive Inks™ Stamp Pads: Lemon (Z2808), Pansy (Z2804), Willow (Z2807)
- Watercolor Paper (Z3146)
- Watercolor Paints (Z3132)
- Paintbrush Set (Z3188)
- Waterbrush—Small Round (Z3224)
- Black Memento™ Ink Pad (Z899)
- VersaMark™ Ink Pad (Z891)
- Ranger™ White Super Fine Embossing Powder (Z2068)
- Craft Heater (Z555)
- 3L® E-Z Dots® Adhesive (Z3022)
- Thin 3-D Foam Tape (Z2060)
- Supplies not from Close To My Heart: Cuttlebug
It would be wonderful if you have a moment to leave a comment telling me know what you think of my card before you head to ***Jennifer Dykstra's JD Designs***.
I hope you are finding many ideas for using the Thin Cuts and Thin Cuts Bundles available for 25% off retail during the Cut It Out! promotion from Close To My Heart. Thanks for hopping with us!
Saturday, March 11, 2017
Dreamin’ Big Blog Hop
Welcome to our Close to My Heart Dreamin' Big Blog Hop! On this hop we will be showcasing items created by several talented Close To My Heart Independent Consultants using the Dreamin' Big collection available in Seasonal Expressions 1.
If you are visiting from Crafting with Carol by Carol Loftus then you are on the right track. Carol is also our hostess and her blog is the beginning of our hop.
For our Dreamin' Big Blog Hop I created this card.
I stamped two of the insects and the sentiment with VersaMark and embossed with clear powder to create a resist. Then I used my sponge daubers to ink the cardstock. When I inked the lady bug and dragonfly I selectively tapped the stamp to the ink pads to stamp with multiple colors at one time. I used the journaling pen to add details to the ladybug.
Even in this tighter photo it is hard to see, but I used the shimmer brush to add a little shimmer to the circles in the wings of the dragonfly. I also lightly touched the top floral-like image in the butterfly with the shimmer brush. I lightly bent the wings on the insects and only applied the foam tape to the centers so the wings could be free.
All supplies are from Close To My Heart except where noted:
If you are not already working with a CTMH Independent Consultant, you may purchase all of the supplies I used at my Online Business Address.
Before you head to see what Dresses and Spurs by Erica Haskin created, please take a moment to let me know what you think of my card. I love to read your comments and I hope you are finding many ideas for using the Dreamin' Big collection.
Here is a copy of the blog hop list. As soon as possible I will update this table so clicking the blog address will take you directly to each person's Dreamin' Big blog post.
Thank you for hopping with us today!
If you are visiting from Crafting with Carol by Carol Loftus then you are on the right track. Carol is also our hostess and her blog is the beginning of our hop.
For our Dreamin' Big Blog Hop I created this card.
I stamped two of the insects and the sentiment with VersaMark and embossed with clear powder to create a resist. Then I used my sponge daubers to ink the cardstock. When I inked the lady bug and dragonfly I selectively tapped the stamp to the ink pads to stamp with multiple colors at one time. I used the journaling pen to add details to the ladybug.
Even in this tighter photo it is hard to see, but I used the shimmer brush to add a little shimmer to the circles in the wings of the dragonfly. I also lightly touched the top floral-like image in the butterfly with the shimmer brush. I lightly bent the wings on the insects and only applied the foam tape to the centers so the wings could be free.
All supplies are from Close To My Heart except where noted:
- Dreamin' Big Paper Packet (X7218B)
- Dreamin’ Big Cardmaking Thin Cuts Bundle (Z3303)
- 12" x 12" cardstock color: White Daisy (1385)
- 5½" × 4¼" White Cards & Envelopes, Value Pack (X254)
- Exclusive Inks™ Stamp Pad colors: Glacier (Z2841), Goldrush (Z2823), Juniper (Z2865), Saffron (Z2851), Slate (Z2873), Sorbet (Z2865), Whisper (Z2872)
- Sponge Dauber (3-pack - Z726) or (value pack of 12 - Z1938)
- Shimmer Brush—Clear (Z3293)
- Black Memento™ Ink Pad (Z899)
- VersaMark™ Ink Pad (Z891)
- Ranger™ Clear Super Fine Embossing Powder (Z2088)
- Craft Heater (Z555)
- Marvy® Uchida® LePen™ Journaling Pen (Z1979)
- 3L® E-Z Dots® Adhesive (Z3022)
- Thin 3-D Foam Tape (Z2060)
- Supplies not from Close To My Heart: Cuttlebug
If you are not already working with a CTMH Independent Consultant, you may purchase all of the supplies I used at my Online Business Address.
Before you head to see what Dresses and Spurs by Erica Haskin created, please take a moment to let me know what you think of my card. I love to read your comments and I hope you are finding many ideas for using the Dreamin' Big collection.
Here is a copy of the blog hop list. As soon as possible I will update this table so clicking the blog address will take you directly to each person's Dreamin' Big blog post.
| Carol Loftus | http://carolloftus.blogspot.com/ |
| Brenda Lapp - you are here | http://centralnyscrapper.blogspot.com/ |
| Erica Haskin | http://dressesandspurs.blogspot.com/ |
| Julie Scott | http://craftwithjulie.blogspot.com/ |
| Amy Ulen | http://amyulen.com/ |
| Darlene Plotinski | http://beneathmybranches.blogspot.com/ |
| Haley Dyer | http://inkyscrapper.blogspot.com/ |
Thank you for hopping with us today!
Sunday, March 5, 2017
Workshops Your Way™ Guides
Occasionally I am asked about where to find the instructions for the Workshops Your Way™ Kits offered by Close To My Heart. The Guides are files you can download in PDF format to your computer, tablet or phone that you can either use by reviewing them on your screen or printing them on your printer.
The instructions for Workshops Your Way™ Kits can only be downloaded while the Idea Book they are pictured in is valid. All of the WYW instructions for kits that appear in Seasonal Expressions 1 will be removed from my Online Business Address at 11:59 pm Mountain time (the time is based on where CTMH Corporate headquarters is located) on April 30, 2017.
When you are shopping for a Workshops Your Way™ Kit is the best time to download the instructions. While you are waiting for your package to be delivered you can review the instructions and contact me if you have any question so you can dive in as soon as your kit arrives.
On the product description page there are two links for downloading the Guide for that WYW; the links go to the same PDF. The first is right under the button to add the item to your cart and the second is at the bottom of the written description.
If you [left] click on the link, it will open the PDF in a new browser tab (this is the default in most browsers, but if you have changed the settings in your browser you may get a new window or a prompt asking what action you would like to take). When the document is open, you can either print or save from there.
The above screenshot was taken from Firefox, but is very similar in Chrome. There is a difference when you click the download button: in Firefox on Windows, the download is saved to your default Download folder and there is no option to change folders before the download begins, while in Chrome a "Save As" dialog appears and you can choose where to save the file (see below for an example of the "Save As" dialog.
If you are using Microsoft Edge, I found you have to click somewhere on the screen before you will see the icons in the upper right for printing or saving. The icons are similar to above.
If you are using Microsoft Internet Explorer, I found you have to move your mouse to the bottom of the screen to get the save and print options to appear.
Whether you are using Microsoft's Edge or Internet Explorer browsers, the save button works the same. When you click it a "Save As" dialog appears and you can choose where to save the file (see below for an example of the "Save As" dialog.
Alternatively you can right-click on the link to save the PDF to your computer.
In case right-clicking to save a file to your computer is a new-to-you concept, here are a few screenshots from a Windows 10 computer that I hope you will find useful:
If you use the Chrome browser, this is what your screen will look like:
Select "Save link as..." and then the familiar "Save As" dialog box will appear on your screen (see below if you are not sure what I mean by "Save As" dialog box).
If you use the Firefox browser, this is what your screen will look like:
Again, select "Save line as..." and then the familiar "Save As" dialog box will appear on your screen.
If you use the Microsoft Internet Explorer browser, this is what your screen will look like:
Select "Save target as..." and then the familiar "Save As" dialog box will appear on your screen.
If you use the Microsoft Edge browser, this is what your screen will look like:
Again, select "Save target as..." and then the familiar "Save As" dialog box will appear on your screen.
After you have selected the option to save the PDF, you will see a "Save As" dialog box similar to this (no matter which browser you are using the boxes are similar enough on a Windows computer that I only took one screenshot):
The file name will likely be auto-filled for you, but you can change it to a friendlier name so it is easier to search for in the future. You will most likely want to put the file in your Documents folder. I have a CTMH folder inside the Documents folder and a Workshops Your Way sub-folder. Use the location that works best for you.
I do not have access to a computer with the Mac OS to test and take screenshots; when I used an Apple computer last, the concept of right-clicking and saving was not too different.
I hope this helps you to find and save the instructions for the WYW kits you purchase.
The current Workshops Your Way™ Kits are:
To make this information easier to find in the future, I created a page that you will find a link to in the green bar above and there is a link in the right side-bar.
The instructions for Workshops Your Way™ Kits can only be downloaded while the Idea Book they are pictured in is valid. All of the WYW instructions for kits that appear in Seasonal Expressions 1 will be removed from my Online Business Address at 11:59 pm Mountain time (the time is based on where CTMH Corporate headquarters is located) on April 30, 2017.
When you are shopping for a Workshops Your Way™ Kit is the best time to download the instructions. While you are waiting for your package to be delivered you can review the instructions and contact me if you have any question so you can dive in as soon as your kit arrives.
On the product description page there are two links for downloading the Guide for that WYW; the links go to the same PDF. The first is right under the button to add the item to your cart and the second is at the bottom of the written description.
If you [left] click on the link, it will open the PDF in a new browser tab (this is the default in most browsers, but if you have changed the settings in your browser you may get a new window or a prompt asking what action you would like to take). When the document is open, you can either print or save from there.
The above screenshot was taken from Firefox, but is very similar in Chrome. There is a difference when you click the download button: in Firefox on Windows, the download is saved to your default Download folder and there is no option to change folders before the download begins, while in Chrome a "Save As" dialog appears and you can choose where to save the file (see below for an example of the "Save As" dialog.
If you are using Microsoft Edge, I found you have to click somewhere on the screen before you will see the icons in the upper right for printing or saving. The icons are similar to above.
If you are using Microsoft Internet Explorer, I found you have to move your mouse to the bottom of the screen to get the save and print options to appear.
Whether you are using Microsoft's Edge or Internet Explorer browsers, the save button works the same. When you click it a "Save As" dialog appears and you can choose where to save the file (see below for an example of the "Save As" dialog.
Alternatively you can right-click on the link to save the PDF to your computer.
In case right-clicking to save a file to your computer is a new-to-you concept, here are a few screenshots from a Windows 10 computer that I hope you will find useful:
If you use the Chrome browser, this is what your screen will look like:
Select "Save link as..." and then the familiar "Save As" dialog box will appear on your screen (see below if you are not sure what I mean by "Save As" dialog box).
If you use the Firefox browser, this is what your screen will look like:
Again, select "Save line as..." and then the familiar "Save As" dialog box will appear on your screen.
If you use the Microsoft Internet Explorer browser, this is what your screen will look like:
Select "Save target as..." and then the familiar "Save As" dialog box will appear on your screen.
If you use the Microsoft Edge browser, this is what your screen will look like:
Again, select "Save target as..." and then the familiar "Save As" dialog box will appear on your screen.
After you have selected the option to save the PDF, you will see a "Save As" dialog box similar to this (no matter which browser you are using the boxes are similar enough on a Windows computer that I only took one screenshot):
The file name will likely be auto-filled for you, but you can change it to a friendlier name so it is easier to search for in the future. You will most likely want to put the file in your Documents folder. I have a CTMH folder inside the Documents folder and a Workshops Your Way sub-folder. Use the location that works best for you.
I do not have access to a computer with the Mac OS to test and take screenshots; when I used an Apple computer last, the concept of right-clicking and saving was not too different.
I hope this helps you to find and save the instructions for the WYW kits you purchase.
The current Workshops Your Way™ Kits are:
- Happy Congratulations Cardmaking Kit (G1125) featuring Dreamin' Big - Guide
- Here for You Cardmaking Kit (G1124) featuring Some Kinda Wonderful - Guide
- Hello Baby Cardmaking Kit (G1123) featuring Hello Lovely - Guide
- Mother's Day Cardmaking Kit (G1122) featuring Sugar Rush - Guide
- Dreamin' Big Scrapbooking Kit (G1121) featuring Dreamin' Big - link to Guide
- Some Kinda Wonderful Scrapbooking Kit (G1120) featuring Some Kinda Wonderful - Guide
- Hello Lovely Scrapbooking Kit (G1119) featuring Hello Lovely - Guide
- Sugar Rush Scrapbooking Kit (G1118) featuring Sugar Rush - Guide
To make this information easier to find in the future, I created a page that you will find a link to in the green bar above and there is a link in the right side-bar.
Wednesday, March 1, 2017
Tea-rrific March 2017 Blog Hop
Welcome to the March 2017 SOTM Blog Hop featuring the stamp set Tea-rrific. This month there are almost 30 bloggers sharing projects they created with the CTMH Stamp Of The Month. If blog hopping is new to you, we try to keep it easy: just keep clicking on the link to the next blog (typically near the bottom of the post) to visit the next stop. Our blog hop is circular so visiting the next blog will take you back to where you started.
You should have arrived here from ***Tracie Cassidy's Cre8ing from the {Heart}***. If you get lost along the way, Melinda Everitt keeps a list of participants on her blog at If You Bling It.
My card was inspired by cards I've seen where a decorative panel is cut from the front, sometimes using a metal die, and backed with paper or acetate so the card inside can be seen. I hope you like my card. My crafty mojo has not been the same since my father died suddenly on February 16. I could only bring myself to create a tag to attach to the gift bag for a recent family baby shower [gasp]; thank goodness earlier in February I completed the card my mom was giving. I hope signing up for the blog hops will help me find the motivation to craft again. At least it will make me have something creative to share with you a couple times each month while I learn to adjust.
I stamped the bottom portion of the stacked tea cups first then I cleaned the stamp. When I re-inked for the top section of the tea cup stack, I only inked a portion of the heart tea cup. Thanks to the clear stamp, I was able to make the cup look like the tea cup bottom is in the cup below without using any tools or self-adhesive notes for masking.
I really like two-part stamps where there is a phrase for the card front that continues on a stamp appropriate for the card inside. I used some of the extra flowers I stamped, colored and fussy cut to highlight the sentiment. I used Watercolor Pencils because they are portable and I can color during my lunch break while I catch up on television shows I missed.
Before you head to ***Corinna's Crafts by Corinna Murphy***, the supplies I used to create my project are listed below.
All supplies are from Close To My Heart except where noted:
Before you leave I would be delighted if you left me a comment letting me know what you think of my project. I hope you are finding many ideas for how you might use the Tea-rrific stamp set. Thanks for hopping with us! So you do not have to scroll back up, the next stop on the hop is ***Corinna's Crafts by Corinna Murphy***.
You should have arrived here from ***Tracie Cassidy's Cre8ing from the {Heart}***. If you get lost along the way, Melinda Everitt keeps a list of participants on her blog at If You Bling It.
My card was inspired by cards I've seen where a decorative panel is cut from the front, sometimes using a metal die, and backed with paper or acetate so the card inside can be seen. I hope you like my card. My crafty mojo has not been the same since my father died suddenly on February 16. I could only bring myself to create a tag to attach to the gift bag for a recent family baby shower [gasp]; thank goodness earlier in February I completed the card my mom was giving. I hope signing up for the blog hops will help me find the motivation to craft again. At least it will make me have something creative to share with you a couple times each month while I learn to adjust.
I stamped the bottom portion of the stacked tea cups first then I cleaned the stamp. When I re-inked for the top section of the tea cup stack, I only inked a portion of the heart tea cup. Thanks to the clear stamp, I was able to make the cup look like the tea cup bottom is in the cup below without using any tools or self-adhesive notes for masking.
I really like two-part stamps where there is a phrase for the card front that continues on a stamp appropriate for the card inside. I used some of the extra flowers I stamped, colored and fussy cut to highlight the sentiment. I used Watercolor Pencils because they are portable and I can color during my lunch break while I catch up on television shows I missed.
Before you head to ***Corinna's Crafts by Corinna Murphy***, the supplies I used to create my project are listed below.
All supplies are from Close To My Heart except where noted:
- My Acrylix™ March 2017 SOTM: Tea-rrific Stamp Set (S1703)
- 5½" × 4¼" White Cards & Envelopes, Value Pack (X254)
- Whimsy Fundamentals (Z3253)
- 12" X 12" Cardstock: White Daisy (1385)
- Black Memento™ Ink Pad (Z899)
- Exclusive Inks™ Stamp Pad in the following colors: Pixie (Z2844)
- Watercolor Pencils (3505)
- Waterbrush—Small Round (Z3224)
- 3L® E-Z Dots® Adhesive (Z3022)
- Thin 3-D Foam Tape (Z2060)
- 3-D Foam Tape (Z1151)
- Supplies not from Close To My Heart: craft knife, glass cutting mat
Before you leave I would be delighted if you left me a comment letting me know what you think of my project. I hope you are finding many ideas for how you might use the Tea-rrific stamp set. Thanks for hopping with us! So you do not have to scroll back up, the next stop on the hop is ***Corinna's Crafts by Corinna Murphy***.
March 2017 CTMH News
The March 2017 Stamp of the Month is Tea-rrific
Tea-rrific (S1703) is an exclusive D-size set of 11 stamps that is only available for purchase during the month of March 2017. The stamp set can be yours for $5 when you place an order of $50 or more in qualifying Close To My Heart products (and you qualify for additional sets at $5 for each $50 you spend). Alternatively it is available at $17.95. Recommended CTMH My Acrylix® Blocks for this stamp set are: 1" x 1" (Y1000), 2" x 2" (Y1003) and 2" x 3½" (Y1009).
CTMH Corporate Artists created these cards using the name stamp set.
If you would like a list of the products used to create the above items, you will find the information in the Recipes for Seasonal Expressions 1, a PDF file that lists the products used to make the samples in the Seasonal Expressions 1 so you may re-create projects at home. I am participating in a Happy Easter blog hop this month; you will find my post here tomorrow. Please visit my CTMH 2017 03 Mar SOTM Tea-rrific for additional ideas using this stamp set.
March 2017 - Cut It Out!
UPDATES:
No qualifying order total is needed to purchase the featured Thin Cuts/Thin Cut Bundles at the promotional price. And purchase of any of the featured products does count toward hostess rewards and the discounted Stamp Of The Month. Shipping/handling will be based on the full retail price of the items purchased.
The featured Thin Cuts are shown below, but can also be found on the Monthly Specials menu on my Online Business Address (OBA).
* There are stamp sets that coordinate with this Thin Cut option; Journaling Heart and Heartfelt Hello coordinate with Basic Hearts and Journaling Circle and Leafy Congrats coordinate with Basic Circles.
** This Thin Cuts option is not shown in the current idea books; the Thin Cuts were introduced at Australasia Convention in October 2016. They coordinate with stamp sets that are in Annual Inspirations 2016-2017. This is the option you want select if you have previously purchased the coordinating stamp set.
*** This Thin Cuts bundle option is not shown in any of the current idea books; the Thin Cuts were introduced at Australasia Convention in October 2016. The coordinating stamp sets were introduced in Annual Inspirations 2016-2017 (page numbers listed above). This is the option you want select if you do not have either the stamp set or the Thin Cuts.
Seasonal Expressions 1 2017
Two months of 2017 have already evaporated which means you can only order form Seasonal Expressions 1 for two more months. SE1 is only valid until April 30, 2017 and many items are while supplies last. Typically when an item in one of our thinner Idea Books sells out it is no longer offered (as soon as Corporate posts a retiring list I will share it here). If there are items in SE1 that you would like to craft with, please do not risk losing your opportunity to purchase it.
If you are ready to place an order or would like to research any product, the Shop Now button will take you there.
If you have any product or promotion questions, do not hesitate to email me. You will also find me on Facebook at Brenda's Paper Crafts. Thank you for visiting today.
Tea-rrific (S1703) is an exclusive D-size set of 11 stamps that is only available for purchase during the month of March 2017. The stamp set can be yours for $5 when you place an order of $50 or more in qualifying Close To My Heart products (and you qualify for additional sets at $5 for each $50 you spend). Alternatively it is available at $17.95. Recommended CTMH My Acrylix® Blocks for this stamp set are: 1" x 1" (Y1000), 2" x 2" (Y1003) and 2" x 3½" (Y1009).
CTMH Corporate Artists created these cards using the name stamp set.
If you would like a list of the products used to create the above items, you will find the information in the Recipes for Seasonal Expressions 1, a PDF file that lists the products used to make the samples in the Seasonal Expressions 1 so you may re-create projects at home. I am participating in a Happy Easter blog hop this month; you will find my post here tomorrow. Please visit my CTMH 2017 03 Mar SOTM Tea-rrific for additional ideas using this stamp set.
March 2017 - Cut It Out!
UPDATES:
- Sugar Rush Cardmaking Thin Cuts Bundle - no longer available as of 03/31/2017
- Dreamin’ Big Card Thin Cuts Bundle (Z3303) - no longer available as of 3/20/2017
- Happy Birthday Thin Cuts (Z3004) - temporarily unavailable - expected end of April
- XOXO Thin Cuts (Z3005) - no longer available as of 03/27/2017
- Hearts Thin Cuts (Z3260) - no longer available as of 03/31/2017
- Swirly Seashells Thin Cuts (CC1155) - no longer available as of 03/31/2017
- Sweet Birthday Thin Cuts (CC1156) - no longer available as of 03/31/2017
- Wreath Thin Cuts (CC1157) - no longer available as of 03/31/2017
No qualifying order total is needed to purchase the featured Thin Cuts/Thin Cut Bundles at the promotional price. And purchase of any of the featured products does count toward hostess rewards and the discounted Stamp Of The Month. Shipping/handling will be based on the full retail price of the items purchased.
The featured Thin Cuts are shown below, but can also be found on the Monthly Specials menu on my Online Business Address (OBA).
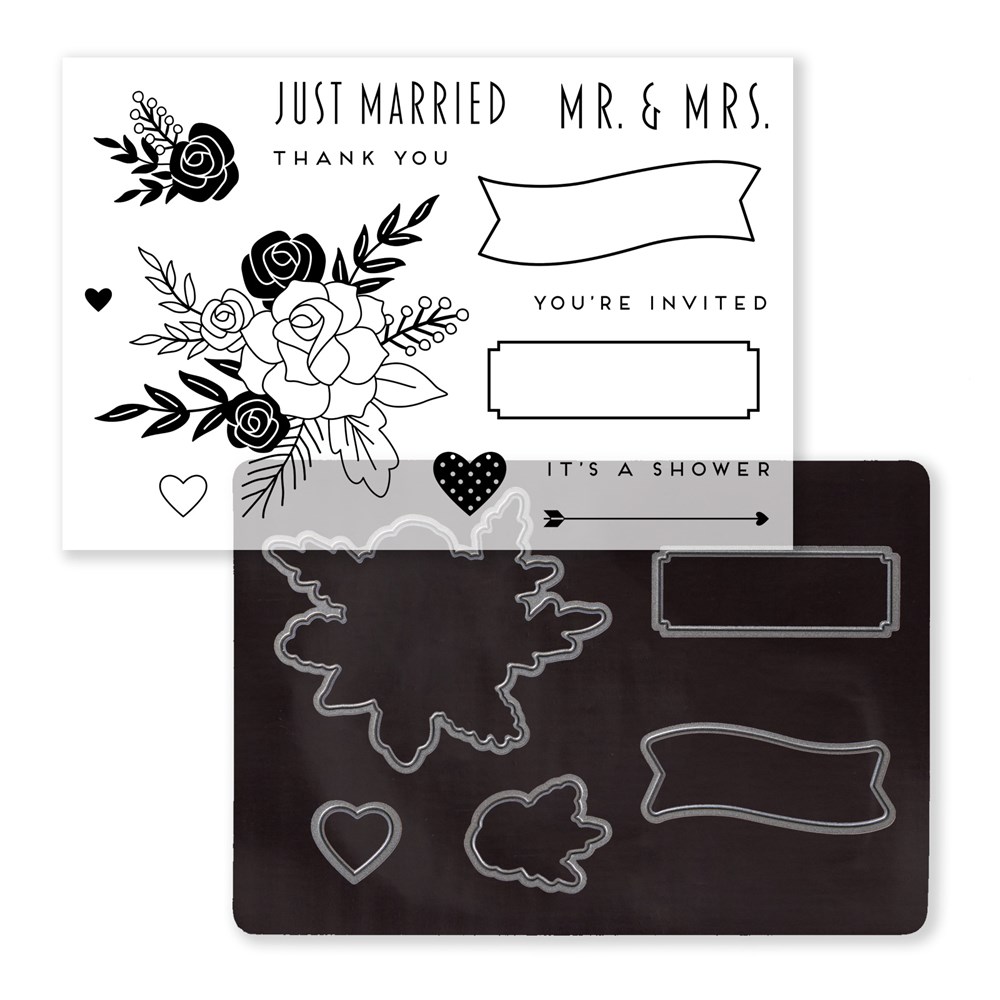
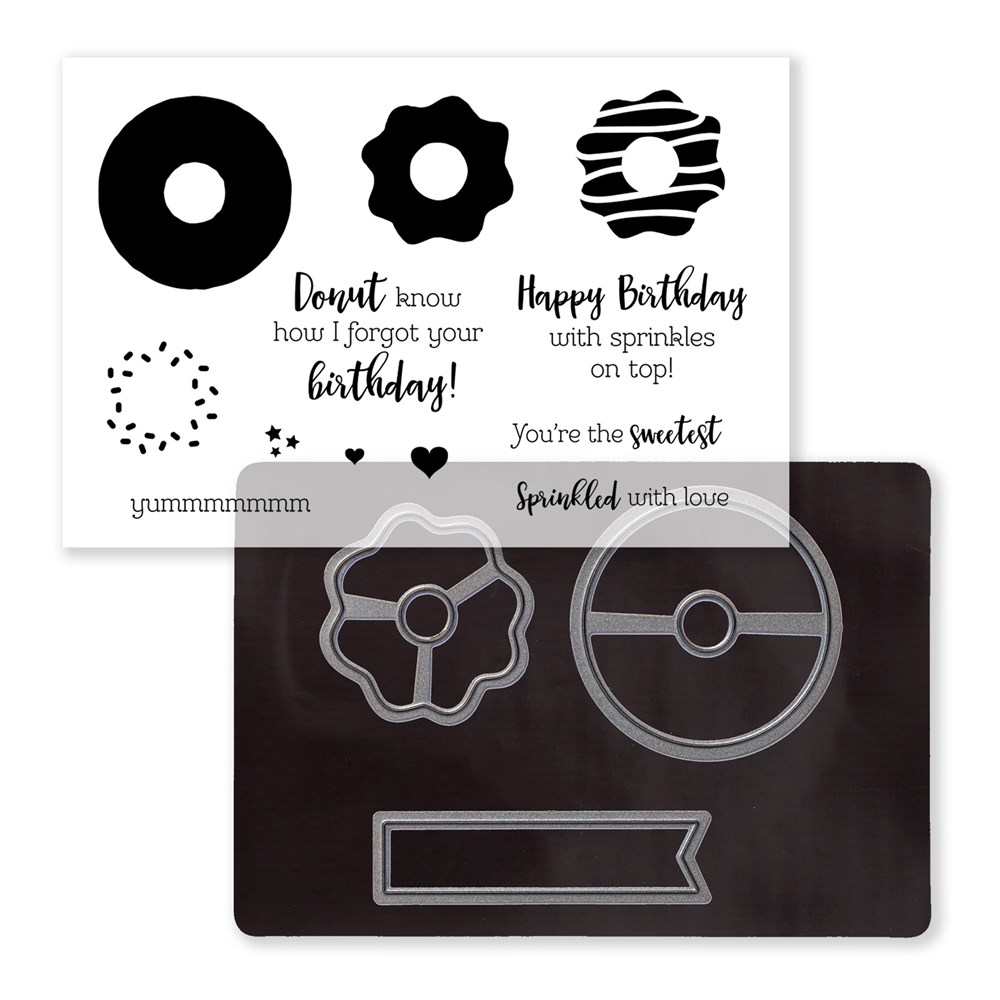
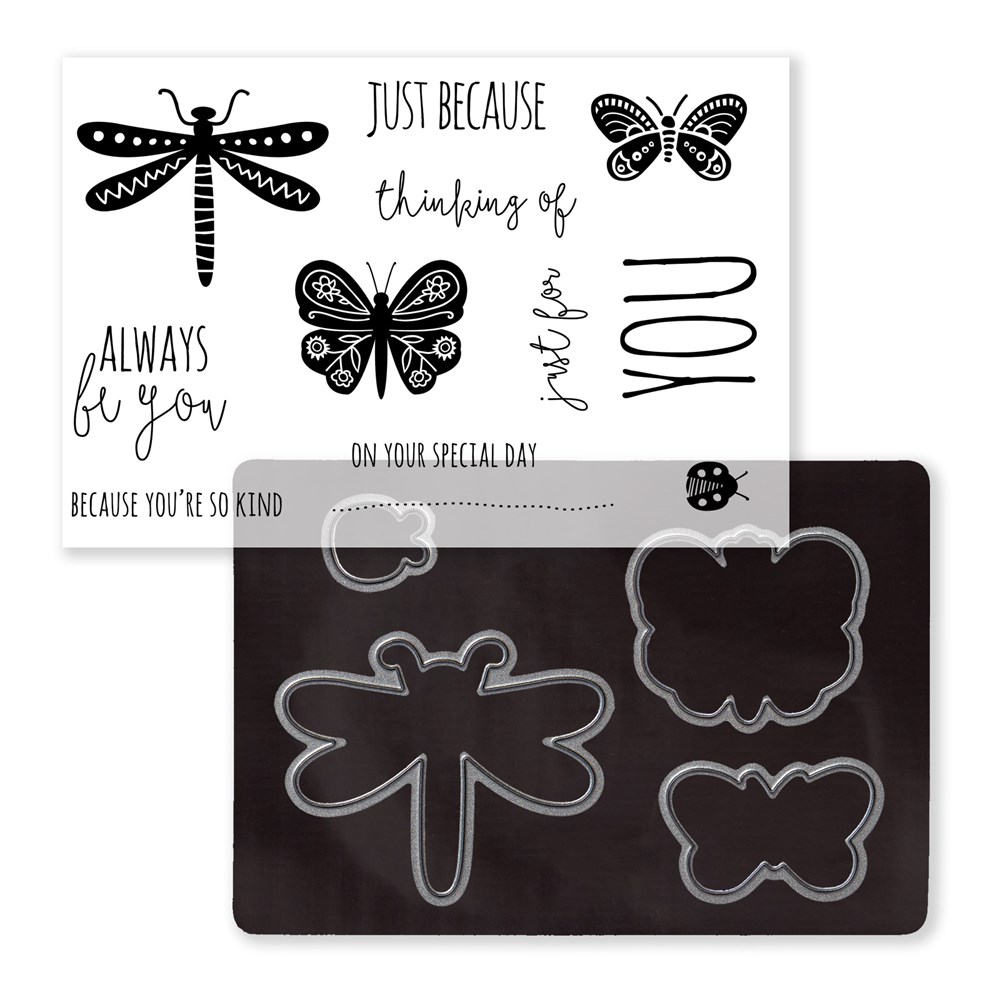
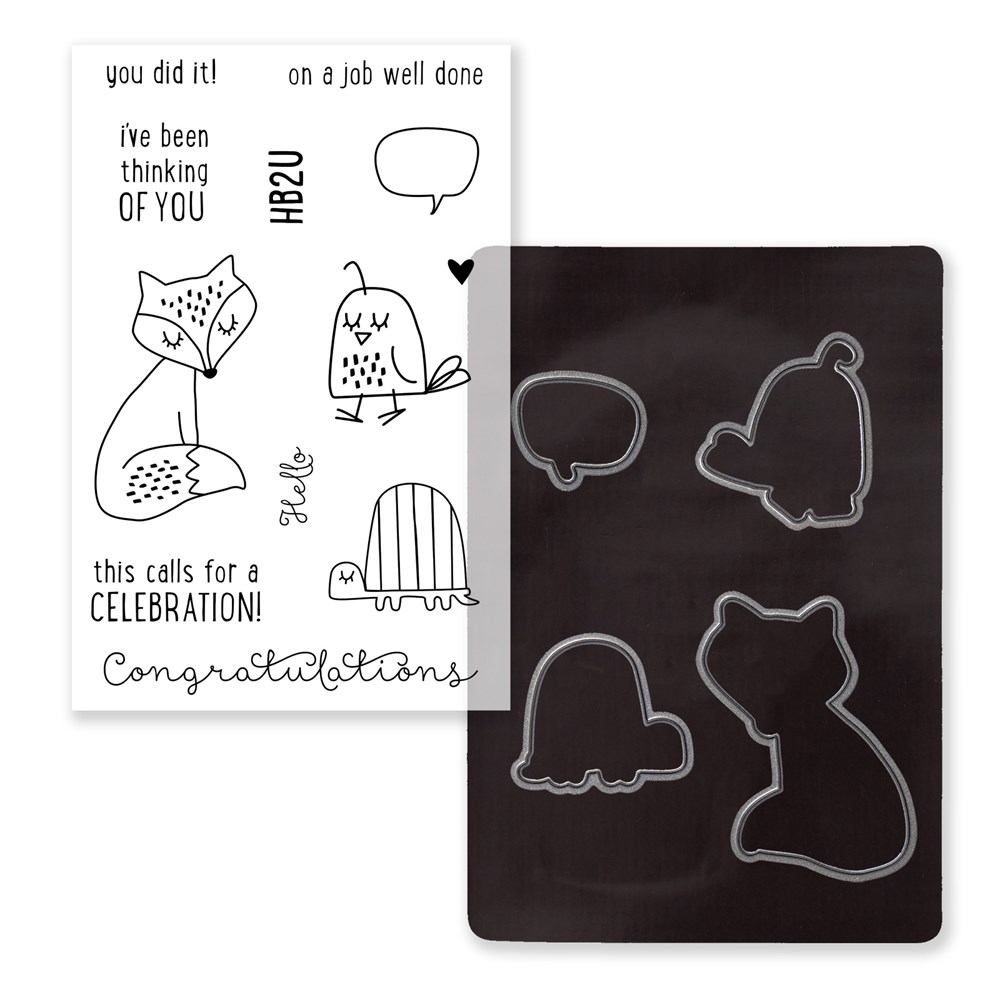
| Item # | Page # | Photo/Description | Full Price | Promo Price | ||
| Z3260 | AI p79 |
| $14.95 | $11.21 | ||
| Z3261 | AI p79 |
| $14.95 | $11.21 | ||
| Z3258 | AI p79 |
| $13.95 | $10.46 | ||
| Z3257 | AI p79 |
| $10.95 | $8.21 | ||
| Z3259 | AI p79 |
| $11.95 | $8.96 | ||
| Z3256 | AI p79 |
| $13.95 | $10.46 | ||
| Z3301 | SE1 p10 |
| $28.95 | $21.71 | ||
| Z3300 | SE1 p20 |
| $23.95 | $17.96 | ||
| SE1 p30 |
| |||||
| Z3302 | SE1 p40 |
| $23.95 | $17.96 | ||
| Z3317 | SE1 p52* |
| $12.95 | $9.71 | ||
| Z3318 | SE1 p52* |
| $12.95 | $9.71 | ||
| Z3305 | SE1 p51 |
| $10.95 | $8.21 | ||
| Z3304 | SE1 p51 |
| $9.95 | $7.46 | ||
| CC1155 | n/a** |
| $18.95 | $14.21 | ||
| CC1156 | n/a** |
| $9.95 | $7.46 | ||
| CC1157 | n/a** |
| $10.95 | $8.21 | ||
| CC1158 | n/a** |
| $15.95 | $11.96 | ||
| CC1219 | n/a*** AI p61 |
| $31.95 | $23.96 | ||
| CC1220 | n/a*** AI p39 |
| $18.95 | $14.21 | ||
| CC1221 | n/a*** AI p66 |
| $16.95 | $12.71 | ||
| CC1222 | n/a*** AI p53 |
| $32.95 | $24.71 |
* There are stamp sets that coordinate with this Thin Cut option; Journaling Heart and Heartfelt Hello coordinate with Basic Hearts and Journaling Circle and Leafy Congrats coordinate with Basic Circles.
** This Thin Cuts option is not shown in the current idea books; the Thin Cuts were introduced at Australasia Convention in October 2016. They coordinate with stamp sets that are in Annual Inspirations 2016-2017. This is the option you want select if you have previously purchased the coordinating stamp set.
*** This Thin Cuts bundle option is not shown in any of the current idea books; the Thin Cuts were introduced at Australasia Convention in October 2016. The coordinating stamp sets were introduced in Annual Inspirations 2016-2017 (page numbers listed above). This is the option you want select if you do not have either the stamp set or the Thin Cuts.
Seasonal Expressions 1 2017
Two months of 2017 have already evaporated which means you can only order form Seasonal Expressions 1 for two more months. SE1 is only valid until April 30, 2017 and many items are while supplies last. Typically when an item in one of our thinner Idea Books sells out it is no longer offered (as soon as Corporate posts a retiring list I will share it here). If there are items in SE1 that you would like to craft with, please do not risk losing your opportunity to purchase it.
If you are ready to place an order or would like to research any product, the Shop Now button will take you there.
If you have any product or promotion questions, do not hesitate to email me. You will also find me on Facebook at Brenda's Paper Crafts. Thank you for visiting today.


