Wednesday, February 28, 2018

Whimsy Fundamentals Collection Thank You Card

I had a few thank you cards to create. I adapted the Celebrate card in this photo (which is in the carousel on my Consultant website during February) for one of my cards.


Instead of using the Sorbet and Crystal Blue combination in the photo, I used Thistle and Sweet Leaf.


I also left off the ribbon (or zip strip - I am not certain which it is) because I might have misjudged what the size to cut the strips. In addition, I had a mostly intact rose near the top of the card, so I decided to let it shine and I added gems to the stamped cardstock. The sentiment is from the February 2018 SOTM Sunny Thoughts.

I needed another Thank You card, so I used the wedding card for inspiration.


This card is similar to the Valentine Card I shared on February 13. Two key differences are the sentiment is printed on the White Daisy cardstock and cut as a larger panel and is print and cut just for the words. I did the same for the top layer of the rose.


 Before adding the sentiment and top layer of the rose to the larger print then cut embellishment I covered them with the Clear Shimmer Brush.

I am a little pressed for time today so I will ask you to refer to my February 13 post for most of the information. If you have any questions, please reach out using the Contact Form to the right. Thank you for visiting today.

Friday, February 23, 2018

February Flash Sale

I just got a chance to look at the Flash Sale items. Wow! There are some great sale items. I know there are a few staples that I plan to stock up on.

My schedule is a little off today because we attended a benefit dinner, then had to take care of the cats and, well, you know the chores that typically have to be done before fun. :-) I need to finish a sympathy card this evening so to save myself a bit of time, I took screenshots of the Flash Sale items to share with you.


You will find the available Flash Sale items on my Consultant Website until 5pm EST Saturday, February 24 or while supplies last. Please scroll down to my post this morning for the "fine print" details of the sale. Thanks for stopping by.

Flash Sale Starts at 5pm EST

Set an alarm on your phone or the buzzer on your oven. Close To My Heart is having another Flash Sale.


Close To My Heart is having a 24-hour flash sale on Consultant websites this weekend! The sale will begin at 5:00pm EST on Friday, February 23, and end at 5:00pm EST on Saturday, February 24. As with previous flash sales, there are a few details to be aware of:
  • Sale prices are only available on orders placed on my Consultant website and products are available while supplies last.
  • The sale features a mix of current and retired products; a quantity of each current item has been set aside for the sale. It's possible that the designated amount of current items will sell out and once they do, that item will no longer be available during the sale, so shop early! For current items where the flash sale quantity sells out, the item will be available when the sale ends at the normal price.
  • All discounted items count towards Hostess Rewards, Stamp of the Month qualification, etc.
  • Shipping and handling is based on the full retail value of the sale items.

End February with great savings on a variety of products available on my Consultant website!

Tuesday, February 20, 2018

Think Pink Blog Hop

Welcome to the Think Pink Blog Hop featuring pink and gold products from Close To My Heart. This month there are about 15 bloggers sharing projects they created with Pretty In Pink campaign items. If blog hopping is new to you, we try to keep it easy: just keep clicking on the link to the next blog (typically near the bottom of the post) to visit the next stop. Our blog hop is circular so visiting the next blog will take you back to where you started.


You should have arrived here from ***Michelle Loncar's Show and Tell with Michelle***. If you get lost along the way, Melinda Everitt keeps a list of participants on her blog at If You Bling It.

As I watched the assembly video for the Butterfly Mobile Papercrafting Project provided by the CTMH Office I noticed a comment from someone who wished there were options for those who do not use the Cricut® machine. I am guessing that there are others who did not comment, but have the same concern. Because of this I made it a goal to create a project using only Thin Cuts.


Due to the length from top to bottom this was a hard project to photograph. Inside everywhere was too dark, but outside there were no solid backgrounds. I hope you can still get a good impression of my mobile.

I knew somewhere I saw flowers created using circles so I did a quick search of the Internet. I found this page Make Easy Paper Flowers: 5 Fast & Fun Tutorials with the flower I had in mind.


After crinkling the flower layers I did not flatten them too much. I layered pieces from largest to smallest until I had ten flowers that I liked. Then I used the Piercing & Embossing Tool Kit to start a hole in the center for the prongs of the brad (I used the smallest, flattest brad "head" I could find so I could add the larger Gold Glitter Gems to the top on the brad).

To cut circles, I started with strips of cardstock ⅛" larger than each circle die. I was able to cut two pieces of cardstock on each pass thought my Cuttlebug.
  • from a 2⅝" x 12" strip I was able to cut four 2½" circles
  • from a 2⅛" x 12" strip I was able to cut five 2" circles
  • from a 1⅝" x 12" strip I was able to cut seven 1½" circles
  • from a 1⅛" x 12" strip I was able to cut ten 1" circles
For the hearts I only used the 2" and 1½" hearts.When I cut the hearts, I also use strips of cardstock; I placed the hearts on the cardstock strip at an angle so the tip of the heart was in the corner and alternated the angle with each cut:
  • from a 2⅛" x 12" strip I was able to cut six 2" hearts
  • from a 1⅝" x 12" strip I was able to cut eight 1½" hearts
I used the color and stamping suggestions that were in Butterfly Mobile Papercrafting Project Guide. Since the heart Thin Cuts are not decorative, by that I mean no cutouts in the middle, I did not cut any gold hearts. On each side of the thread I only have two layers of cardstock.

I used the cover of my Stamp Scrubber to crease my hearts down the center. I placed the edge along the center and lifted one side. I then turned the heart over and applied one Glue Dots® Mini Dot near the top and one near the bottom of each heart. I added the thread and then layered the other side encasing the thread. Then I added the second layer of cardstock on each side.

When I added the four "outside" heart stands, I threaded a needle and "sewed" the strand to the embroidery hoop. I just weaved the top end of the thread through the wrapped hoop a few times—sort of like ending the floss when cross-stitching. I tied the middle strand to the cross in the center of the hoop.

After adding my heart stands, I added the flowers using two Glue Dots® Craft Dots. I used two because of the width of the flowers—I added one on each side of the brad "legs".

Before you head to ***Scrap Stamp Share by Tammy Lubick***, the supplies I used to create my project are listed below.

All supplies are from Close To My Heart except where noted:
If you are not already working with a CTMH Independent Consultant, you may purchase all of the supplies I used at my Consultant website.

If you have a few moments, please leave a comment letting me know what you think of my mobile. I hope you are enjoying the items created with the Pretty In Pink items CTMH has to offer. Thank you for hopping with us!

So you do not have to scroll back up, the next stop on the hop is ***Scrap Stamp Share by Tammy Lubick***.

Saturday, February 17, 2018

Pretty In Pink Butterfly Mobile Papercrafting Project

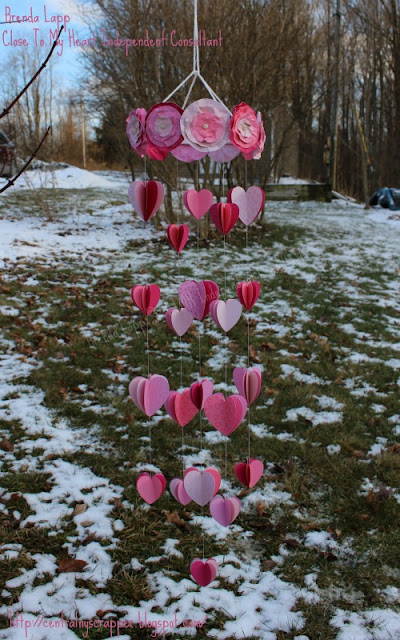
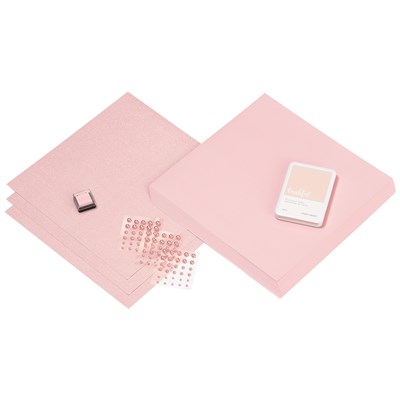
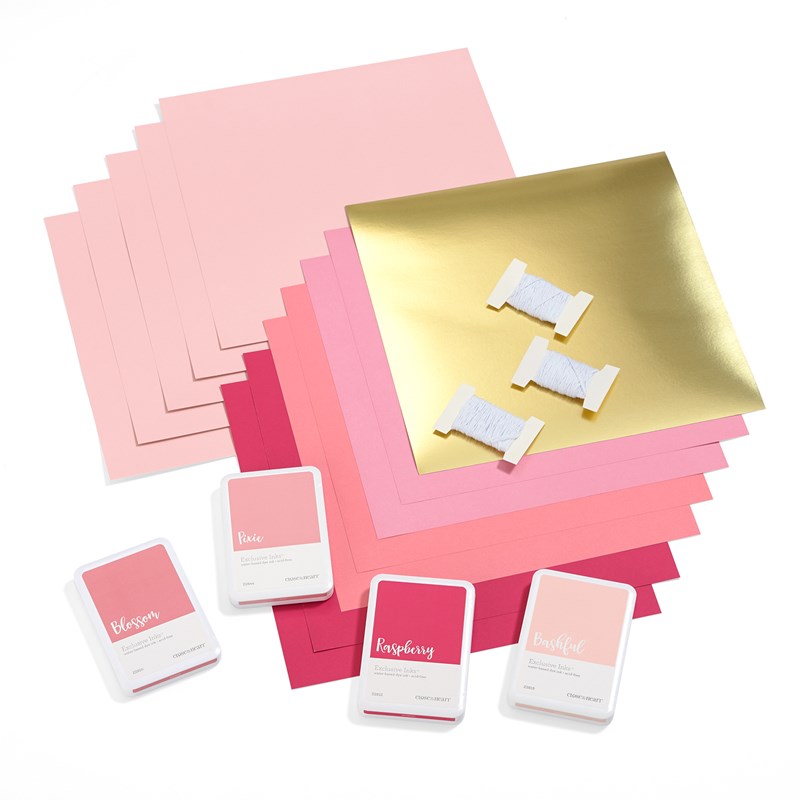
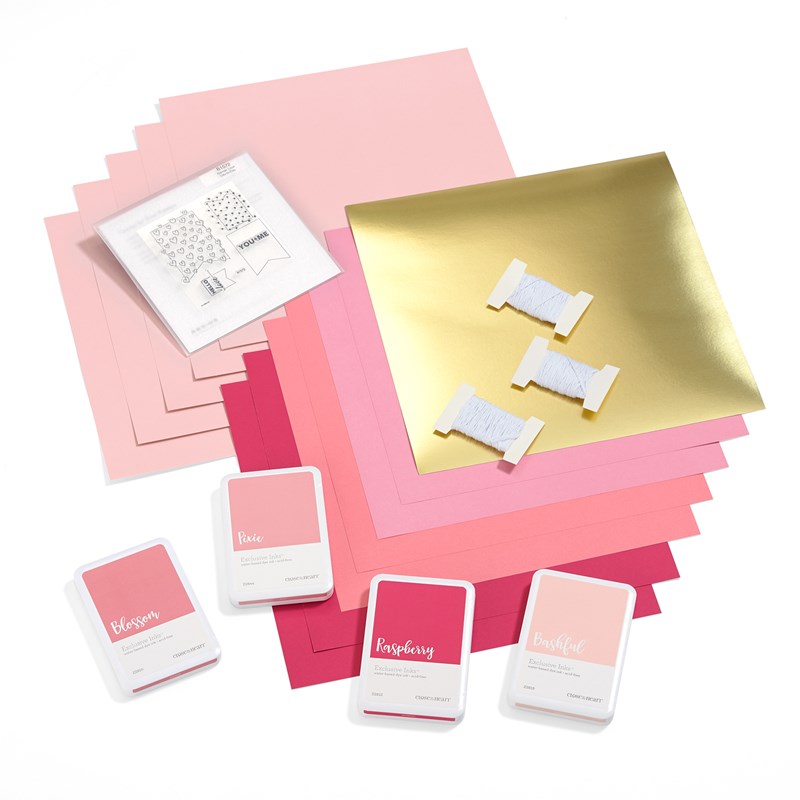
Are you excited about the Pretty In Pink Butterfly Mobile Papercrafting Project? In case the project does not sound familiar to you, here is a photo.


Step-by-step instructions for how to make the mobile are available on the Butterfly Mobile Bundle and the Butterfly Mobile Bundle with Stamp Set product pages of my Consultant Website (look for the PDF under the add to cart button). An assembly instructional video is also posted on the CTMH YouTube channel.

Do you have an Expression 2, Imagine, Expression or older machine and have some questions about the cuts shown in the Guide? I hope this post will help you. If you still have questions after reading through it, please use the contact form to the right to reach me.

This is how the Cricut® Shapes are listed in the Guide:


I highlighted the cartridge name in the above snip so they would be easier to find. The information between brackets like this, <TeamWork>, should match the information you see on the Expression machine screen and some other older machines. It will be in the upper left corner when you are selecting the image to cut, more about this is below. The key name, e.g. <TeamWork>, does not display on the Imagine or Expression 2 screen because the image is previewed on a virtual mat.

Let's look at a couple of handbook pages for reference. If reading the Cricut© Shapes information in Recipes is relatively new to you, here is an example to help explain it:


This recipe (circled in red) is to cut a tag for the Tea-rrific with Dreamin' Big Paper Mother's Day Tag. It says "Artbooking 3" Shift+Photo Mat 1 <TeamWork> (p. 83)". You will find the image on page 83 of the Artbooking Handbook (PDF opens in new tab). The images circled in yellow need the Shift Key activated to cut (otherwise you will cut the image on the left).

Set the size to 3" using the dial (on the Expression 2 and Imagine machines size is selected on-screen). On the keypad press the Shift key, the Photo Mat 1 creative key (creative keys should remain lit) and then press the <TeamWork> key in the bottom row (indicated by a red dot in the above image; it is just below the N/n key). On the Imagine and Expression 2 machines, where the keyboard is on screen, you will use the stylus to select these options.

For some of the images to cut the correct size, you will need to make sure Real Dial Size is On; the key should be lit (see the image below for more information about Real Dial Size). This is especially true for cuts from the Artbooking cartridge.


Real dial size means that the machine will cut the image the height (from the lowest possible point to the highest) you have it set on the size dial. Many of the Cricut® cartridge handbooks that were released before the Explore machine have a page that gives an visual example of Real Dial Size that might be helpful. On the Expression 2 and Imagine look for "True/Relative Size" on the screen. Page 26 of the Imagine Manual Cricut® says "true/relative size—toggles between allowing you to resize images in relative mode, which sizes images with relation to the key height character in your text, and true mode, which sizes images independent of any other image".

Expression manuals can be found here; Expression 2 manuals can be found here; Imagine manuals can be found here.

Using the Cricut® Shapes list above, let's start with page 62 of the Artbooking Handbook. I highlighted the images we are going to use.


To cut the solid butterfly on the left, we need to press two keys: Icon creative key and <g> (the Icon key should stay lit). Set the size dial at 1½". Press the Real Dial Size button, it should remain lit; this is so the butterfly will be exactly 1½" from bottom to top. Your Expression screen should look like this:


Cut the quantity listed for each color listed in the Guide.

To cut the decorative butterfly on the right, we need to press three keys: Shift, Icon creative key and <G>. Again, you want the size dial set at 1½" and Real Dial Size lit. Your Expression screen should look like this:


Cut the quantity listed for each color listed in the Guide.

For this cut from Artbooking you can see from the photo below that it does matter if you forget to select Real Dial Size.


This next cut is from the Artbooking cartridge, but will be used for the center of the Poppy flowers (we will cut the flowers later using the Flower Market cartridge).


To cut the circle, we need to press three keys: Shift, Border creative key and <Teamwork> (the button below the n/N). You want the size dial set at ¼" and Real Dial Size lit. Your Expression screen should look like this:


Cut 18 from Gold Foil as listed in the Guide.

Referring back to the Cricut® Shapes list from the Guide, let's look at page 42 of the Artistry Handbook. Again I highlighted the images we are going to use.


To cut the solid butterfly on the left, we need to press one key: <Summer>. Set the size dial at 1¾". Real Dial Size is not important for this cut—the cut will be correct whether you use Real Dial Size or not. Cut the quantity listed for each color listed in the Guide.

To cut the decorative butterfly on the right, we need to press two keys: Shift and <Summer>. Set the size dial at 1¾". As for the previous cut, the sizing is correct whether or not you select Real Dial Size. Cut the quantity listed for each color listed in the Guide.


I did not take photos of my Expression screen because I am not sure how easy they are to read. If you would like me to take photos of the screen for this butterfly and the poppy, please let me know via the contact form.

Referring back to the Cricut® Shapes listed above, let's look at page 45 of the Flower Market Handbook. Again I highlighted the images we are going to use.


To cut what is needed to create one Poppy we need both the cut on the left and the right. So the cuts will be in proportion to each other, this time we 
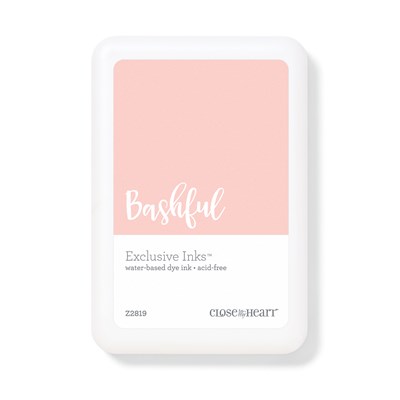
do not want to use Real Dial Size—the Real Dial Size button should not be lit. Set the size dial at 4". Cut the 18 from Bashful with the <Poppy> key and 18 from Bashful with Shift and <Poppy>.

The photos of the virtual mats on the Imagine screen show the difference between relative and true size. On the photo with true size selected I superimposed a 4" square on each cut so it is easier to show that the cuts would not be cut in proportion to each other. I expect that you would see similar virtual mats on the Expression 2 machine.

Relative Size

True Size
I hope this post helps you if you are using a Cricut© machine with cartridges. I did my best to be certain that this information is accurate, but mistakes can happen. If you see something that is incorrect or confusing, please let me know.

If you have a machine that works with Cricut© Design Space, the CTMH Corporate Office shared their Design Space file in the Guide. When you open the file, your screen will look a bit like this (I added some notes). So they could try to fit everything on one screen, images are layered on top of each other.


Don't forget, if you have questions, please reach out using the comment form to the right. Thanks for visiting.

Friday, February 16, 2018

Sunny Thoughts SOTM with Make Waves

A few days ago I shared a birthday card inspired by a card created by the CTMH Corporate Artists. Their card in shown the photo below.


I recently created a thank you card inspired by the other card in that photo. If you would like a list of products used to create the projects above, please visit my earlier blog post or, if you would like a PDF of the recipes, you will find that here.


Again, I stayed fairly true to the card in the photo, but made some substitutions for the Compliments. For the hearts I used the heart from I (Heart) Christmas and the smallest one from Basic Hearts

I stamped the sentiment with Emerald then VersaMark™ ink and heat embossed with clear powder. I colored Clear Sparkles with a Cherry Pink marker.

I thought the way the dots on the Pansy paper were place when I cut the strip looked unbalanced, so I used Aqua Shimmer Trim, cut in half along the length, to cover the dots closest to the edge. Then I used the other half between the other two Make Waves papers. I am very pleased with how it turned out and it adds some more sparkle to the card.

All supplies I used to create this card are from Close To My Heart:
The February SOTM is available until 11:59pm MST on February 28th. If you decide you would like to purchase the stamp set for $5 with a qualifying purchase, add the other items to your cart and then add the SOTM from the green Promotional Items area of your shopping cart.

I hope you like my version of the thank you card. Thank you for stopping by today. If you have a minute or two, please let me know what you think of my card.

Thursday, February 15, 2018

Step Right Up!

So exiting! A surprise special from now until March 31, 2018. Step Right Up!


There are two options. There is a stamp set: My Acrylix® Showtime Stamp Set (D1789). This stamp set is available for purchase during the entire special. The other choice is a Step Right Up Bundle (CC2184). The bundle is available only while supplies last.

Item #PhotoBundle Name Products IncludedRetail PriceBundle Price
D1789
My Acrylix® Showtime Stamp Set
My Acrylix® Showtime Stamp SetD1789My Acrylix® Showtime Stamp Set $17.95$17.95
CC2184
Step Right Up Bundle
Step Right Up BundleD1789 My Acrylix® Showtime Stamp Set
1386 Black Cardstock (2 sheets)
X5975 Cranberry Cardstock (2 sheets)
X5961 Saffron Cardstock (2 sheets)
X5957 Sapphire Cardstock (2 sheets)
1385 White Daisy Cardstock (2 sheets)
Z3365 Gold Foil Paper (2 sheets)

Z3371 Gold Pearls
Z1848 Red Shimmer Trim
$39.79$28.95

No qualifying purchase is necessary to take advantage of the Step Right Up! special items and there are no limits on how many you can order. Purchase of either item counts toward the discounted Stamp Of The Month. Neither the stamp set nor the Step Right Up Bundle are available with Hostess Rewards.

This is a fun set to use on birthday cards or invitations and party favors. It would also be great on birthday layouts or pages to remember a visit to the carnival or the circus or a vacation at a theme park. It brings warm memories just thinking of it.

Wednesday, February 14, 2018

Whimsy Fundamentals Collection Sending You Love Card

I needed a cute and quick Valentine's Day card. I was already using the Whimsy Fundamentals Collection so I starting pairing papers until I found something that I liked, then I started looking through the stamps that were near my workspace. I had this die from Spellbinders that I had not used yet. This is what I came up with.


For the inside, I still had the From the Heart stamp set nearby (you can still get the Card Kit - CC1229) and looked though my stamp database for a Valentine's stamp.


All supplies are from Close To My Heart except where noted:
Thanks for visiting today.

Tuesday, February 13, 2018

Whimsy Fundamentals Collection Valentine Card

This photo is rotating on my CTMH Consultant Website this month. I think the projects are very cute so I decided to try one of the cards.


Inspired by the wedding card, I created this Valentine Card.


I did not have a stamp that was large enough for the space so I looked through the CTMH-exclusive Cricut® cartridges and found this sentiment. I attached it to the White Daisy rectangle and flattened the image so I could use the Print then Cut feature in Design Space. I also flattened the rose, but it wanted it to be more of an embellishment, so I did not attach it to a background.

After printing and cutting the rose I used the Clear Shimmer Brush over the darker areas. Since all printers are not the same, you may want to try this on a piece of printed scrap (or an extra Print then Cut) before trying it on your artwork.

All supplies I used to create this card are from Close To My Heart:
I mocked up the card in Design Space. I only cut the sentiment and rose using a Cricut® Maker; other cuts were done with a paper trimmer. My Design Space file is here.

Thank you for stopping by today and I hope you have a wonderful Valentine's Day.

Thursday, February 8, 2018

February SOTM Sunny Thoughts with Make Waves

This month the CTMH Corporate Artists created some wonderful items using the February SOTM, Sunny Thoughts, and this month's featured paper, Make Waves.


This artwork is in addition the artwork published in Seasonal Expressions 1. The Corporate Artists created a single-page layout, two cards and a tag.

If you would like to create something similar to the projects above, the required supplies are:

4¼″ × 5½″ Thank You Card
S1802My Acrylix® Sunny Thoughts — February Stamp of the Month
X7227BMake Waves Paper Packet
X5978Glacier Cardstock
1385White Daisy Cardstock
Z2806Emerald Exclusive Inks™ Stamp Pad
X7227CMake Waves Complements
Z4142Make Waves Sequins & Gems
Z2088Ranger™ Clear Super Fine Embossing Powder
Z555Craft Heater
5½″ × 4¼″ Birthday Wishes Card
S1802My Acrylix® Sunny Thoughts — February Stamp of the Month
X7227BMake Waves Paper Packet
1385White Daisy Cardstock
Z2804Pansy Exclusive Inks™ Stamp Pad
X7227CMake Waves Complements
Z4146Make Waves Shimmer Trim
Z4142Make Waves Sequins & Gems
Z1979Marvy® Uchida® LePen™ Journaling Pen
12″ × 12″ You are the Sunshine in my Pocket Page
S1802My Acrylix® Sunny Thoughts — February Stamp of the Month
X7227BMake Waves Paper Packet
1385White Daisy Cardstock
X5978Glacier Cardstock
Z2841Glacier Exclusive Inks™ Stamp Pad
Z2806Emerald Exclusive Inks™ Stamp Pad
Z2844Pixie Exclusive Inks™ Stamp Pad
X7227CMake Waves Complements
Z4146Make Waves Shimmer Trim
Z4142Make Waves Sequins & Gems
Z3318Thin Cuts — Basic Circles
Die-cutting Machine*
Hello Sunshine Tag
S1802My Acrylix® Sunny Thoughts — February Stamp of the Month
X7227BMake Waves Paper Packet
1385White Daisy Cardstock
Z2804Pansy Exclusive Inks™ Stamp Pad
Z2841Glacier Exclusive Inks™ Stamp Pad
Z4142Make Waves Sequins & Gems
Z4146Make Waves Shimmer Trim
Z3344Thin Cuts — Basic Tags
Die-cutting Machine*
Gift Bag

* The Cricut Cuttlebug™ is available at Level 1 of Hostess Rewards; more information can be found on my Consultant Website; if you would like to be a Hostess for an in-home or on-line Gathering, please reach me using the contact form to the right.

If you would like a PDF of the recipes, you will find it here.

I was inspired by the birthday card and I kept it fairly true to the card created by the Corporate Artists. I had to make a few substitutions because I did not do a good job planning ahead with which items to purchase. Oops.


I colored Clear Sparkles with the Lavender ShinHan Marker and cut embellishments from White Glitter Paper using the Artiste cartridge.I cut "washi tape" from the striped Make Waves paper.

All supplies I used to create this card are from Close To My Heart:
The February SOTM is available until 11:59pm MST on February 28th. If you decide you would like to purchase the stamp set for $5 with a qualifying purchase, add the other items to your cart and then add the SOTM from the green Promotional Items area of your shopping cart.

I hope you like my version of the Birthday card. Thank you for stopping by today. If you have a spare moment or two, please let me know what you think of my take on this card.

Thursday, February 1, 2018

Sunny Thoughts CTMH SOTM Blog Hop

Welcome to the February 2018 SOTM Blog Hop featuring the stamp set Sunny Thoughts. This month there are approximately 25 bloggers sharing projects they created with the CTMH Stamp Of The Month. We try to keep our blog hop easy: just keep clicking on the link to the next blog (typically near the bottom of the post) to visit the next stop. Our blog hop is circular so visiting the next blog will take you back to where you started.


You should have arrived here from ***Gina's Little Corner of StampinHeaven by Gina Brandstetter***. If you get lost along the way, Melinda Everitt keeps a list of participants on her blog at If You Bling It.


Birthday cards are always nice to have on hand so I created this card and embellished it with flowers from the Flower Market cartridge. It is ironic that Alyson Mayo is the next stop on this hop because I used a variation of a trick that Alyson shared on the Seasonal Expressions 1 New Product Blog Hop.


I also recently needed a Thank You card. I stuck with an oval theme. Since I really like the fonts/scripts used to create the sentiments included with the February SOTM so I pulled it out and started creating.


Unfortunately my idea did not work with the largest of the Thin Cuts—Basic Ovals (Z3328), so I created the oval using a Basic Shape in Cricut Design Space. Before cutting the oval with the Make Waves paper, I used copy paper and stamped my images to be sure the images I wanted to use would fit on the oval and the oval would fit the card front. Then I duplicated the oval and made the copy a bit larger to create the Pansy mat.

Before you head to ***Alyson Mayo's Create with Alyson***, the supplies I used to create my project are listed below.

All supplies are from Close To My Heart except where noted:
  • My Acrylix™ Stamp Set: February 2018 SOTM: Sunny Thoughts (S1802)
  • Make Waves Paper Packet (X7227B)
  • 12" X 12" Cardstock: Canary (X5982), Emerald (X5969), Glacier (X5978), Lagoon (X5968), Pansy (X5966), Sorbet (X5983), Willow (X5970)
  • Specialty Paper: Vellum Paper (Z3367)
  • White Cards & Envelopes Value Pack (X254)
  • Exclusive Inks™ Stamp Pads: White Daisy (Z2863)
  • Ranger™ White Super Fine Embossing Powder (Z2068)
  • Craft Heater (Z555)
  • adhesives: Adhesive Runner (Z3372), Thin 3-D Foam Tape (Z2060)
  • embellishments: Grey Gems (Z3089)
  • Cricut® Collection: Flower Market Physical Cartridge (Z3285) or Digital Collection/no cartridge (Z3290); note ― flowers are listed > 1 time for those using an Expression 2 or older Cricut® machine
    • Violet Flower ― #MD381C8 ― page 3 ― various sizes ― Shift + Flower-1 <#>
    • Violet Flower ― #MD381C8 ― page 3 ― various sizes ― Flower-2 <3>
    • Violet flower ― #MD381FC ― page 3 ― various sizes ― Flower-2 <3>
    • Violet flower ― #MD381FC ― page 3 ― various sizes ― Shift + Flower-2 <#>
    • Violet flower ― #MD381FC ― page 3 ― various sizes ― Icon <3>
    • Buttercup Flower ― #MD40098 ― page 9 ― various sizes ― Flower-1 <9>
    • Buttercup Flower ― #MD40098 ― page 9 ― various sizes ― Shift + Flower-1 <Bracket>
    • Laurel Branch ― #MD42FDD ― page 19 ― various sizes ― Background <o>
    • Pine Flower ― #MD6ECB1 ― page 25 ― various sizes ― Shift + Background <B>
    • Leaf ― #MD71597 ― page 35 ― various sizes ― Shift + Container <G>
  • Cricut® Explore Air™ 2 (available at Level 3 of Hostess Rewards; see page 4 of Annual Inspirations 2017-2018)
    • my Design Space files are here (birthday card) and here (thank you card)
  • Supplies not from Close To My Heart: Cricut® Design Space
If you are not already working with a CTMH Independent Consultant, you may purchase all of the supplies I used at my Consultant website.

If you have a few moments, please leave a comment letting me know what you think of my cards. I hope you are enjoying the projects created with the February SOTM. Thank you for hopping with us!

So you do not have to scroll back up, the next stop on the hop is ***Alyson Mayo's Create with Alyson***.

February 2018 CTMH News

Where did January go?! It feels like the month went by in a flash and the New Year began months ago, not just 31 days ago. The last few days of this month I have been battling an aching back which has been making keeping up difficult, but I am thankful that the flu has left us alone. I hope you and yours are healthy.

The February 2018 Stamp of the Month is Sunny Thoughts


Sunny Thoughts (S1802) is an exclusive D-size set of 13 stamps that is only available for purchase during the month of February 2018. The stamp set can be yours for $5 when you place an order of $50 or more in qualifying Close To My Heart products (and you qualify for additional sets at $5 for each $50 you spend). Alternatively it is available at $17.95. Recommended CTMH My Acrylix® Blocks for this stamp set are: 1" x 1" (Y1000), 2" x 2" (Y1003), 1" x 6½" (Y1005), 3" x 3" (Y1006) and 2" x 6½" (Y1010).

CTMH Corporate Artists created a page and card using the Sunny Thoughts stamp set.


If you would like a list of the products used to create the above items, you will find the information in the Recipes, a PDF file (which will be posted soon) that lists the products used to make the samples in the Seasonal Expressions 1 so you may re-create projects at home. I am participating in a Sunny Thoughts blog hop this month; you will find my post here tomorrow. Please visit my CTMH 2018 02 Feb SOTM Sunny Thoughts for additional ideas using the Sunny Thoughts stamp set.

February 2018 — Pretty in Pink


February is the season for hearts, flowers, and celebrating what matters most. You can share the love and think pink all month long with the Pretty in Pink special! Select pink and gold products and two coordinating stamp sets are 25% off the retail price and three different product bundles are 30% off the retail price. These bundles include the Bashful—Color of the Year bundle and two bundles with supplies to make a Butterfly Mobile Papercrafting Project.


Step-by-step instructions for how to make the mobile are available on the Butterfly Mobile Bundle or the Butterfly Mobile Bundle with Stamp Set product pages of my Consultant Website. An instructional video is also posted on the CTMH YouTube channel.

Purchase any of the individual items listed below at 25% off the retail price!

Item #PhotoItem Retail Price25%-off Price
Z9996
Everyday Life™ Album—Bashful
Everyday Life™ Album—Bashful $14.95$11.21
Z3383*
Cut Above® Layout Kit—The Story Begins (Baby Girl)

visit the product page to see the 10 layouts you can create with this kit
$59.95$44.96
Z3388
Picture My Life™ Cards—The Story Begins (Baby Girl)
Picture My Life™ Cards—The Story Begins (Baby Girl) $4.95$3.71
D1728
My Acrylix® What Matters Most Stamp Set
My Acrylix® What Matters Most Stamp Set $17.95$13.46
B1572
My Acrylix® Banner Love Stamp Set
My Acrylix® Banner Love Stamp Set $9.95$7.46
Z2819
Bashful Exclusive Inks™ Stamp Pad
Bashful Exclusive Inks™ Stamp Pad $7.95$5.96
X5941
Bashful Cardstock
Bashful Cardstock $14.50$10.88
Z2508
Bashful Exclusive Inks™ Mini Pigment Pad
Bashful Exclusive Inks™ Mini Pigment Pad $2.95$2.21
Z2844
Pixie Exclusive Inks™ Stamp Pad
Pixie Exclusive Inks™ Stamp Pad $7.95$5.96
X5984
Pixie Cardstock
Pixie Cardstock $14.50$10.88
Z2810
Blossom Exclusive Inks™ Stamp Pad
Blossom Exclusive Inks™ Stamp Pad $7.95$5.96
X5973
Blossom Cardstock
Blossom Cardstock $14.50$10.88
Z2812
Raspberry Exclusive Inks™ Stamp Pad
Raspberry Exclusive Inks™ Stamp Pad $7.95$5.96
X5974
Raspberry Cardstock
Raspberry Cardstock $14.50$10.88
Z3360
Bashful Glitter Paper
Bashful Glitter Paper $6.95$5.21
Z3369
Bashful Pearls
Bashful Pearls $3.95$2.96
Z3381
Gold Heart Clips
Gold Heart Clips $6.95$5.21
Z3312
Gold Glitter Gems
Gold Glitter Gems $4.95$3.71
Z3238
Gold Glitter Paper
Gold Glitter Paper $6.95$5.21
Z3365
Gold Foil Paper
Gold Foil Paper $6.95$5.21

* Purchasing this item allows you a 30% discount on one My Legacy™ album of your choice.


Purchase any of the product bundles listed below at 30% off the retail price!

Item #PhotoBundle Name Products IncludedRetail PriceBundle Price
CC2181
Color of the Year
Color of the YearZ2819Bashful Ink Pad
X5941
Bashful Cardstock
Z2508
Bashful Mini Pigment
Z3360
Bashful Glitter Paper
Z3369
Bashful Pearls
$36.30$25.41
CC2182
Butterfly Mobile
Butterfly MobileX5941Bashful Cardstock (5 sheets)
X5973
Blossom Cardstock (2 sheets)
X5984
Pixie Cardstock (2 sheets)
X5974
Raspberry Cardstock (2 sheets)
Z3365
Gold Foil Paper (1 sheet)
Z2819
Bashful Ink Pad
Z2810
Blossom Ink Pad
Z2844
Pixie Ink Pad
Z2812
Raspberry Ink Pad
Z3216
White Twine (qty. 3)
$48.57$34.00
CC2183
Butterfly Mobile Bundle
with Stamp Set
Butterfly Mobile Bundle with Stamp SetB1572Banner Love Stamp Set
X5941
Bashful Cardstock (5 sheets)
X5973
Blossom Cardstock (2 sheets)
X5984
Pixie Cardstock (2 sheets)
X5974
Raspberry Cardstock (2 sheets)
Z3365
Gold Foil Paper (1 sheet)
Z2819
Bashful Ink Pad
Z2810
Blossom Ink Pad
Z2844
Pixie Ink Pad
Z2812
Raspberry Ink Pad
Z3216
White Twine (qty. 3)
$58.52$40.96


Seasonal Expressions 1 2018


This is the second month the Seasonal Expressions 1 Idea Book but we already have an item that is no longer available. The Chelsea Gardens Cardmaking Stamp + Thin Cuts (Z4158). It was featured by many consultants during January since we were encouraged to highlight the Chelsea Gardens papers and so many people loved it that it created a demand the Corporate could not meet. I am sorry if your are disappointed that this product is no longer available. The Chelsea Gardens stamp set is available and will be available until April 30, 2018.

While not pictured in Seasonal Expressions 1, the Watercolor Pencils are no longer available. Corporate hopes to refresh the colors and have them available in the next Annual Inspirations.

This idea book is valid until April 30, 2018. The book can be viewed on the Idea Books page of my Consultant Website or you can download a PDF of the book here.

If you are ready to place an order or would like to read more about a product, the Shop Now button will take you there.


If you have any product or promotion questions, do not hesitate to email me. You will also find me on Facebook at Brenda's Paper Crafts. Thank you for visiting today.