Sunday, October 1, 2023

October 2023 CTMH News

The best laid plans...That's been my Saturday. I planned to use the Gnomes for Autumn Thin Cuts and share some of ideas (using stamps, stencils and patterned paper) on the hat, shirt and flower to give them different looks and share them before the A Gnome for All Seasons—Autumn special ended yesterday. I also wanted to try using the flower to create a beard. I also planned to do some cutting before the Say It with Style Facebook Events. Unfortunately I woke up feeling unwell, had a telemedicine visit, was given a prescription, when headed to pickup the prescription was almost in an accident (someone pulled out in front of us–thank goodness even in her 80s my mother has quick reflexes) and I have just been exhausted. Other creative days are coming soon, I hope.

I have some exciting news about the Stamp Of The Month. Some months there will now be a Stamp + Thin Cuts option.

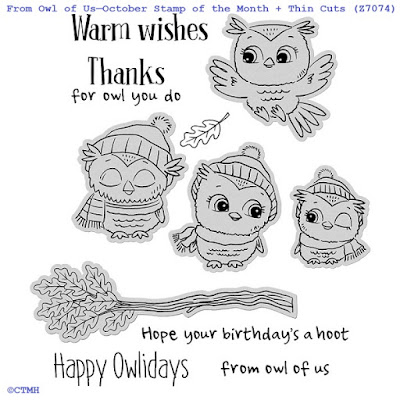
From Owl of Us—October Stamp of the Month

From Owl of Us—October Stamp of the Month (S2310)
From Owl of Us (S2310) is an exclusive D-Size set of 11 stamps. From Owl of Us is available only during the month of October 2023. The stamp set can be free for CTMH VIP Customers who place a qualifying order during October 2023. Those who are not CTMH VIP Customers can place a qualifying order and purchase the stamp set on the same order for only $5. Everyone qualifies for additional sets at $5 for each additional $50 spent on the same order. The October 2023 SOTM is also available for $19.95 with no other purchase required. The recommended CTMH My Acrylix® Blocks for this stamp set are: 1" × 1" (Y1000), 1" × 6½" (Y1005), 2" × 2" (Y1003), 4" × 4" (Y1017). 
From Owl of Us—October Stamp of the Month + Thin Cuts (Z7074)
If you select the From Owl of Us—October Stamp of the Month + Thin Cuts (Z7074), you receive the same D-Size set of 11 stamps plus 5 metal dies to cut the shapes shown. The Stamp of the Month + Thin Cuts is only $22.95 with a qualifying order; the From Owl of Us—October Stamp of the Month + Thin Cuts is also available for $37.95 with no other purchase required.

The CTMH Art Department created cards using From Owl of Us:

card created with From Owl of Us—October Stamp of the Month

card created with From Owl of Us—October Stamp of the Month
I am really excited to have the option of Thin Cuts that coordinate with the Stamp of the Month. I hope you are too!

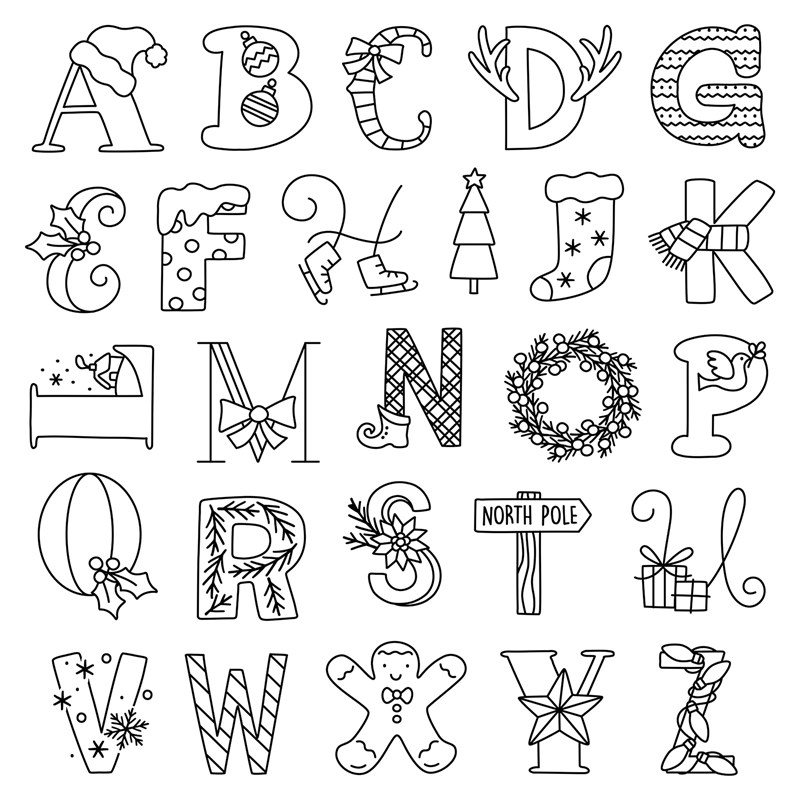
Joy of the Season

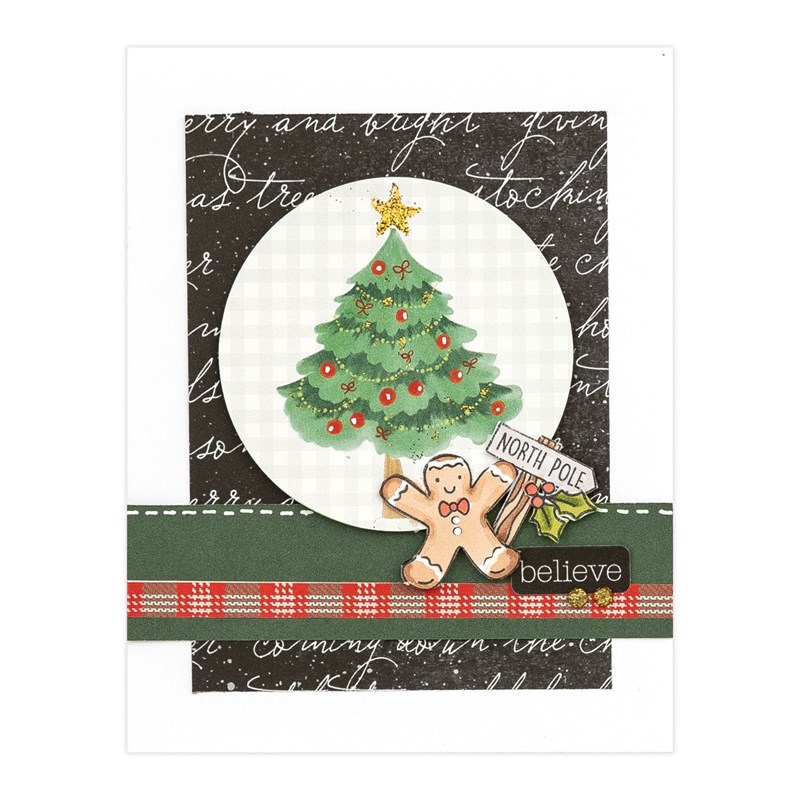
Joy of the Season
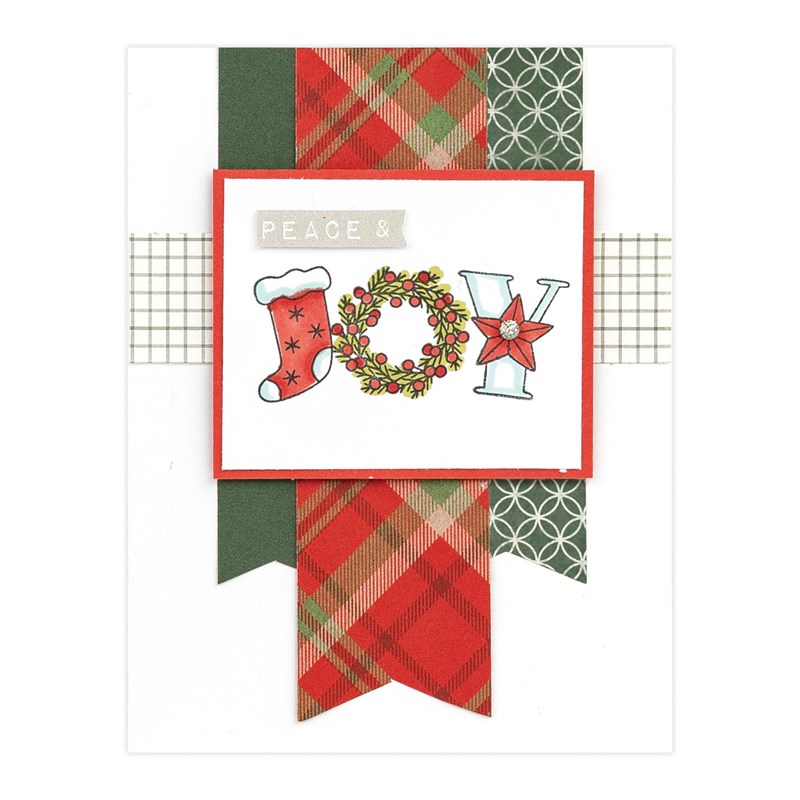
Joy of the Season
If you are looking for a quick way to create your Christmas cards, look no further than the Cut Above® Joy of the Season special! This Cut Above® kit includes pre-printed card bases and die-cuts, including sentiments. The cards come together in short order, giving you to time to participate in other holiday festivities! Complete the cards using the Joy of the Season stamp set, which include the perfect sentiments for the card insides. Save 20% when you buy stamp set and card kit together!
Joy of the Season Flyer
If you would like a PDF of the above flyer, you can download it here. Joy of the Season is available October 1–December 31 while supplies last.

National Stamping Month—Say It with Style

National Stamping Month—Say It with Style
Continuing from National Stamping Month (September) is Say It with Style. This collection of exclusive stamp sets with coordinating Thin Cuts dies and two new card front stencil packs creates cards for almost an occasion. Save by purchasing a Say It with Style product bundle or one or more of 4 different workshop kits (the workshop kits are available with or without stencils). Find the biggest discount with the Stay It with Style Workshop Kit Bundle which includes all of the workshops kits.

This coming week Close To My Heart is having four Facebook Live events to create one each of the cards with us. For a schedule and link to the Facebook Live events, please visit my September 8 post.

This flyer has all of the Say It with Style details:

National Stamping Month—Say It with Style - page 1
National Stamping Month—Say It with Style
page 1
National Stamping Month—Say It with Style - page 2
National Stamping Month—Say It with Style
page 2
National Stamping Month—Say It with Style - page 3
National Stamping Month—Say It with Style
page 3
National Stamping Month—Say It with Style - page 4
National Stamping Month—Say It with Style
page 4
National Stamping Month—Say It with Style - page 5
National Stamping Month—Say It with Style
page 5
National Stamping Month—Say It with Style - page 6
National Stamping Month—Say It with Style
page 6

You can download a copy of the flyer in PDF format here. National Stamping Month—Say It with Style is available until October 31, but only while supplies last.

I Want Candy

I Want Candy Special
I Want Candy

I Want Candy featuring a bright, but not too bright, paper packet with coordinating cardstock, a choice of two stamps + Thin Cuts (one Halloween-themed and the other more everyday) and puffy stickers continues to be available. I Want Candy is offered in two different scrapbooking workshop kits—one with a Halloween theme and one with a non-Halloween focus. You can choose from an entire product bundle, individual items, the Eerie-sistible Scrapbooking Workshop Kit or the I Want Candy Scrapbooking Workshop Kit. Layouts from both workshop kits are pictured in the flyer below, or scroll through the images on the product pages.

I Want Candy Flyer - page 1
I Want Candy Flyer - page 2
I Want Candy Flyer - page 3
I Want Candy Flyer - page 4

The above flyer is also available in PDF format here. The I Want Candy special will remain available through October 31, 2023, while supplies last.

Album Retreat

November 2023 CTMH Virtual Album Retreat
Seats for the November 2023 Virtual Album Retreat are still available. You will find all of the details, still photos of each layout, and purchasing opportunity, here. Karen from the Corporate Office shared album retreat details in this video on Facebook. A Facebook account is not needed to view the video preview, but will be required to attend the Virtual Album Retreat since the classes are held in a private Facebook Group.

Essentials Catalog

Cover of Essentials 2023-2024 Catalog

We are in month two of latest Close To My Heart annual catalog, Essentials. In Essentials you will find all of the supplies needed for crafting projects: inks, cardstock, embellishments glues, tools like blocks and stencils and Thin Cuts, and more. You will find the Essentials catalog here. Under the online page turner version of the catalog is a link to download a PDF of the catalog so you can keep it on your device to browse anytime.

September–October 2023 Catalog

September–October 2023 Catalog
Cover of September–October 2023 Catalog
We are in the final month of the September–October 2023 Catalog. In the September–October 2023 Catalog you will find the newest collections, The Good Life and Home for Christmas. Both include coordinating stamps, workshops, embellishments, and digital art. There is a Mix-in paper packet which is designed to go with both collections, and a variety of stamps for many occasions.

Shipping

Close To My Heart made some updates to the ordering system to allow for a choice of FedEx shipping options on US orders based on the weight of the order. For orders under 10 lbs., there is now an option to choose either FedEx Ground Economy or FedEx Ground. For orders over 10 lbs., the FedEx Ground Economy shipping option will no longer be available, leaving only the FedEx Ground shipping option.

The rate for the FedEx Ground shipping option will depend on the weight of the order as well. For orders under 10 lbs., the FedEx Ground shipping option will be $15.95 or 15.95%, whichever is greater. For orders over 10 lbs., the rate will instead be $8.95 or 8.95%. FedEx charges more to ship orders under 10 pounds via Ground Service, which is the reason for the different rates based on the package weight. 

On my eCommerce website, the shipping options will be displayed based on the weight of the items in the cart.

Thank you for visiting today. I hope you have a relaxing day before the hustle and bustle of the work week is upon us again.

Thursday, September 28, 2023

Late September 2023 CTMH News

I have some news to share that I do not want to get lost in my October 2023 update, so I thought I would jump on with a quick post.

PLEASE NOTE THERE ARE UPDATED DATES AND TIMES FOR THE FACEBOOK LIVES

National Stamping Month—Say It with Style

If you are planning to attend any of the National Stamping Month Facebook Live Events, the schedule has been updated a bit. Rather than two workshops on each day, there will be one workshop each day for four days on October 3–6 at 4pm EDT each day. I updated the September 8 Mark Your Calendars for Say It with Style Facebook Events post with the new date and links to the new Facebook events.

I also want to remind you that we have two specials ending on September 30 - three when you include the Stamp Of The Month.

A Gnome for All Seasons—Autumn

A Gnome for All Seasons—Autumn
A Gnome for All Seasons—Autumn will be ending on September 30. It is my understanding that A Gnome for All Seasons—Autumn is the first in a series of gnome inspired items that Close To My Heart will be bringing to us. While I have not been a super fan of the gnomes since the beginning, they are beginning to grow on me. To save some room for a quick photo progression of assembling the Thin Cuts Autumn Gnome below, I will ask to you visit my September 1 post for more information about the A Gnome for All Seasons—Autumn collection or visit my eCommerce page.

Memory Lane

Memory Lane
Memory Lane

The Memory Lane special will also be ending on September 30. I shared details of Memory Lane when it was first introduced in July. I love the soft, soothing color in Memory Lane. My only regret is my Memory Lane supplies are still in the box waiting for me to carve out some time to create.

Thoughtful Tokens—September Stamp of the Month

Thoughtful Tokens—September Stamp of the Month (S2309)
As always, the Stamp Of The Month is only available for one month and then it is gone. Thoughtful Tokens (S2309) is no exception. I have used the sentiments from this set because they are a perfect size for when you want the card front to shine, but unfortunately I have not had much luck finding time to use the other stamps in the set.

Finally, I would like to show you how I worked with the Gnomes for Autumn Thin Cuts (CC72327).

Gnomes for Autumn Thin Cuts Step 1
The above photo shows all of the Thin Cuts used the create the Autumn Gnome. I used the light side of Peach for the face (background) cut and hands and the dark side for the nose. I used Mocha for the braids, feet and flower center. I used Sangria (retired) for the shirt, Honey Butter for the hat, Sundance for the flower and Jade for the stem (below I show an assembled gnome with Sage for the stem).

I should note that I used a wet glue like (a Quickie Glue™ Pen (Z1512) or Dual-tip Permanent Glue Pen (Z3440) so I have a little time to wiggle the pieces into place.

Gnomes for Autumn Thin Cuts Step 2
This photo shows my first assembly steps. I added the shoes/feet and flower stem. I put the hat on before the nose so it makes it easier to place the nose in the correct spot, however I did not place the glue close to the bottom edge so I could lift the hat and slightly slide the nose under the brim of the hat.

Gnomes for Autumn Thin Cuts Step 3
At this stage I add the flower, dress/shirt and nose. Be sure to lift the brim and slide the nose under the brim of the hat a little.

Gnomes for Autumn Thin Cuts Step 4
Here I had the flower center and braids (for the braid on the right, leave some room on the right edge for the hand). The braids will cover the base/background at the bottom and keeps the gnome from appearing bald.

Finally it is time to add the hands. The hand on the left has a little dimple where the hand is holding the flower stem. The hand on the right is shaped a little like an egg. I put the pointed end at about 1pm and just slightly tucked the rounded end under the braid (slightly tucked is so little I do not have a ruler that is precise enough to tell you a measurement).

And here are two finished gnomes.

Gnomes for Autumn Thin Cuts Step 5
Another clever Maker showed a guy gnome on Facebook from the Gnomes for Autumn Thin Cuts. Unfortunately I saw it in a private Facebook group so I cannot share a link, I do not remember their name, and I did not get a chance to try it before writing this post. What they did was to trim the flower and stem from the base/background and to use part of the flower to make a beard. I will try to get a chance to create and share one before the end of September.

I hope you have a great rest of your week and that your weekend plans include some crafting. Take care!

Saturday, September 23, 2023

Stenciled Star Birthday Cards

Since I received the stencils in the Essentials 2023–2024 catalog, I am hooked on stenciling. What a wonderful way to take a piece of cardstock and make it unique to me with colors that I select for the image. I can also vary the amount of ink on my brush and the pressure I use to further make the image unique.

While I have posted other stenciled projects recently, this is one of the first stenciled projects I started. I pulled out of scraps to create with while I got a feel for how to best hold the brush, how much to ink the brush and how much pressure to use. I think it was little bit of fate that pushed this project aside because the It's Your Birthday Stamp + Thin Cuts (part of the National Stamping Month—Say It with Style special), had not been introduced yet when I started.

I used the same One Sheet Wonder idea as when I created the Halloween Cards I shared earlier this month. All of the colored cardstock were either stenciled or embossed so it would not be so plain.

Birthday Cards created with Stencil Pack 1 (7 cards)
Birthday Cards created with Stencil Pack 1
So the stenciled panels do not get lost on the card fronts, I inked the edges. I used It's Your Birthday Stamp + Thin Cuts on several of the cards above. On the first card I layered the Thin Cut on top of a square of Candy Apple so the sentiment did not get lost among the stars. I just trimmed the square to be about 5/16" larger than the Thin Cut piece. When I used the "Sending Birthday Hugs" stamp, I used low tack tape to mask the word "hugs" (I inked with the tape in place then used tweezers to remove the tape before stamping). I found the Just a Number Stamp Set with "wishes" and stamped that in place of "hugs". Since "wishes" was a little smaller, I used the star stamp from It's Your Birthday to fill in a little. I used the "left overs" from die cutting the Happy Birthday Thin Cut and backed it with white cardstock then I used a journaling pen to draw lines inside the cut (I wish the photo showed that piece better). The two cards at the bottom use the different sizes of the Stitched Fancy Brackets I created when showing how I made them in a previous blog post. The card on the left was stamped with The Good Life—Cardmaking and the card on the right uses Thoughtful Tokens—September Stamp of the Month.

Birthday Cards created with Stencil Pack 1 (6 cards)
Birthday Cards created with Stencil Pack 1
This group of cards were created very similar to the cards in the first photo. The happy birthday on the first card are from the Thin Cut with the blue cut layered on top of the yellow die cut so the yellow is just slightly peeking out like a shadow. The next card has a banner cut from Party Banners and a stamp from the Craft with Heart™ Cardmaking September–December 2019 subscription box stuck to a My Acrylix® Block to follow the arch of the cut; I also used a stamp from this set on the other Party Banners die cut.

I really like how I can pull supplies from my stash to mix with current products create a batch of cards where no two cards are too much alike. I will be giving this group of cards to the local senior citizens group; they have someone makes sure members receive a card at their luncheon when they are celebrating a birthday that month.
 
Supplies used:
Code to above product name appearance:
  • text with link = this is a current product available on my eCommerce site at the time this post was published
  • highlighted text with link = this is a product that was available on my eCommerce site when I created the paper craft(s) pictured above and the post was published; since it is on the retiring list and no longer appears in the current catalogs, or it was part of a promotion, it is available only while supplies last
  • plain text = retired product no longer on my eCommerce site; if you really like a product, look for it at yard sales, on Facebook groups or other places people resale items
When you get creative the next time, be sure to check your supplies for a fun way to re-use or re-purpose items. I hope you like how I mixed and matched new products with older supplies.

Tuesday, September 19, 2023

CTMH Stitched Fancy Brackets - Cutting Different Sizes

Hello friends!

Recently I shared cards using the Stitched Fancy Brackets where I made the size a bit smaller to better fit the stamp I was using. Here are two examples; this thank you card:

floral card 3 created with stenciled cardstock
floral card 3 created with stenciled cardstock - card details here

And this sympathy card:

Sympathy Card created with August 2023 SOTM (S2308)
Sympathy Card created with August 2023 SOTM (S2308) - card details here
There has been some curiosity about how I created just the right size of bracket for the stamp I selected. Let me show you how I made them.

Start by selecting a scrap or strip of cardstock and cut on the desired edge. I have started with a strip as narrow as 1", but I never choose anything too much wider than just over ½ the width of the die (the second example below shows this better).

Step 1 - First Cut
Step 1 - First Cut
Remove the die cut and start to align for the second cut. Fit the stitched notches on the cardstock into the raised stiches on the die and use a low tack tape (I used iCraft Removable Purple Tape that I have in my stash, but the 1" Masking Tape (Z4606) works the same) to hold the cardstock in place while running through your die cutting machine.

Step 2 - Prepare for Second Cut
Here are your finished brackets in a smaller size for shorter or smaller sentiments.

Finished Cut Brackets
For the cuts below, I used the longer side of the smaller Stitched Fancy Bracket and a wider cardstock strip with the larger Stitched Fancy Bracket. As you can see, the edge of the die flairs out a bit close to the middle of the edge, so you need to avoid the cardstock falling too close to the center of the die. As above, I fit the stitches on the cardstock into the stitched "blades" on the die and taped the cardstock in place before running this through my die cutting machine.

Step 1 - First Cut - Longer Thin Cut Edge and Wider Cardstock
Here is a longer, less in height, bracket by using the longer side of the smaller die and a taller bracket by using a wider cardstock strip.

Finished Cut Brackets - Longer Thin Cut Edge and Wider Cardstock
Now you may be wondering what other dies you can do this with and honestly I have not tried that many from Close To My Heart. Some dies you can just look at and know it is unlikely to cut well, but if you really want that shape, try the die with a scrap of cardstock if you are curious.

If you are lucky enough to have the retired Stitched Brackets (Z3631), this technique works for narrower strips of cardstock (1" strip used for sample below). Because the die indents near the middle of the edges, the edge would get cut in such a way so the result is not a mirror image top to bottom.

Finished Cut Bracket - Stitched Brackets (Z3631)
If you take a closer look at the cut I made using Stitched Brackets, due to the indent I have a bit of a second stitched impression. It is faint enough that I would still use the completed cut, but if you are very, very particular, you may choose to not use the die cut.

Supplies used:
Code to above product name appearance:
  • plain text = retired product no longer on my eCommerce site; if you really like a product, look for it at yard sales, on Facebook groups or other places people resale items
  • text with link = this is a current product available on my eCommerce site
  • highlighted text with link = this is a product that was on my eCommerce site when I created the paper crafts pictured above and wrote the post, but since it is on the retiring list and no longer appears in the current catalogs, or it was part of a promotion, it is available only while supplies last
I hope you give this technique a try. I think it is a great way to extend your options when paper crafting. I would love to see how you use this technique. Thank you for stopping by today.

Monday, September 18, 2023

Stenciled Floral Thank You Cards

Let's start the week on a positive note with some pretty flowers. I mailed the cards shown below last Tuesday; I hope they were received by now and arrived in good condition (I put them in a zip top plastic bag just in case the weather was rainy).

I have been enjoying creating with the newest stencils from Close To My Heart. With White Daisy cardstock, blending brushes and Rosy, Limeade, Jade and Honey Butter Exclusive Inks™, I created this floral sheet.

stenciled cardstock created with Stencil Pack 1 (Z7040)
From the floral sheet, I cut using this "guide".
floral stenciled paper cutting guide
floral stenciled paper cutting "guide"
I do not give you exact measurements because you may have other ideas based on what flowers you want to highlight on your cards. When cutting the floral layer, I first trimmed off ⅛" from the left and right sides (indicated by the red in the diagram above). Then I trimmed off ⅛" from the top and the bottom (shown in orange). After I trimmed ⅛" off around the sides, I cut 3¾" from the left and right sides (shown as yellow and green above). When I got to the remaining strip (the middle of the card), the plan was to trim ¼" from each side (indicated with purple) which would leave a 3¾" strip (shown in blue), but in my case I measured wrong (see photo below). It worked out in the end, but you may want to measure better than I did, or you may want a wider "leftover" strip from the middle (or the sides) and try to use that strip on another project. I cut each 3¾" strip into two 5" pieces. When cutting the 5" length, sometimes I started at the top and other times the bottom; on the middle piece I made one cut from the top and the other cut from the bottom because I was not happy with the stenciling I did in the middle – I was a little to "loose" with my circles when blending. Here's my sheet after making the cuts (the ⅛" already hit the recycle bin by the time I took this photo):

stenciled cardstock cut for cardmaking
By now you want me to finally show you the cards I created with my stenciled cardstock. Here they are:

floral card 1 created with stenciled cardstock
On this card I layered the floral stenciled cardstock on top of a piece of Limeade cardstock (lighter side). I die cut a piece of White Daisy using the Dragonfly Wishes Stamp + Thin Cuts (I am bummed this is no longer on my website – it was when I created my cards) and stamped the coordinating "thank you" from the same set.

floral card 2 created with stenciled cardstock
I layered the floral stenciled cardstock on top of a piece of Limeade cardstock (darker side). I cut the words from Jade and Rosy cardstock and layered the die cuts so a bit of the Rosy die cut would create a shadow.

floral card 3 created with stenciled cardstock
This time I layered the floral stenciled cardstock on top of a piece of Rosy cardstock (light side). I die cut a piece of White Daisy using the Stitched Fancy Brackets Thin Cuts (if you are saying "wait, the die does not cut that shape", please come back tomorrow for a step-by-step on how I cut the bracket). I stamped the "thank you" from Floral Notes Stamp Set (I applied a piece of masking tape to the stamp, inked, removed the tape then stamped "thank" then repeated to add "you").

floral card 4 created with stenciled cardstock
I layered the floral stenciled cardstock on top of a piece of Jade cardstock (lighter side). I die cut a piece of White Daisy using the Dragonfly Wishes Stamp + Thin Cuts and used the "thank you" from Thoughtful Tokens—September Stamp of the Month.

floral card 5 created with stenciled cardstock
For this card I layered the floral stenciled cardstock on top of a piece of Rosy cardstock (darker side). I die cut a piece of White Daisy using the Dragonfly Wishes Stamp + Thin Cuts and stamped the coordinating "thank you" from the same set.

floral card 6 created with stenciled cardstock

On my final card I layered on Jade (darker side). I die cut Jade cardstock with the Scalloped Circle Frame and White Daisy with Circles Thin Cuts. I used a stamp from Flowers Are like Friends. I did not want to cover up too much of the stenciled flowers, so I placed the die cuts off center and trimmed to they did not extend past the Jade layer.

Except for the "thank you" from the For You Thin Cuts, all of the sentiments are popped with Thin 3-D Foam Tape. You can use the Quickie Glue™ Pen or Dual-tip Permanent Glue Pen to adhere the die cuts from the For You Thin Cuts.

Products used to create the Thank You cards:

Code to above product name appearance:
  • plain text = retired product no longer on my eCommerce site; if you really like a product, look for it at yard sales, on Facebook groups or other places people resale items
  • italicized text = retired and only used inside the cards
  • text with link = this is a current product available on my eCommerce site
  • highlighted text with link = this is a product that was on my eCommerce site when I created the paper crafts pictured above and wrote the post, but since it is on the retiring list and no longer appears in the current catalogs, or it was part of a promotion, it is available only while supplies last

If you were thinking the 12" x 12" stencils were only for scrapbooking, I hope I showed that they are much more versatile and can be used for cardmaking and other paper crafting. Be sure to stop back tomorrow to see how I used the Stitched Fancy Brackets to create just the right size die cut for the stamp I used. Have a great week!

Saturday, September 16, 2023

Princess and Castle Happy Birthday Card

We had a birthday in our family this week. My great-niece turned four, so I created this card for her.

birthday card created with Storybook-Cardmaking, Birthday Numbers, Goodbye Isn't Forever, Thoughtful Critters
birthday card created with four CTMH Stamp Sets

When I saw the Storybook—Cardmaking stamp I thought it would go so well with the princess in the Birthday Numbers stamp from a few months earlier. Then when I went to use both on a card, I felt I needed a way to bridge the images. Fortunately the August 2023 Stamp Of The Month, with a little masking, allowed me to use the river as a path and gave me the transition I was looking for.

I stamped the princess on a White Daisy circle cut with the Circle Thin Cuts and I used the Scalloped Circle Frame Thin Cuts to cut a Mulberry scalloped circle to place under the princess. I colored with several colors form the new Colorista by Spectrum Noir™ pencils. I added Clear Shimmer Brush to the scallops, clouds, mirror and window. I used the Slimline Stitched Card Front with Mulberry to cover the slimline card front.

Products used to create this birthday card:
Code to above product name appearance:
  • plain text = retired product no longer on my eCommerce site; if you really like a product, look for it at yard sales, on Facebook groups or other places people resale items
  • text with link = this is a current product available on my eCommerce site
  • highlighted text with link = this is a product on my eCommerce site (at the time of this post), but since it is on the retiring list and no longer appears in the current catalogs, or the promotion in which it was featured is over, the item is available while supplies last
I hope you are inspired to mix and match your stamps and Thin Cuts to create unique to you paper crafts. Have a wonderful weekend ahead.