Sunday, March 31, 2013

Another Easter 2013 Card

Easter2013Card3Greeting

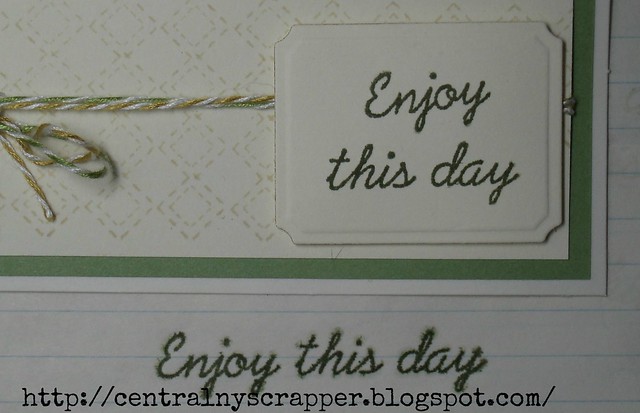
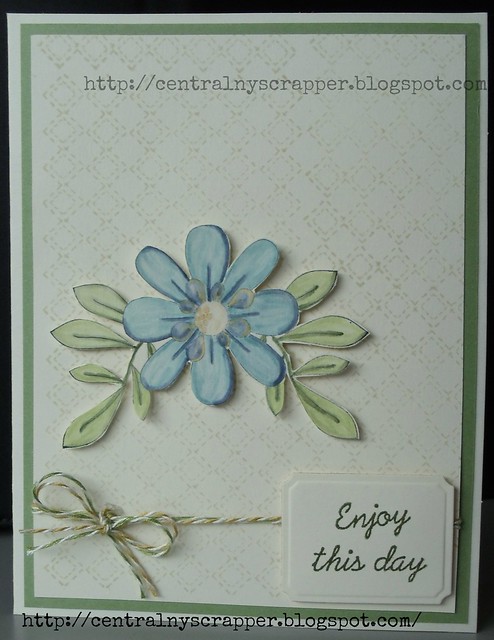
Today I am sharing another card that I made for this Easter. The above image is the greeting from the card.

Easter2013Card3

I used the same new-to-me technique (that I mentioned in my Friday, March 29 post) to color in the stamped image. In case you need a quick refresher, I used old "plain" colored pencils (not watercolor), odorless mineral spirits and tortillons (some people call them stumps) to color in the stamped image. I posted more information below.

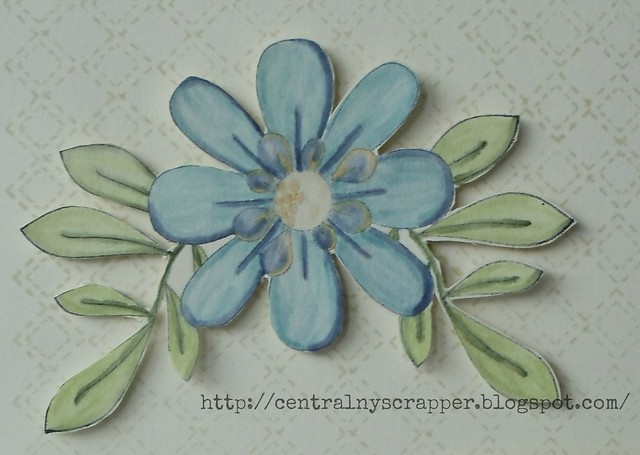
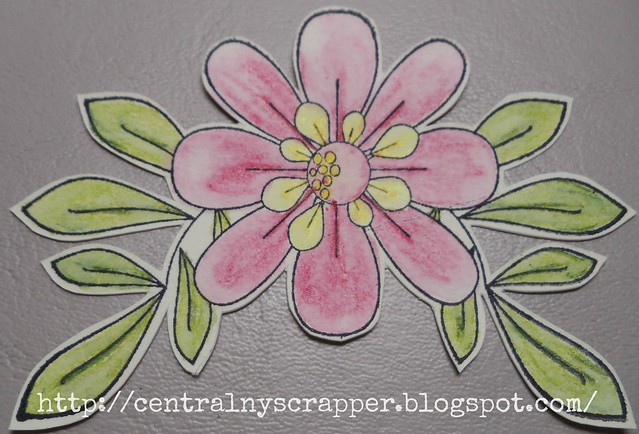
Here is a closeup of the stamped image:

Easter2013Card3Closeup

Materials used: Eggcellent Stamps by Jillibean Soup, Holiday Seasons Clear Stamp Set by Inkadinkado, generic white card base from my stash, DCWV green cardstock, pink cardstock from by stash, CTMH Colonial White Cardstock, CTMH Exclusive Inks® Stamp Pads (Archival Black and Sweet Leaf), Jillibean Soup Baker's Twine (green and purple), Anna Griffin/Cuttlebug embossing folder.

In case you would like a little more information about the coloring technique I used, I used the suggestions in a product review on Amazon. The product is called Stampers Anonymous Gamsol Odorless Mineral Spirits Kit by Stampers Anonymous and it was the review "Good beginner or travel kit by S. Conway". I am reprinting part of the review here because I am afraid when the item sells out (as of this post there are only 7 remaining) the product information and review will no longer be available.

Reprinted from link above:

How I use with stamps:
Stamp a design with a permanent ink. Make sure it is dry before beginning technique.
Draw around the void spaces of the stamp with colored pencil basically leaving a line of colored wax around the space, leaving the center of the void area unmarked.
With screw top on Gamsol, tip upside down to wet the sponge tip. Touch a blending stump to the wet sponge and soak up fluid to moisten tip. Put cap on bottle to limit evaporation.
Take the moist tip and run it in tiny circles from the waxy line to the unmarked area. The Gamsol break down the colored pencil line and will allow the stump to pick up some of the color. drawing tiny circles causes the color to slowly blend inward toward the unmarked center. Can add more color, or second color, etc while continuing to make tiny circles all around your colored space, bringing the color from the outer edge into the center in smooth blended tones. Lots of videos online showing how.
Tips:
- Be patient. Better to go slower, add color to get the desired effect.
- Start with lightest tones first, then blend in darker tones.
- If you have dark color on stump and try to blend into a lighter area, the darker color will transfer. Clean stump by rubbing on sandpaper, or use one end for light, one end for dark.
- Paper needs to be thick enough to handle the solvent breaking down. Use good quality card stock.
- If you use the wrong ink, it will be picked up on your blending stump. Test before your actual project.
- Do not use this with watercolor pencils.
- This technique works with inexpensive crayola brand colored pencils quite satisfactory, but better pencils like Prismacolor, Mona Lisa and others will give smoother blending results.
This technique is relaxing. Enjoy.
[end of review]

Thank you for stopping by my blog today. I would like to take this opportunity to remind you to visit tomorrow for a special announcement.

Friday, March 29, 2013

Easter 2013 Cards

Last night I finished Easter cards for my nieces so they (and a little gift) could be delivered before the holiday. Here are the cards that I came up with for 2013:

Easter2013Cards

I tried a new-to-me technique to color in the stamped image. I used old (and I mean old - from my childhood) "plain" colored pencils (not watercolor), odorless mineral spirits and tortillons (some people call them stumps) to color in the stamped image. The stamp set I used is Eggcellent Stamps by Jillibean Soup.

Here are additional photos of the cards (as always, just click on am image to see a larger version):

Easter2013Card1

Materials used: generic white card base from my stash, DCWV green cardstock, CTMH Dotty For You, CTMH Colonial White Cardstock, CTMH Exclusive Inks® Stamp Pads (Archival Black and Sweet Leaf), Doodlebug grey washi tape.

Easter2013Card1Closeup

My kitten, Dotty (or is it Dottie, I have not decided yet), thought she needed to help me snap some photos this morning. It seems fitting that she helped since the dotted paper is from the Dotty For You promotion that CTMH had during National Scrapbooking Month in 2012. Her foot looks huge here, but she is a petite mischievous lady.

Easter2013Card2

Materials used: generic white card base from my stash, DCWV green cardstock, CTMH Dotty For You, CTMH Colonial White Cardstock, CTMH Exclusive Inks® Stamp Pads (Archival Black and Sweet Leaf), Jillibean Soup Baker's Twine (Olive; funny, my niece's cat is named Olive).

Easter2013Card2Closeup

On this card I also used a colored pencil on the grass to fill it in a bit more. I does not show well in the photo, but I liked the softer feel it gave. I found that the odorless mineral spirits did not make the dye-based Sweet Leaf ink bleed, but my image had been stamped for about 48 hours before I started coloring. Perhaps that made a difference?

If you are curious about one of the cards I made last year, I created a Sliding Pop-Up Element Card based on a post by Scrappy Canuck. As I said last year if you have not visited her blog, you really should. There are several tips and tricks and tutorials there.

Thanks for taking the time to read my blog post today. Please come back on April 1 for some exciting news (hint, there is a chance to win something).

Monday, March 25, 2013

Get Your Glitz On

We all love to add some glitz and glimmer to our crafting projects. Some of us look at it as the "icing on the cake" or "cherry on top of the sundae". This video has some ideas for adding that glitz and glimmer without overpowering your project.

A couple of things to note from the video. When the Spring/Summer 2013 Idea Book was released everyone wondered how the background was created for the layout on page 90. This shows you how you can achieve the same look. You will also see a great idea for highlighting your journaling with just a bit of shimmer trim.


The CTMH Corp. description of the video Glitter Glam is "Learn how to add glitter to your projects for a glamorous look using Close To My Heart products like glitter paper, Shimmer trim, glitter gel, and more. It's an easy way to add some shine to your cards and layouts!" Some of the products features in the video are:
It is time for you to get your glitz on.

If you would like more information about the shimmery, glittery, glitzy products CTMH carries, please do not hesitate to contact me. If you would like to purchase any of the items to create your own sparkly projects, just click the Shop Now button.


Thanks for taking the time out of your busy schedule to stop by my blog today. I would love to hear what you think about the ideas presented or projects shared.

Wednesday, March 20, 2013

More Inspiration - Using Fabric

If you love the layout shown on page 71 of the Spring/Summer 2013 Idea Book but are not sure where to start to create the ruffle under the photo or the fabric edges around the cardstock, this video was made for you.


The CTMH Corp. description of the video Project Inspirations: Fabulous Fabric is "Learn how to dress up a scrapbook layout with fabrics from the Chantilly and For Always textile collections from Close To My Heart. These fabulous fabrics are sure to punch up the pizzazz in your papercrafting!" Some of the products features in the video are:
Yes, you will use a needle and thread to create that ruffle, but no worries about how neatly you sew as you will be covering up that edge with another piece of fabric. In addition, all of the fabric is attached to the paper using adhesive so there is no need to use a sewing machine. Though you could attach the fabric with your sewing machine if you would like - it just would give your project a little different look.

If you would like more information regarding how to create this layout or one similar to it, please do not hesitate to contact me and I'll do my best to answer all of your questions. If you would like to purchase any of the items to create your own mini album, just click the Shop Now button.


As always I would love to see the projects you make with paper or fabric. Thanks for making my blog one of your stops today.

Monday, March 18, 2013

Papercrafting with Fabric

If you have looked at some of the projects that use the new textiles in the Spring/Summer 2013 Idea Book and would like to make some of your own projects that use fabric, I have great news. CTMHCorp created a video with some tips and tricks for using the textiles.


The CTMH Corp. description of the video Fabric Basics is "Learn great tips and techniques for using fabric in your artwork—where to use it, how to adhere it, and how to create ruffles, flowers, and much more! Close To My Heart's new line of beautiful textiles make it simple to embellish cards, layouts, and three-dimensional items with fabric." Some of the products features in the video are:
When watching the video you will get a closer view of the layout shown on the front cover of the Spring/Summer 2013 Idea Book (I totally missed the frayed edges on that until I saw the video), the layout on page 34 and the pillow on page 116. You will also see some cards and and Muslin Drawstring Bags that are not in the Idea Book.

The technique used to create the ruffled fabric on the "Happy Birthday" card will likely be helpful if you are trying to make something like the layout on page 19. And you will get tips regarding adhesives and for using the fabric on your Cricut®.

If you would like to purchase any of the items to create your own projects using fabric, just click the Shop Now button.


I would love to see projects you create using the textiles. Thanks for stopping by.

Tuesday, March 12, 2013

New Challenge Blog - Rose Blossom Garden

I recently learned of a new challenge blog, Rose Blossom Garden Challenge Blog. Those with the CTMH Exclusive Cricut® Cartridges might like to participate in the challenges they will post on the 1st and 15th of the month (starting April 1).


Challenges will focus on a specific key of one of the CTMH Exclusive Cricut® Cartridges - Art Philosophy or Artiste. What a great way to learn more about the cartridges you already have!

Right now you can head over to their welcome message, become a follower and leave a comment to enter to win a stamp set. You can get a second entry by posting the news on your own blog and leaving a comment with a link to your blog.

I am excited about the Rose Blossom Garden Challenge Blog and I hope you are too.

Thursday, March 7, 2013

Mini Album using Cricut® Artiste Collection

If you have looked at the mini album on page 86 of the Spring/Summer 2013 Idea Book and wondered how it was constructed I have great news for you. CTMHCorp uploaded a video with additional information related to the cutting and construction of the mini album.


The CTMH Corp. description of the video is "Learn how to create an 8" × 5" mini album from start to finish using an eclectic array of papers, stamped images, and Cricut® shapes from Close To My Heart."

Some of the products features in the video are:
A couple of things to note from the video. To keep your mini album eclectic, do not line up the pages from large to small or all at the top or bottom of the spine. Do not seperate the strands of the Baker's Twine. Also pierce then stitch, pierce then stitch and repeat rather than piercing the length of the spine then trying to stitch. This helps keep the pages lined up and from shifting too much. Don't forget to put a nice tight knot in the twine at the start and end of your stitching to hold the album together for years to come.

If you would like more information about the mini album, please do not hesitate to contact me and I'll do my best to answer your questions. If you would like to purchase any of the items to create your own mini album, just click the Shop Now button.


I would love to see the mini albums you create. Thanks for visiting today.

Wednesday, March 6, 2013

Improvising and Blogoversary Blog Candy

When preparing my project for my Blogoversary I could not put my hands on my stamp positioner tool. I knew if I tried to find it I might be pulling an all-nighter. You see, I craft either on a folding table in my unfinished basement or on my living room floor (as the distressing ink stain on the carpet shows) and most of my supplies get boxed back up and put on industrial-like shelving when not in use. Since it has been some time since I used the tool, well, let's say I'm not sure which box it ended up in. I plan to finish my basement and have an awesome craft room as soon as possible; maybe the budget will allow this year. :-)

Since I could not find that tool, I had to improvise. I knew I wanted to stamp a one line stamp on two lines. What I ended up doing is stamping on a scrap piece of paper and then centering the die-cut I wanted to stamp on above the word (or words) I planned to stamp. I also masked the actual stamp with a different scrap of paper (just by wrapping the paper around the stamp) so I would be certain to not get any ink where I did not want it; I have viewed blog posts where people have masked with tape.


Viola. I hope if you lose your stamp positioner tool on your desk (or your kids or dog take off with it - my kittens will take anything if they can fit their jaw around it - I have to watch them like a hawk), you will find this helpful.

On to the blog candy winner from Julie's Blogoversary Blog Hop. Random.org selected the 8th comment on that post which is..... 
by belle who left this comment on March 1, 2013 at 11:51 AM:
Beautiful flowers my friend!!! I love seeing your work!!

I'll keep the actual contents of the blog candy a surprise (don't you love fun mail?), but will say there is a stamp set in the envelope. I hope by belle will like her package.

Thanks again to everyone that took the time to hop and leave comments along the way. I am hearing rumors we will hop again in 2014 (unless we can find a reason to hop sooner).

Tuesday, March 5, 2013

Using the Cricut® Craft Room

You can use the Cricut® Craft Room (CCR) with the CTMH Exclusive Cricut® Cartridges. I am still a novice at using CCR, but have learned that you can weld letters so an entire word or phrase will be connected (like words and phrases are on some cartridges) and cut out all at one time. You can use the negative space for creating titles or you can personalize images by layering one image on top of another. CCR will even let you remove cut lines from an image, for example decorative cuts in a box top. You can also use CCR to save paper because you can rotate images on the mat so you can cut the images closer to each other. Some people share the CCR files that have created so you can use them for your own projects; you just need to have the same cartridge that they used.

Featured products in the Cricut® Craft Room video are:
More information about the CTMH Cricut® Collections can be found on my Online Business Account.

The Cricut® Artiste Collection handbook and the Cricut® Art Philosophy Collection handbook show you call of the available designs (you will need Adobe Reader to view the files). An assembly handbook is also included with the Artiste collection.

Let's watch the video.


The CTMH description for the video reads "Learn how to use Cricut® Craft Room (http://www.cricut.com/home/craftroom) to create projects with your Cricut® machine using cartridges from Close To My Heart."

I have pinned the blog posts of the great projects I have found online. Find them on my CTMH Cricut® Cartridges pinboard.

If you would like a demonstration of CTMH products, including the Cricut® collections, or would like to schedule a Home or Online Gathering, please contact me. If you would like to make a purchase click the Shop Now link below.


Thank you visiting today.

Monday, March 4, 2013

Foldables with CTMH Exclusive Cricut® Collections

While I have both CTMH Exclusive Cricut® Cartridges I am still learning all of the features and designs included on them. Each cartridge includes about 700 images that help you create cards (some interactive), 3-D items, tags, borders, fonts, dimensional items including flowers and more.

Featured products in the Cricut® Foldables video are:
"Each Cricut® collection includes one cartridge plus three coordinating D-size My Acrylix® stamp sets, available only in the collection, plus three sets of Dimensional Elements chipboard die-cut shapes designed to go with the cartridge images. Stamp on your Cricut® shapes; cover your Dimensional Elements with a Cricut® shape; or cut, stamp, and then cover!" Source: CTMH Cricut® Collections where you can read more about the collections and links to at machine comparison sheet (if you have not purchased a Cricut® machine yet), tips and tricks, shape indices and sample shapes.

The Cricut® Artiste Collection handbook and the Cricut® Art Philosophy Collection handbook show you call of the available designs (you will need Adobe Reader to view the files). An assembly handbook is also included with the Artiste collection.

Let's watch the video.

 
The CTMH description for the video reads "Learn how to create foldable paper pieces cut with the Cricut® Art Philosophy and Artiste cartridges from Close To My Heart. From yo-yos to bows, Cricut®-cut embellishments add something special to any scrapbook page, card, or home décor piece."


I would like to remind you this is Jump for Joy in March! - Jump to the Next Level of Hostess Rewards. From March 1-31, 2013 when you have an online or in-home Gathering and your Gathering reaches $250 or more (before tax, shipping or rewards) you will jump; that is be rewarded at the next level of Hostess Rewards. Hostesses can receive more discounts and free products. The fine print reads: *Shipping/handling and tax applies. Only Gatherings with a total of $250 or more will qualify for the jump in Hostess Rewards or Hostess Rewards Plus! Qualifying hostesses will receive Hostess Rewards from one level only—the level that is one higher than their sales total. Offer valid March 1–31, 2013.

In addition, as an added incentive to be a hostess in March 2013, if you decide to try to "Jump" to the next hostess level by having a Gathering (at home or online), have orders from two people (in addition to your own order; minimum of three orders) and don't quite reach $250 in sales, I will award you for trying by giving you your choice of one A-size stamp set. If you "Jump" to the next hostess level, I will give you your choice of one B-size stamp set. Tax and shipping for "incentive" stamp set is included.

If you would like a demonstration of CTMH products, including the Cricut® collections, or would like to schedule a Home or Online Gathering, please contact me. If you would like to make a purchase click the Shop Now link below.


Thank you for stopping by.

Sunday, March 3, 2013

Valentine's Day 2013 Cards

If you stopped by looking for Julie's Blogoversary Blog Hop it is the next post down.

I'm posting these long after the holiday, but thought I'd share anyway. Here are the Valentine's Day cards I created for my nieces who are 17 and 18 years old.

This card uses the CTMH January 2013 SOTM stamp set. I was leaning toward not purchasing that stamp set until I saw the SOTM blog hop that typically starts at Life is Like a Bowl of Stamps. Take a look at the hop or my Pinterest Board and you'll see why the talented crafters on that hop convienced me that I needed to purchase this stamp set.


I used a card base and black strip of paper I had on hand and cardstock and inks from CTMH. The sentiment stamp is from the CTMH Whooo's Your Valentine kit and the punch is Martha Stewart Crafts.

I carried the border punch to the inside:


I used a Stampin' Up stamp for the sentiment.

My next card was inspired by a card in the CTMH Workshops On The Go® For Always Cardmaking Kit.


I used a card base and black strip of paper I had on hand and paper from Basic Gray's Little Black Dress. The stamps are from the CTMH Whooo's Your Valentine kit and an Anna Griffin collection (background behind the strips of paper).


I used some of the Little Black Dress paper and the Stampin' Up stamp on the inside.

I hope you like the cards. Thanks for stopping by today.

Friday, March 1, 2013

Celebrating Friendship Blog Hop - Julie's Blogoversary

Welcome to the "Celebrating Friendship" Blog Hop to celebrate the one year blogoversary of Julie Odil's Muddy Paws & Inky Fingers.

In case you just happened upon my blog post, please go back and start the hop at Julie's blog Muddy Paws & Inky Fingers. You should have arrived here from Miwa Lee (Chocolatier Miwa).

Here is the card I created. While I love the 3D embellishing that people are adding to their cards and layouts, I tend to keep my projects a little simpler. I mail most of my cards - even to family - because I think it is exciting to get something via the postal service other than junk mail and bills.


Here is a close-up of the flower:


Supplies used:
  • Unity Stamp Company Life Becoming & Quiet Essence - 2010 {June} edition (SSK-011)
  • card base and envelope - no label on box
  • Close to My Heart (CTMH) Exclusive Inks® Stamp Pads: Bamboo, Goldrush, Twilight, Outdoor Denim, Sweet Leaf, New England Ivy, Archival Black
  • VersaMark Watermark Stamp Pad
  • CTMH Blending Pen
  • CTMH Colonial White Cardstock
  • Spellbinders Nestabilities Large Labels (S4-168) with the Grand Calibur
  • Bazzill green card stock
  • Jillibean Soup Mustard/Olive Baker's Twine
  • foam (and flat) adhesive

I pressed the flower stamp into the Versamark stamp pad then immediately into the Archival Black pad and then stamped the cardstock. I did this for a little better ink coverage and to help avoid staining of the stamp. It also left extra ink on the stamp so I could get a nice second generation stamp (the blue flower; the first generation stamp is below). To color in the flower I used the technique where, while the stamp pad is closed, you gently press the cover of the stamp pad onto the ink pad surface to create a pallet. I then used the blending pen to pick up the ink and "paint" it onto the cardstock.

After this week (so far) of work and evening meetings, I have lost my crafting mojo and did not finish my second card, but I wanted to share the stamped image anyway.


 Supplies used:
  • Unity Stamp Company Life Becoming & Quiet Essence - 2010 {June} edition (SSK-011)
  • CTMH Colonial White Cardstock
  • Close to My Heart (CTMH) Exclusive Inks® Stamp Pads: Archival Black
  • VersaMark Watermark Stamp Pad
  • Lyra Aquacolor water soluble wax crayons
  • CTMH Waterbrush Medium
I am very happy with how the leaves look, but I think I need a little more practice after looking at the petals. I just colored a little with the wax crayons, darker on the veins and toward the center for the flower and lighter at the petal end then I went over the area with the waterbrush.

Your next stop on the hop is Gwen's at Windchimes and Lilacs.

Thank you so much for stopping by. I love comments (though I found I have to moderate them to avoid spam). If you have the time, please let me know what you think.

I will be awarding blog candy (TBD) to one visitor that becomes a follower (if you are not one already) and leaves a comment on this post. Please check back on Wednesday, March 6 to see if your name was drawn from the hat.

Finally, here's the entire hop list in case you get lost along the way:

Julie Odil Muddy Paws & Inky Fingers
Rebecca Daniels  BloomingPink
Polly Zastawnik Polly Zas - PaZasProductions
Rachel Anderson Kitchen Table Scraps
Mary Shriver Come Craft With Me
Angeline Scrappy Scrappy
Miwa Lee (Chocolatier Miwa) What's Up in 3MG World
Brenda (centralnyscrapper) Crafting for sanity? Or insanity?  --- You are here
Gwen Teerink Windchimes and Lilacs
Maria Levine Ria Creations
Christina McAdams Thrifty Sisters
Paula McClane Scrap Addict's Attic
Lucy Evans Littlescrapsoflucy
Karen Nofziger Karey2005 - Craftily Yours
Corrie Wagner Corrie's Crafts
Kary Lim Papercrafting & Travels
Erin (CelticCrafter) & Ruth Celtic Crafters
Laura Sanchez Laura Ann's Breakfast Pizza
Theresa Krout Inky Fingers

Thanks again for visiting.

CTMH March 2013 Stamp of the Month: Floral Happiness

The Close To My Heart March 2013 Stamp of the Month is Floral Happiness.


This stamp set would make beautiful home décor items to display in your own home (or to give as gifts) as well as cards and scrapbook pages that will be cherished for years to come. To obtain a list of products used to create the above items and suggested techniques, please see the current Stamp of the Month page (ideas for previous months can be found on the left side of that page).

This stamp set can be yours only during March 2013 for $5 with an order of $50 or more in qualifying products.


The CTMH Digital Delights! Promotion Studio J® Savings that started on February 1 has been extended and now ends on March 15. If you have not been able to create any Studio J® layouts yet you have a little more time to purchase a two-page layout for $5 (a savings of $1.95).


Another special I would like you to be aware of is Jump for Joy in March! - Jump to the Next Level of Hostess Rewards. From March 1-31, 2013 when you have an online or in-home Gathering and your Gathering reaches $250 or more (before tax, shipping or rewards) you will jump; that is be rewarded at the next level of Hostess Rewards. Hostesses can receive more discounts and free products. The fine print reads: *Shipping/handling and tax applies. Only Gatherings with a total of $250 or more will qualify for the jump in Hostess Rewards or Hostess Rewards Plus! Qualifying hostesses will receive Hostess Rewards from one level only—the level that is one higher than their sales total. Offer valid March 1–31, 2013.

As an added incentive to be a hostess in March 2013, if you decide to try to "Jump" to the next hostess level by having a Gathering (at home or online), have orders from two people (in addition to your own order; minimum of three orders) and don't quite reach $250 in sales, I will award you for trying by giving you your choice of one A-size stamp set. If you "Jump" to the next hostess level, I will give you your choice of one B-size stamp set. Tax and shipping for "incentive" stamp set is included.

If you are not familiar with CTMH products yet, I would like to have the opportunity to meet with you to give you a chance to try them. Do not hesitate to contact me if you have questions about CTMH products or promotions or to schedule a Home or Online Gathering. If you would like to make a purchase click the Shop Now link below.


Thank you for visiting.