Friday, July 31, 2015

Studio J® Flash Sale Extension

Earlier this afternoon I received this update from Close To My Heart.

"Wow! We are seeing a tremendous response to the Studio J® Flash Sale! All this increased traffic is causing the system to respond a bit more slowly than you are probably used to. In an effort to alleviate some of that traffic, we are extending the sale through Monday, August 3 at 11:59 pm (MDT). But don't wait until then to get your order in—submit yours as early as you can so that you can take advantage of this phenomenal deal on Studio J layouts."

I am sure if you have great weather you will not want to be inside in front of your computer, but if your weather this weekend is not the best, I hope you will give Studio J® a try. You do not have to download and install software and you do not have to pay for anything until you approve the results on screen. While I have not used Studio J® to create layouts, I have used it to print non-traditional sized photos. The best results I have ever had.

I have several posts about Studio J® that give tips for creating layout or printing photos. To find them click on the Studio J® tag at the bottom of this post.

This Studio J® button will take you to the Studio J® page on my OBA:


If you have any product or promotion questions, do not hesitate to email me. You will also find me on Facebook at Brenda's Paper Crafts.

One Last Jump On It July Card

I had this idea for the Jump On It July blog hop, but I did not get a chance to finish it until now. This is a tri-fold card I created with the Hats Off Hostess Rewards Stamp Set. You can still get your own for $5 when you order $25 in current, retail priced stamp sets before 11:59 pm MDT (1:59 am EDT) tonight. Now is a good time to stock up on any stamp sets on your wish list that are retiring on August 31. See the "Retiring Items" section of my OBA to find the stamp sets and other products that are retiring.

I used the clock die cut and coordinating stamps to create the clock face and hands. To create the tri-fold card I cut a piece of 12" x 12" Glacier cardstock at 5½", then I scored the 12" edge at 4" and 8".


I used the hat, glasses and mustache almost exactly as they appear on the stamp carrier sheet.


I was thinking Father's Day the entire time I had this card in my mind's eye. I have no idea why because this stamp set does not remind me of my dad; he rarely wears a hat and only has a mustache when he grows a winter beard. Then I discovered the August 2015 SOTM Framed had a "Happy Father's Day" greeting and I thought Father's Day was fate.


All supplies are from Close To My Heart except where noted:
In addition to the Jump On It July promotion ending tonight, the Studio J® Flash Sale is also ending.

I have exciting news for August, but I cannot tell you more until 12:01am EDT on the 1st, so please come back tomorrow.

If you are inspired to purchase the Hats Off stamp set or any CTMH product for your next project and are ready to place an order or would like to research any product, the Shop Now button will take you to my Online Business Address.


If you have any product or promotion questions, do not hesitate to email me.

Wednesday, July 29, 2015

CTMH on Social Media

Did you know that Close To My Heart is on several social media sites? I know some of you do not want to join too many social media sites to follow a business, Independent Consultant or person, but many of these sites do not require an account if you just want to browse for photos and comments ("liking" or commenting would be unavailable).

Here are the links to the official CTMH social media sites with some information about how much you can see without logging on:
  • Pinterest - CTMH - you can see all of their Pinterest Boards without being pestered to logon or create an account, but once you click on a Board to view pins the logon window covers up the middle of the screen
  • Instagram - @ctmhofficial - you can see all of their photos; click on a photo for the information CTMH provided when they uploaded the photo and to view comments from others; if you want to like a photo or comment, you need to be signed into an Instagram account
  • Facebook - CloseToMyHeart - you can see all of their pictures, posts and comments on the posts; you may need to click a link to see more (all) comments; if you want to like a photo or comment, you need to be signed into a Facebook account
  • Twitter - @CTMH - you can see all of their pictures, posts and comments and click links that they shared; click on a #hashtag to see posts on Twitter using that tag (the posts could be from anyone); click on a tagged person or company to see their profile and two latest tweets; if you want to reply, retweet or favorite a tweet, you need to be signed into a Twitter account
  • YouTube - CTMHCorp - you can view the videos, playlists and read comments; if you want to rate or comment on a video you need to be signed in with a Google account
  • Blog - Make It From Your Heart - you can view and comment without a logon, but when you comment you need to provide a name (published) and email address (not published)

I am also on these social media sites, but I am not nearly as active on some sites as CTMH or other Consultants:
  • Pinterest - cnyscrapper - I pin a lot of ideas, but I don't have nearly enough time to create as much as I would like
  • Instagram - @cnyscrapper
  • Facebook - BrendasPaperCrafts
  • Twitter - @cNYscrapper
  • YouTube - centralNYscrapper
  • Blog - Crafting for sanity? Or insanity? - you can view without a logon, you can logon to comment or comment anonymously; comment moderation is turned on for all comments
I hope these links and notes help you to find crafting inspiration for using your Close To My Heart products.

If you are inspired to use CTMH products for your next project and are ready to place an order or would like to research any product, the Shop Now button will take you to my Online Business Address.


If you have any product or promotion questions, do not hesitate to email me.

Monday, July 27, 2015

CTMH Supports Operation Smile™

Sine 2008 Close To My Heart has provided support to and partnered with Operation Smile™, an organization that provides free, life-changing surgery that repairs smiles and reshapes lives. CTMH is now offering t-shirts as another way to raise funds to change the lives of children and their families.


The t-shirts are available on my OBA. They are available in grey and red in both men’s and women’s designs for $25 USD (larger sizes cost slightly more). You should know that $10 of every shirt purchased is donated toward Operation Smile. These shirts are exclusive to Close To My Heart and represent the company’s mission to celebrate life and share what matters. You can learn more about Close To My Heart's partnership with Operation Smile™ on the What We Do page. You will also find a size chart at the bottom of that page.

Please join Close To My Heart in providing smiles.

Sunday, July 26, 2015

2015 Straight Family Reunion

It is summer and that means it is time for another Straight Family Reunion. It you have been a subscriber or observer of my blog over the years, you know that we have Silent Auctions and/or Raffles to help pay the expenses for the following year.

I created this wall hanger for the 2015 reunion.


The "family" chipboard base was purchased at Hobby Lobby. I covered the chipboard with Delta All-Purpose Sealer and Delta Creamcoat Butter Cream Acrylic Paint.

I sprayed papers from the Sunshine In My Soul Glitz Paper Pack and cardstock from Recollections with Krylon UV-Resistant Clear Acrylic Coating. Through online research and trial and error I found that the acrylic coating puts some sheen on the paper, but more importantly, it helps prevent the paper from absorbing the Mod Podge I use to adhere the paper to the chipboard. If you saw my first two Mod Podge projects last July 24 and July 25, you saw my untreated papers absorbed the moisture and bubbled and buckled.

I traced the shape on the back of the paper, cut them out and adhered the paper to the chipboard with Mod Podge. When everything was dry, I sanded the edges so any loose paper was removed. Then I added our family name and date established. I cut them from Recollections cardstock using the Cricut®/Close To My Heart Art Philosophy collection, Cricut® Design Space and the Explore. I used Mod Podge to adhere and seal everything.

I hope you like creation. I think my family did. There was a bit of a bidding war which surprised me since attendance was down due to the weather.

Thanks for visiting today.

Friday, July 24, 2015

Jump On It July Be Jolly Gift Box

Today I am sharing a gift box that is inspired by one on page 7 of Annual Inspirations 2014-15. This is the gift box created by Corporate artists.


While my box is similar, I did not have any Yuletide Carol paper that was not already "spoken for" so I used Cranberry cardstock and a stamp from the Snowhaven Cardmaking WOTG to create the body of the box.


Here is the top of my box. The snowflake is stamped on Glacier cardstock in first generation Glacier ink. It is easier to see in real life.


When I stamped the body of the box I lined up the bottom of the trees about ¾" from the bottom of the box. Then I stamped the small snowflake from the Snowhaven Cardmaking WOTG in first and second generation using Slate ink. Unfortunately the tags hides most of that stamping in the photo. I stamped before folding the pieces. I only say that because I had a hard time forcing myself to wait to fold until after I stamped.

When stamping the greeting from the Be Jolly set I cut the stamp apart rather then using the sticky note masking technique I told you about during the Jump On It July Blog Hop. The words were so close together masking was difficult. In addition, by the time I stamped three times (once to create the mask and once for each of the other colors), the mask for the ampersand was so saturated that the ink went through the sticky note anyway.

Products used to create my version of this gift box:
If you create this gift box I hope you found something in this post that helps you achieve what you have envisioned in your mind's eye. I also hope that you like my interpretation of the Be Jolly Gift Box. If you have a moment, I would love to read your comments. Thank you for visiting today.

Saturday, July 18, 2015

Butterfly Gate Fold Card

I really like to try new papercrafting products. I recently started playing with some metal dies I purchased from the shopping channel Create and Craft. In case Create and Craft is new to you, they started broadcasting in the USA in December 2014, on the 29th if I remember correctly, which was perfect timing for me since I have that week off from work.

The dies I have been using recently are from the Create and Craft Mariposa line. The dies are exclusive to Create and Craft. This card was made with the Create and Craft Mariposa Reflections Die. This is not how I planned for the completed card to look, but I like it and think in the end it turned out great (IMO). More about what I intended below.


I used all eight of the dies in the package to create the card. I planned to use the butterfly wing just to emboss the purple cardstock, but my repositionable tape had too much tack and some of the color came up and you could see the white core. I also think I will try to find a way to lessen the pressure for the embossing with this die in the future. This is what the card looked like before adding the wings:


I definitely could not give this card away. Then I thought about adding some vellum to the wings to "repair" or "rescue" the butterfly.


I applied Scotch Quick-Dry Adhesive to the back of the wing and attached the vellum. Then I cut small pieces of Thin 3-D Foam Tape to attach the wing to the card base.

I hope you too think my "repair" or "rescue" of this card was successful.

Supplies used to create this card:
I am a Close To My Heart Independent Consultant and CTMH linked products above may be ordered from my Online Business Address. The list of other products and links to them (if any) are for your convenience only; they are products I have been happy using. I am not an affiliate of any other retail outlet. If the craft projects I share inspire you and you would like to use Close To My Heart products to create them, I would appreciate it if you placed an order on my OBA.

Thanks for visiting today.

Friday, July 17, 2015

Studio J® Flash Sale

Close To My Heart is having a Flash Sale until July 31, 2015 on Studio J®.


In addition to creating digital scrapbook pages, Studio J® is perfect for printing photos. You can print photos in any size up to 12" x 12" by using the No Limits pattern and Custom Photo Wells. I posted more information and a video here. If you want to print "standard" size photos, use Photo Express Collections to "print" your photos in a variety of sizes.

The Photo Express Collection choices are:
  • 2" x 2" photos; you will have 72 photo wells to use
  • 3" x 3" photos; you will have 32 photo wells to use
  • 3" x 4" photos; you will have (12) 4" x 3" horizontal/landscape photos wells and (12) 3" x 4" vertical/portrait photos wells to use; this is the perfect size for Picture My Life™ scrapbooking
  • 4" x 4" photos; you will have 18 photo wells to use
  • 4" x 6" photos; you will have six (6) 6" x 4" horizontal/landscape photos wells and six (6) 4" x 6" vertical/portrait photos wells to use; this is also the perfect size for Picture My Life™ scrapbooking
  • 6" x 8" photos; you will have two (2) 6" x 8" horizontal/landscape photos wells and two (2) 8" x 6" vertical/portrait photos wells to use and two (2) 6" x 4" vertical/portrait photos photos wells and two (2) 4" x 6" horizontal/landscape wells to use
  • 5" x 7" photos; you will have three (3) 5" x 7" horizontal/landscape photos wells and three (3) 7" x 5" vertical/portrait photos wells to use and two (2) 5" x 5" photos wells, one (1) 3" x 2" photos well, one (1) 2" x 3" photos well and four (4) 2" x 2" photos wells to use
To find the new Photo Express Collection templates, go to Studio J® and sign in (if you do not have a Studio J® account yet you will be prompted to create one). Then choose "Create a new project". You will be prompted to name the project and then will be asked to upload photos. After you have uploaded photos, choose "Continue" in the lower right. You will then need to select a layout type. If you want to create custom photo wells as shown in the above video here, choose "Create Your Own Custom Layout", but if you want to use the Photo Express Collections, choose "Start with an Express Collection". Scroll down until you see "Photo Collections (7 layouts)". Click on it once and choose Continue. Then choose the size photos you would like and Continue.

You do not have to complete all of the layouts or photos sheets in Studio J® in one sitting; the minimum purchase is 5 layouts. You may save your project and come back to it later.

I have several posts about Studio J® that give tips for creating layout or printing photos. To find them click on the Studio J® tag at the bottom of this post.

This Studio J® button will take you to the Studio J® page on my OBA.


If you have any product or promotion questions, do not hesitate to email me. You will also find me on Facebook at Brenda's Paper Crafts.

Wednesday, July 15, 2015

Jump On It July Blog Hop

Welcome to the Jump On It July Blog Hop. There are approximately 30 bloggers participating in this hop. For this hop we are featuring the Hostess Rewards stamps sets that you may purchase for $5 when you purchase $25 in current, retail priced stamps. Alternatively when you qualify for Jump On It July, you may choose the Stamp Of The Month, Life Is Wonderful, for free. A blog hop featuring the SOTM was earlier this month; you can start that hop at Michelle Stewart's blog.


You should have arrived here from ***Michele Rowley's Evergreen Memories***. If you get lost along the way, a complete list of participants is listed at Melinda Everitt's If You Bling It.

As you make your way through my post if you would like a larger image of any project just click on the photo.

This card was inspired by the pattern Aubrey's Invitation™ on page 81 of the Originals Card Confidence Program™.


I thought you may like to see what I did with the tag better.


Here is a close-up of the Well Wishes "focal" stamp. I was inspired to layer by the sample in Annual Inspirations.


I still had some inspiration, so I also made this card.


I was influenced by the sample in Annual Inspirations, but I made my card with some different colors and a little simpler, with fewer layers and without the twine. If you are new to masking or just cannot cut your stamps, this is the masking technique I used:


I stamped the image on a sticky note (with the sticky side on the left). Be sure to stamp close enough to the left edge so there will be some sticky on the two pieces you cut out. Then I used a craft knife to cut out the parts I wanted to be in a different color. I put the mask where I planned to stamp and stamped in Cranberry (though the slots). Then I pulled up the mask, put down the "banner" pieces to cover the Cranberry stamping and stamped in Whisper. I save my masks by sticking them to the paper insert that is with all My Acrylix™ Stamp Sets.

The next stop on the Jump On It July Blog Hop is ***Gina's Little Corner of StampinHeaven by Gina Brandstetter***.

All supplies are from Close To My Heart except where noted:
As I mentioned above, you may choose the Stamp Of The Month for free when you qualify for Jump On It July. If you missed the SOTM blog hop, you will find the first blog on that hop at Michelle Stewart's blog. Since there were almost 50 participating bloggers, there is plenty of inspiration. In case you do not have Annual Inspirations 2014-2015 or Seasonal Expressions 2 nearby, I posted images of the 
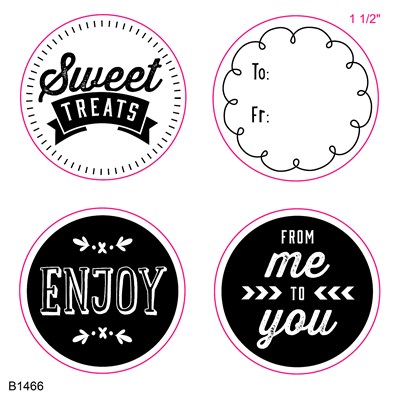
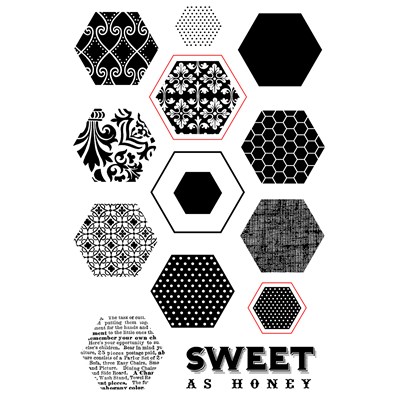
Jump On It July stamp options on July 2 and images of 
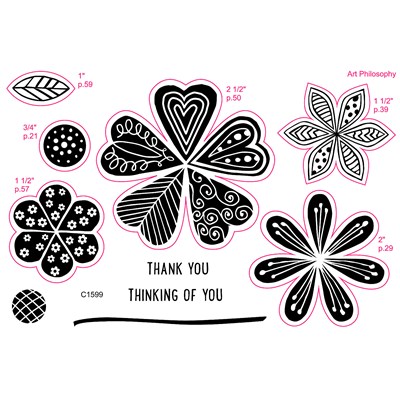
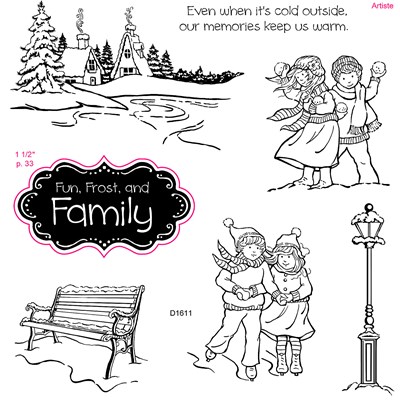
Corporate-created artwork on July 9.

If you are not already working with a CTMH Independent Consultant, you may purchase all of the supplies I used at my Online Business Address.

I love to read what people think about my creations; if you have a moment, please leave a comment. So you do not have to scroll back toward the top, the next stop is ***Gina's Little Corner of StampinHeaven by Gina Brandstetter***. Thanks for hopping with us.

Sunday, July 12, 2015

Retiring CTMH Products

The Annual Close To My Heart Convention was just held in California. While I cannot share new product news with you just yet, I can tell you that in addition to the paper packs, compliments, assortments, embellishments, mini medleys, My Crush™, washi tapes and ribbons, Designed Décor, My Creations™, Cut Above™, Picture My Life™, other miscellaneous items and stamp sets retiring on August 31, 2015 (there is a Retiring Items category on my OBA), there are several colors in the Enchantment Palette that are retiring.


The retiring colors are:

colorExclusive Inks™
Stamp Pad
Exclusive Inks™
Re-Inker
12" X 12" Cardstock
Smokey PlumZ2147Z22471291
Outdoor DenimZ2140Z22401275
Indian Corn Blue
Ponderosa Pine
Olive
Autumn Terracotta
Barn Red

New England Ivy, Goldrush and Ruby will be staying part of the Enchantment Palette. Unfortunately I am unable to tell you the names of the new colors right now.

Other Enchantment products are the Enchantment Cardstock Combo Pack (X5934), the Paper Fundamentals Enchantment Assortment (Z2031) and the Enchantment Exclusive Inks™ Mini Pigment Pads Set (Z2502).

So you have another visual reference, I am adding the retiring products to my Pinterest Board, CTMH Retiring August 31, 2015. Is is a snanshot of the Board:


Items on the retiring list are available until August 31, 2015 or while supplies last. Inventory on my OBA under Retiring Items is real-time, that is, if you do not find it there, unfortunately it has sold out.

UPDATE - August 3, 2015: I am sorry, but the stamp sets below ARE NOT retiring on August 31. There was a mix-up on the retiring list. Most of the stamp sets are not pictured in the new 2015-16 Annual Inspirations (valid September 1, 2015 through August 31, 2016) or the new 2015 Seasonal Expressions (valid September 1, 2015 through December 31, 2015), but they will be on my OBA.

ItemStamp SetStamp ImageCompatible With
B1466Sweet SalutationsArt Philosophy
Artiste
Artbooking
C1537HoneycombArtbooking
C1599
Pretty Petals
Art Philosophy
D1599
Geek Is Chic
Art Philosophy
D1611
Frosty Fun
Artiste
D1613
Best Christmas
Art Philosophy
D1617
Make It Merry
Artbooking

With the Jump On It July promotion, this is a perfect month to purchase retiring stamps that were on your wish list. For every $25 you spend on stamps, you may select the SOTM for free or one of the Hostess Rewards stamp sets for $5. Additional details at the linked post or on my OBA.

If you have any product or promotion questions, do not hesitate to email me. You will also find me on Facebook at Brenda's Paper Crafts.

Thursday, July 9, 2015

Jump On It July Artwork Provided by CTMH

I am so excited that you are able to purchase one or more of the Hostess Rewards stamp sets without hosting a Gathering. The Hostess Rewards stamp sets are only $5 when you spend $25 on current, retail priced stamps. Alternatively you may choose the SOTM for free. This is a wonderful bargain. Typically the Hostess Rewards stamp sets range from $4 to $10 and you have to use Hostess Rewards for them which means hosting an in-home or online gathering with sales $150 or more.


This is the same table I shared on July 2, but rather than the "line drawings" of the stamp sets I have filled the cells with artwork created by CTMH Corporate artists. Click on any image for a larger view; click on the stamp set name and you will see some ideas found on Pinterest for using that stamp set.

July 2015 Stamp Of The Month
S1507 Life Is Wonderful
Annual Inspirations 2014-2015
Hostess Rewards Stamp Sets (pages 5 to 10)
A1163 Practical Planning A1169 Well Wishes
B1454 Thanksgiving Wreath B1455 Be Jolly
B1458 Cuddly Salutations C1587 Sing Glory
C1593 Hats Off C1596 Happy Hexagons
D1608 Better With A Friend
Seasonal Expressions 2
Hostess Rewards Stamp Sets (pages 4 and 5)
C1613 Paper Bird
this space intentionally left blank
C1614 Tagged With Love
this space intentionally left blank

As a reminder, I participated in a Stamp Of The Month blog hop on Wednesday, July 1 and there will be a blog hop featuring the Hostess Rewards stamp sets on Thursday, July 16. If you would like to hop with us, my post will be here.

I used Hostess Rewards stamp sets some projects I previously published on my blog:

If you are ready to place an order or would like to research any product, the Shop Now button will take you there.


If you have any product or promotion questions, do not hesitate to email me. You will also find me on Facebook at Brenda's Paper Crafts.

Monday, July 6, 2015

Operation Smile Happy Everything Blog Hop

Welcome to the Operation Smile Happy Everything Blog Hop. There are approximately 30 bloggers participating in this hop. If you are new to blog hopping, just click on the link (typically near the bottom of the post) to visit the next blogger. Keep clicking and you will make it back to the blog where you started.


This month we are featuring the Happy Everything Stamp Set (D1653). When the Happy Everything stamp set is purchased at full retail price, $17.95, Close To My Heart will donate $3 of the proceeds to Operation Smile.


If you are unfamiliar with Operation Smile®, it is an organization that provides free, life-changing surgery that repairs smiles and reshapes lives, one child at a time. Since 2008, Close To My Heart has provided support to change the lives of over 1,500 children and their families.

You should have arrived here from ***Jennifer Dykstra's jd designs***. If you get lost along the way, a complete list of participants may be found at Melinda Everitt's If You Bling It.

I created two cards for this hop. The first card is modeled on the Overview™ pattern for a 5½" x 4¼" card. The pattern is on page 102 of the Originals Card Confidence Program.


My second card is adapted from the Fancy Five™ pattern for a 7" x 5" card on page 114 of Originals.


Before you visit ***Gina Brandstetter's Gina's Little Corner of Stampin Heaven***, some notes about my cards and the supplies I used to create my project are below.

For the card based on the Overview™ pattern I used Sponge Daubers to apply the ink to the stamp then I "huffed" (or breathed out of my mouth) onto the stamp to re-moisten the ink a little. I also used the Peony Purple ShinHan Marker to change the color of the clear sparkles to purple.

For the card inspired by the Fancy Five™ pattern I turned the card so the fold was on top, but it looked too top heavy with the five cardstock squares on the top, so I reduced the number to three and placed them on the side. The Thistle pieces are cut at 1¾" x 1½" and the Canary piece at 1½" x 1½". I also used Sponge Daubers to apply the ink to the stamp, but this time I misted it with as fine a mist of water I could before stamping. To try to achieve a fine mist I held my mister about 8 to 10 inches from the stamp so it did not get too saturated. The "Not just a year older..." phrase was stamped in second generation Pacifica.

All supplies are from Close To My Heart:
If you are not already working with a CTMH Independent Consultant, you may purchase all of the supplies I used at my Online Business Address.

I love to get feedback on my creations, so if you have a moment, please let me know what think of my cards. So you do not have to scroll back up, the next blog to visit is ***Gina Brandstetter's Gina's Little Corner of Stampin Heaven***.