Wednesday, April 30, 2014

Artbooking Made Easy: Fun in the Sun

The latest (and last) in the video series Artbooking Made Easy is Artbooking Made Easy: Fun in the Sun . Since this is the last week of April this also marks the end of the Artbooking Made Easy video series.


This week's video is Artbooking Made Easy: Fun in the Sun and the CTMH Corp. description of the video is "Whether your favorite summer vacation is camping in the woods or swimming in the ocean, the summertime-themed keys on Close To My Heart's Artbooking cartridge will have the perfect cutouts to use in recording all your unforgettable memories."

Products used in the video:
A few points I want to be certain that you do not miss while watching the video:
  • there are two Summertime Layout keys on the Artbooking cartridge
  • you will find the keys on pages 66 and 67 of the Artbooking booklet
  • the Summertime layout uses several bold colors
  • use your micro tip scissors to edit the Cricut-cut titles
  • some of the cuts were distressed with the sanding block; just be gentle so you do not tear any of your cuts
  • everything on the Summertime layout was cut at the standard 11 inches size (real dial size off so the cuts will be proportional)
  • the Family Vacation layout has the woodgrain overlay from page 66, but it is cut at 4 inches real dial size on so it will fit perfectly between the photos on the right page of this two page layout and to the left of the photos on the left page of this two page layout
  • the woodgrain overlays were cut in White Daisy cardstock then "washed" with Champagne re-inker and water using a paintbrush to give it just enough color to make it look even more like wood texture
  • the same "washed" technique was used on the family vacation title except Lagoon re-inker was used; the title was stitched down therefore you can see some of the edges raised up from the base which gives the layout more texture
  • each photo was labeled with a number; use a hexagon to number corresponding journaling (note: the hexagons came from the negatives after cutting the overlay for the Summertime layout)
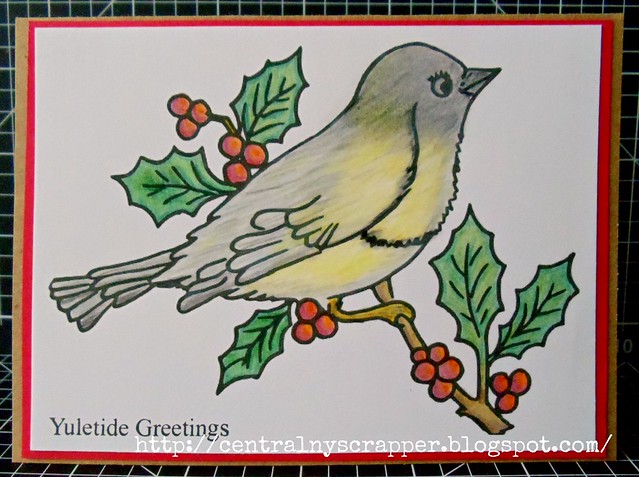
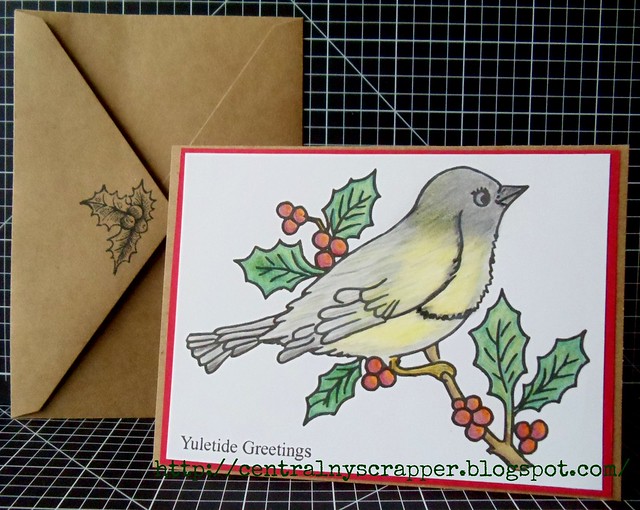
  • the summertime card was also created with cuts from these themed keys; Kristine's tip is for standard size cards to cut everything 3 inches or smaller using real dial size
  • in Jeanette Lynton's post, Artbooking Made Easy: Summertime Layouts, you will find even more detail, closeup photos and a list of supplies used for each album
If you have missed earlier videos in the Artbooking Made Easy series, I am maintaining a list so they are easier to find. Just look for CTMH Cricut® Artbooking Collection in the green bar above.

Contact me if you would like to learn how you would be able to purchase the Artbooking collection at 1/2 off by hosting a Gathering either in-home or on-line.


Feel free to contact me if you have any questions. Thanks for visiting today.

Sunday, April 27, 2014

Monthly Christmas Challenge - Digi Stamps 4 Joy - April 2014

I created this card for the Digi Stamps 4 Joy Monthly Christmas Challenge {April 2104}.

April 2014 Holiday Card

I used the following materials to create the card: Christmas Robin by Digi Stamps 4 Joy printed on White Daisy cardstock which I colored using Lyra Rembrandt 72 Polycolor Fine Art Coloured Pencils for Artists. I stamped the greeting with To You And Yours (B1403) My Acrylix™ Stamp Set from Close To My Heart using a Black Exclusive Inks™ Stamp Pad. I layered onto red cardstock from my stash and a Kraft card.

April 2014 Holiday Card with Envelope

As you can see from the photo above, I stamped a coordinating holly sprig (also from To You And Yours) onto a Kraft envelope.

I hope you creation inspires you to get an early start on your holiday cards. Or to try something new-to-you like I did with digi stamps last month.

Thanks for stopping by. I hope you like the card I created for the Digi Stamps 4 Joy April 2014 Monthly Christmas Challenge.

Wednesday, April 23, 2014

Artbooking Made Easy: Togetherness

Artbooking Made Easy: Togetherness is the latest video in the Artbooking Made Easy video series. Each week until April 2014 (except occasional breaks for holidays) Close To My Heart will release the next video in the series. Each video has tips, tricks and project inspiration for using the Artbooking collection.


The CTMH Corp. description for this week's video Artbooking Made Easy: Togetherness is "Whether you're celebrating romance, family, or friends in your papercrafting project, you'll be head over heels for the fancy frames, ornate edges, and faux flowers from the together-themed keys on Close To My Heart's Artbooking cartridge!"

CTMH products used in the video:
A few points I want to be certain that you do not miss while watching the video:
  • there are two Together layout keys on the Artbooking cartridge
  • you will find the keys on pages 60 and 61 of the Artbooking booklet
  • the first layout shown is a romantic themed page where the grid was cut in White Daisy cardstock and it was backed with Colonial White cardstock which give the layout a soft feel; other papers some from the Ariana and Skylark paper packets
  • the second layout, the Together layout, is not romantic based
  • the rainbow border is a great way to use your scraps or colorful papers and the mod podge look from the back is find because once it is adhered to the layout no one will see it
  • the flower is cut from an element on page 60 which looks like a spiral, start watching the video at 1:50 to see how the flower is created; start by rolling the edge along the top of the spiral, if it is difficult to roll, spritz with a little water to make the paper a little softer; use the quilling tool and place the outer edge in the tool and start rolling toward the center; use Liquid Glass on the base to hold the flower in shape
  • the final project is a card using the same grid as in the first layout; the grid is scaled down to 4 1/2" (likely using Real Dial Size)
  • in Jeanette Lynton's post, Artbooking Made Easy: Together Layouts, you will find even more detail, closeup photos and a list of supplies used for each project
If you have missed earlier videos in the Artbooking Made Easy series, I am maintaining a list so they are easier to find. Just look for CTMH Cricut® Artbooking Collection in the green bar above.

Contact me if you would like to learn how you would be able to purchase the Artbooking collection at 1/2 off by hosting a Gathering either in-home or on-line.


Feel free to contact me if you have any questions. Thanks for visiting today.

Friday, April 18, 2014

Easter Baskets

We no longer have children to give Easter baskets to, but people need a little something to let them know we think they are special, so this year we created several mini baskets. There are nine little baskets on this tray.

EasterBaskets2014

The Easter Baskets I created for my nieces this year were inspired by the artwork on page 8 of the Close To My Heart Spring/Summer 2014 Idea Book.


I cut the baskets on my Cricut Explore using Design Space. The basket is from the Cricut/Close To My Heart Artiste cartridge. You will find it on page 73 of the handbook. I cut the basket as large as I could and was able to fit two baskets and handles on one 12" x 12" sheet of paper. I moved them around in Design Space to maximize the size of the scrap I had leftover. I used the woodgrain from the Timberline collection and a retired B&T from Stella. On my Explore I set the dial to light cardstock and used a "regular" mat and it cut beautifully - a clean cut and no blade marks in the mat. Do not forget to insert the score tool - the little tick marks to tell you where to fold automatically became score lines. I also cut the grass around the basket base with the Explore.

EasterBasketsForNieces

I stamped the images from Some Bunny, a hostess rewards stamp set, on White Daisy cardstock using the Archival Black Exclusive Inks™ Stamp Pad (44751). I colored the images with watercolor pencils (3505) and blended them with a water brush. Then I fussy cut them. Using Liquid Glass (Z679) I assembled the baskets and attached the stamped and/or cut images.

The baskets we gave to everyone else are a little simpler. I cut a tag on the Explore using the Cricut/Close To My Heart Art Philosophy cartridge and Lollydoodle, Ivy Lane and Pear cardstock. The initial was also cut on the Explore from Art Philosophy. For even more decoration, I cut some eggs using the Art Philosophy cartridge then stamped them in a variety of colors that remind me of Spring using Easter Wishes (B1422). Unfortunately I did not get a good photo of that egg; you can see it in the lower right of the photo below.

EasterBasketTags

The tulip covered pops were inspired by the tutorial Tulip Pop Bouquet post by LD Solutions. I used the balloon on page 70 of the Artiste handbook and a generic rectangle from Art Philosophy. I used the hide contour and welding features in Cricut Design Space to create a cut file. For me, I found a lighter weight paper was easier to "gather" around the stick to form the shape. In addition to the ribbon, it is held tight with rubber bands. Floral wire would work too.

EasterBasketTulips

If you have a moment, I would love to know what you think about the Easter Baskets. If you observe Easter, I hope you and yours have a wonderful day. I hope everyone has a great weekend.

Thursday, April 17, 2014

More Easter Cards for 2014

On Tuesday I shared the card I created for Francis. I could not bear to throw away the cuts so I cut another card and used it as a template to place the cuts in the correct location so the bits would make a nice card front. It really did not take that much time and results in a second great card.

Easter 2014 card 1

All pieces were cut using Cricut® Design Space and the Cricut® Explore. The card is Easter Blessings from the image set Simple Holiday Cards. The cardstock is Botanical solid-dyed core from core'dinations. The card on the left is the original card and the card on the right was created from the cuts. The cuts were placed on a piece of cardstock slightly smaller than a card from the 5 1/2" X 4 1/4" White Cards & Envelopes, Value Pack (X254).

Easter 2014 card 2

The blue and yellow cards were made from scraps in my stash; I think the cardstock is from a DCVW value pack.

My question to you...would you have tossed the cuts or would you create a second card similar to this? Do you try to use every scrap? I hope you enjoy the cards I created.

Wednesday, April 16, 2014

Artbooking Make Easy: Capturing Snapshots

The latest in the video series Artbooking Made Easy is Artbooking Made Easy: Capturing Snapshots. Each week until April 2014 Close To My Heart will release the next video in the series. Each video has tips, tricks and project inspiration for using the Artbooking collection.


This week's video is Artbooking Made Easy: Capturing Snapshots and the CTMH Corp. description of the video is "Wondering what to do with all those snapshots you have lying around? Close To My Heart's Artbooking cartridge's snapshots keys are the perfect way to assemble those photos into one oh-so-memorable mini album."

A few points I want to remember after watching the video:
  • there are two Snapshots mini album keys on the Artbooking cartridge
  • you will find the keys on pages 40 and 41 of the Artbooking booklet
  • the sponged and inked polka dots on the front cover come from using the overlay as a stencil
  • for a little more pop, the overlay attached to the cover still has some ink on it after using it as a stencil
  • keep the negative pieces to embellish later pages
  • the keep the mini album cohesive, the same overlay was used to stencil inside pages
  • the banner on an inside page was created by cutting the sunburst shape on page 41 and folding it in half over a piece of twine
  • you can also embellish an overlay by stamping the base page behind where the overlay will be attached and using Washi Tape
  • to use the overlay as a stencil, cut out the overlay and the base page; attach the overlay with Washi Tape to keep the overly from moving during stenciling; the Washi tape will make it easy to remove the overlay later; use sponge daubers with the mini pigment ink pads - to get a solid look, pounce the dauber up and down - to get a soft look, rub in a light circular motion - to get a graduated look as you move down the page go back and lightly cover the next color with Whisper ink, e.g., in the video Whisper was used in the first row, then Slate for the second row; then go over the Slate in the second row with a touch of Whisper then the third row is solid Slate, in the fourth row, Twilight was used, in the fifth row, Outdoor Denim was used, then Whisper ink on top of the blue to make it softer
  • in Jeanette Lynton's post, Artbooking Made Easy: Snapshots Mini Album, you will find even more detail, closeup photos and a list of supplies used for the mini album and the canvas
Featured items used in the video:
If you have missed earlier videos in the Artbooking Made Easy series, I am maintaining a list so they are easier to find. Just look for CTMH Cricut® Artbooking Collection in the green bar above.

Contact me if you would like to learn how you would be able to purchase the Artbooking collection at 1/2 off by hosting a Gathering either in-home or on-line.


Feel free to contact me if you have any questions. Thanks for visiting today.

Tuesday, April 15, 2014

Easter Card for Francis

Easter is fast approaching and I feel like I am running out of time. This is the card I made for Francis, the daughter of my late grandmother's cousin.

Easter 2014 collage

All pieces were cut using Cricut® Design Space and the Cricut® Explore. The card is Easter Blessings from Simple Holiday Cards and the lillies [sic] on the inside are from the image set Easter Blessings. The cardstock is Botanical solid-dyed core from core'dinations except the middle layer of the lilies is CTMH Stella (retired). I really like how the patterned paper looks on the flower. "Happy Easter" was stamped with Black Exclusive Inks™ (Z2105) and is from the CTMH Hostess Rewards Stamp Set Some Bunny (B1446).

I would love to know what you think of the card I created for Francis. Thanks for visiting my blog today.

Wednesday, April 9, 2014

Artbooking Made Easy: Artbooking My Life

Artbooking Made Easy: Artbooking My Life is the latest video in the Artbooking Made Easy series. The video shows us how we can use the Artbooking cartridge with Picture My Life™ scrapbooking program.


Today's video has the CTMH Corp. description of "Take your no-hassle, ready-to-use Picture My Life™ scrapbooking to the next level by incorporating various cutouts from Close To My Heart's Artbooking cartridge! Check it out here, along with charming Mother's Day gift ideas."

Items featured in the video:

Use Real Dial Size to make titles that fit perfectly with the pockets and cards in the Picture My Life™ Scrapbooking programs. You will find a list of coordinating CTMH colors on my Picture My Life™ page found in the green bar above.
    On Jeanette Lynton's post, Artbooking Made Easy: Mother's Day My Creations, you will find even more detail, closeup photos and a list of supplies used to create the journaling cards box and PML layouts.

    If you have missed earlier videos in the Artbooking Made Easy series, I am maintaining a list so they are easier to find. Just look for CTMH Cricut® Artbooking Collection in the green bar above.

    Contact me if you would like to learn how you would be able to purchase the Artbooking collection at 1/2 off by hosting a Gathering either in-home or on-line.


    Feel free to contact me if you have any questions.

    Thursday, April 3, 2014

    What Is On Your Bucket List?

    Bucket List Contest is a recent video by Close To My Heart. The video not only shows us the elements that make up the Base & Bling line, but it also gives us the opportunity to win the materials to create our own Base & Bling wearable item.


    The CTMH description of today's video is "Close To My Heart's Base & Bling line lets you create customized, wearable crafts with a huge selection of metallic charms, stylish adhesive images, and gems for a one-of-a-kind look! For our Bucket List Contest, tell us something that is on your bucket list in a comment on Facebook, Jeanette Lynton's blog, or YouTube before April 30, 2014 for your chance to win materials to create your own Base & Bling wearable craft!"

    Did today's video make you take another look at the Base and Bling items? I have to admit I am very partial to the Storyteller Style Sheet (Z1973). I see a lot of gift ideas on that style sheet. If you are ready to place an order the Shop Now button will take you to my Online Business Address.


    Feel free to contact me if you have any questions.

    Wednesday, April 2, 2014

    Floating Home Décor Ideas

    The latest CTMH video is Floating Your Fancy. The video gives us two ideas for beautiful home décor items. I think either would make wonderful gifts.


    Today's video is Floating Your Fancy. The CTMH Corp. description is "Get the most out of Close To My Heart's Cricut® Artbooking cartridge with these fun home décor ideas. Create decorative floating frames and functional message boards quickly and easily."

    Products used in the video:
    Some of the tips mentioned in the video:
    • this first project is like a floating mini layout
    • the Snapshots Mini-Album overlay can be found on page 40 of the Artbooking handbook
    • the artwork was placed between two panes of glass so it would appear to be floating
    • the ponderosa pine overlay was cut at 7 1/2 inches using Real Dial Size
    • the other colors of overlay were cut at 3 1/2 inches using Real Dial Size
    • the other colors used were: topiary, sweet leaf, the dot from Lollydoodle and twilight
    • if using two panes of glass, be strategic when applying your adhesive to minimize the adhesive showing through the glass
    • the second project, a weekly chart, uses the overlay from the School Layout on page 68
    • the overlay was cut at 11 inches using Real Dial Size and Fit to Page features
    • the exclusive stamp set, My Acrylix My Life, from the Artbooking collection was used to stamp the dates on tags
    • the tags were cut at 3/4 inches using Real Dial Size

    I don't know about you, but I am inspired to create a home décor item. If you are ready to place an order the Shop Now button will take you to my Online Business Address.


    Feel free to contact me if you have any questions.

    Tuesday, April 1, 2014

    CTMH April 2014 Stamp of the Month: Balloon Talk

    Happy April Fools Day! It seems like 2014 is flying by, but I know many of you are looking forward to warmer weather. I am not complaining about our winter - I am
    saving my complaints about a hot humid summer (if it materializes).

    The Close To My Heart April 2014 Stamp of the Month is Balloon Talk.


    The Balloon Talk stamp set is very versatile. I think we will see many layouts and cards created with these stamps.

    You will find a larger image of each project shown in the above photo, a list of the products used and some hints for recreating the samples above on my OBA > Promotions > Stamp of the Month page. Also check my Pinterest Board CTMH 2014 04 Apr SOTM Balloon Talk for additional ideas using this stamp set.

    Balloon Talk (S1404) is an exclusive D-size stamp set of 24 stamps that you can only purchase during the month of April 2014. The stamp set can be yours for $5 when you place an order of $50 or more in qualifying Close To My Heart Products. Alternatively you can purchase it for $17.95.
    Recommended CTMH My Acrylix® Blocks: 1" x 1" (Y1000) and 1" x 3 1/2" (Y1002) 2" x 2" (Y1003).

    The April 2014 Promotion is Discover the Art of Business


    Directly from the promotional materials CTMH posted on the site for Consultants: "Join Close To My Heart as an Independent Consultant April 1–30, 2014, and receive your favorite "art-full" Close To My Heart Cricut® collection FREE! Our New Consultant Kit is just $99 and comes packed with nearly triple the retail value in products and supplies to help you succeed. Plus, when you qualify for the Straight To The Top program, you will be refunded the price of your New Consultant Kit. Select your FREE Cricut® collection—retail priced at $99—when you order your New Consultant Kit and watch your new business soar!"

    If you do not have a CTMH Independent Consultant yet, I would be happy to help you learn more about CTMH products. Click the Shop with me link below to place an order or contact me if you have questions about become a CTMH Independent Consultant, any CTMH products or promotions or to schedule a Home or Online Gathering.


    Thanks for visiting today.