When I
first told you about the Home Chipboard Monogram Workshop, I mentioned that to create it you use the Cricut® Artistry Digital Collection with a Cricut to complete it. Are you interested in creating but do not have a Cricut machine? Today's post is all about creating a version using basic tools: a paper trimmer, scallop border punch (or dies), circle dies, etc.
As I mentioned earlier, the
Workshop Guide walks you though creating this home décor piece using the
Home Chipboard Monogram Workshop Kit (CC3197),
Liquid Glass (Z679),
Thin 3-D Foam Tape (Z2060),
Marvy® Uchida® LePen™ Journaling Pen (Z1979),
Cricut® Artistry Digital Collection (Z3500) with a Cricut machine.
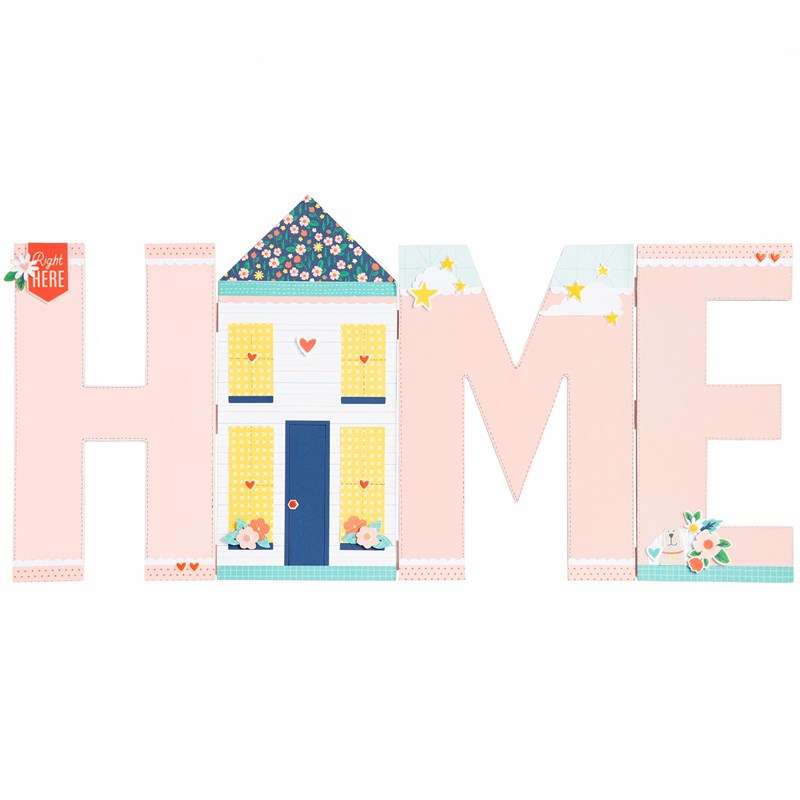 |
| Home Chipboard Monogram Project |
In the Workshop Guide there is a URL for a Cricut Design Space™ project file created just for this workshop. There are eight colors that are cut on a Cricut, but as you look through the mats, you will see that almost every piece is a basic shape.
 |
| White Daisy Cardstock |
The White Daisy cardstock creates one of the layers of the "o", some scalloped embellishments and a cloud for the upper left of the "m". To cut these items by hand, the rectangle is 6" wide x 11" high. Score along the 6" edge ¾" from the top. We will take care of the "ears" later. Use your Scallop Border Punch (Z1851 - retired) or
Thin Cuts—Decorative Borders (Z4241) to cut the scallop edges. There are a few clouds on the cut apart sheet that comes in the Kit or you could add the
So Much Happy Complements (X7241C) to your cart; there are three clouds included in the Complements. Also, if you have some White Shimmer Trim (Z3024 - retired) you could substitute it, "as is" off the roll or punch it with a Scallop Border Punch, or substitute
White Glitter Paper (Z3237) cut with a Scallop Border Punch (or the edge of your choice).
 |
| Peach Cardstock |
The Peach cardstock creates the straps to assist this piece with standing up, a decorative edge for the house and flowers to decorate the house. The 18 straps are 3" wide by 1" high then scored at 1½". The Peach scalloped border could be created the same way as you created the White Daisy border. You could substitute flowers from the cut apart sheet or Compliments or you could fussy cut around one of your favorite stamped flowers. This is a great place to customize your piece for the flowers you like to see (or would like to see) around your house. Spoiler alert: for the flowers you could wait for a new product coming on May 1 in Seasonal Expressions 2 (I cannot share more at this time, but I will tell you this particular item will be one of the first to go in my cart when they are available to order).
 |
| Candy Apple Stripe Paper |
The Candy Apple Stripe Paper is used to create flowers for embellishing the house. See my suggestions under the Peach cardstock for alternatives to this cut.
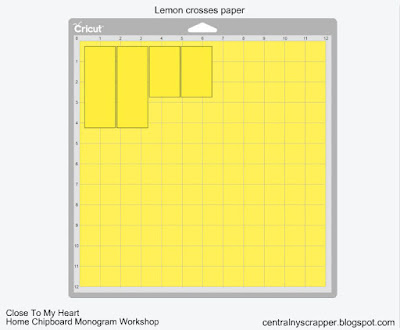 |
| Lemon crosses paper |
The Lemon Crosses Paper is used for the windows and they are simple rectangles. Cut two 1½" wide by 2½" high and two 1½" wide by 4" high.
 |
| Multicolor stripe paper |
You use both sides of the Multicolor Stripe Paper. Unless you want to change up your décor piece, you will use the striped side for the rectangle cut the same as the White Daisy rectangle we cut earlier: 6" wide x 11" high. Score along the 6" edge ¾" from the top. We will take care of the "ears" later. You will also use the striped side for the 2" circle. You can use the
Thin Cuts—Basic Circles (Z3318) to cut the circle.
You will use the Mint Geometric side to decorate the top of the "m". Cut two pieces 1½" wide by 3" high.
 |
| Lagoon grid paper |
The Lagoon Grid Paper is used for the leaves and to decorate the bottom of the house ("o") and "e". As I mentioned when discussing the flowers cut from the Peach cardstock and Candy Apple Stripe Paper, you could substitute cut aparts or Compliments or stamp a flower with leaves and fussy cut (or look for that new product I teased in Seasonal Expressions 2). The strips for decorating the bottom of the letters are cut 6" wide by ½" high and 5¼" wide by ½" high.
 |
| Sapphire cardstock |
The Sapphire cardstock creates our roof, door and window ledges (or boxes). The door is 5" wide by 1½" high. The four window boxes are 1½" wide by ¼" high. I think the easiest way to create the roof is to cut a square 4¼" and then cut it diagonally.
 |
| Sapphire floral paper |
We use both sides of the Sapphire Floral Paper. The floral side creates the roof and the Peach dotted side embellishes the top and bottom of the "h", the bottom of the "m" and the top of the "e". Cut one 5¼" wide by ½" high and six 2½" wide by ½" high (the Design Space file has this cut as 2.35" x .5"; since 2.35" is not an easy size to cut with a paper trimmer, I suggest cutting it too large then trimming it down once it is attached to the letters. Again I think the easiest way to create the roof is to cut a square 4¼" and then cut it diagonally.
I recently placed my order for the Home Chipboard Monogram Workshop Kit, so I am not too far ahead of you. I will be using the ideas above for substituting for the Cricut shapes. I will use the Workshop Guide to assist with assembling my project. As I create this home décor piece I will update this post where I found I needed to make changes.
To purchase your own Workshop Kit, please visit my
Consultant Website. I hope you will work along with me to create your own Home Chipboard Monogram.


0 comments:
Post a Comment
Thank you for leaving a comment! I enjoy reading them.