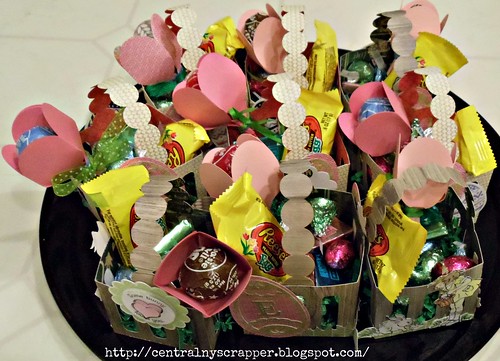
We no longer have children to give Easter baskets to, but people need a little something to let them know we think they are special, so this year we created several mini baskets. There are nine little baskets on this tray.
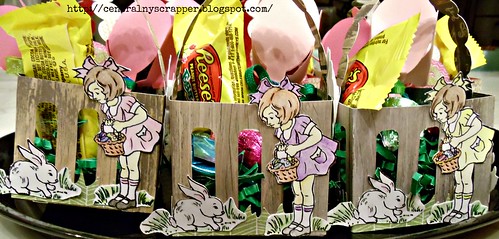
The Easter Baskets I created for my nieces this year were inspired by the artwork on page 8 of the Close To My Heart Spring/Summer 2014 Idea Book.
I cut the baskets on my Cricut Explore using Design Space. The basket is from the Cricut/Close To My Heart Artiste cartridge. You will find it on page 73 of the handbook. I cut the basket as large as I could and was able to fit two baskets and handles on one 12" x 12" sheet of paper. I moved them around in Design Space to maximize the size of the scrap I had leftover. I used the woodgrain from the Timberline collection and a retired B&T from Stella. On my Explore I set the dial to light cardstock and used a "regular" mat and it cut beautifully - a clean cut and no blade marks in the mat. Do not forget to insert the score tool - the little tick marks to tell you where to fold automatically became score lines. I also cut the grass around the basket base with the Explore.
I stamped the images from Some Bunny, a hostess rewards stamp set, on White Daisy cardstock using the Archival Black Exclusive Inks™ Stamp Pad (44751). I colored the images with watercolor pencils (3505) and blended them with a water brush. Then I fussy cut them. Using Liquid Glass (Z679) I assembled the baskets and attached the stamped and/or cut images.
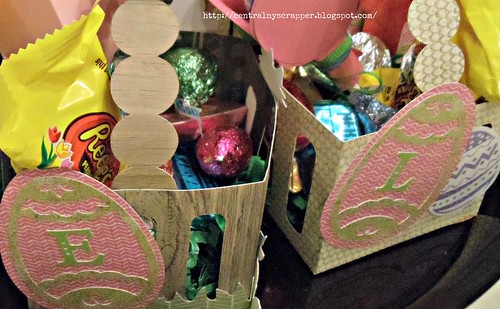
The baskets we gave to everyone else are a little simpler. I cut a tag on the Explore using the Cricut/Close To My Heart Art Philosophy cartridge and Lollydoodle, Ivy Lane and Pear cardstock. The initial was also cut on the Explore from Art Philosophy. For even more decoration, I cut some eggs using the Art Philosophy cartridge then stamped them in a variety of colors that remind me of Spring using Easter Wishes (B1422). Unfortunately I did not get a good photo of that egg; you can see it in the lower right of the photo below.
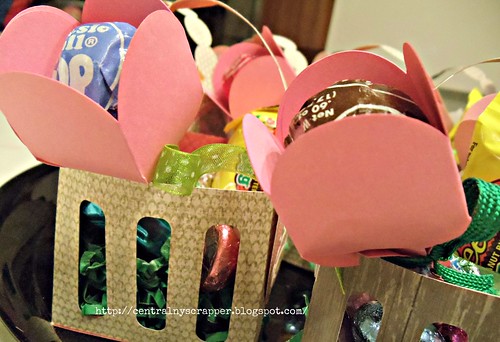
The tulip covered pops were inspired by the tutorial Tulip Pop Bouquet post by LD Solutions. I used the balloon on page 70 of the Artiste handbook and a generic rectangle from Art Philosophy. I used the hide contour and welding features in Cricut Design Space to create a cut file. For me, I found a lighter weight paper was easier to "gather" around the stick to form the shape. In addition to the ribbon, it is held tight with rubber bands. Floral wire would work too.
If you have a moment, I would love to know what you think about the Easter Baskets. If you observe Easter, I hope you and yours have a wonderful day. I hope everyone has a great weekend.


Those are adorable. They would make really cute place setting markers, too. I love the lolly-pop covers. They way you go on about this new Explore of yours makes me think I am really missing out. I don't see myself getting that until I have/make more time for personal crafting. You do such lovely work I know your relatives are all spoiled by your kindness. ~Debbie
ReplyDelete